What if the real story of interior photography doesn’t begin with a camera, but with an idea we’re in danger of losing?

This page is my own palimpsest. Over ≈16+ years, it has transformed from a technical manual into a philosophical diary. The early layers are the dry «working recipes,» gear lists, and lighting calculations. But over them, like living tissue, began to grow dialogues—with clients, with architects, with myself. And above that, a layer of reflections on how spaces shape our emotions, how architecture becomes an extension of personality. The palimpsest is the perfect metaphor. Its value lies not in a final, polished text, but in the entire history of its revisions, trials, and errors, visible when held to the light.
This is why the my gallery portfolio↴, once at the head of this page, has quietly migrated to its end. This isn’t a devaluation of labor, but an acknowledgment of a simple truth: the most valuable part of the work is that which has no precise cost. It’s the understanding of how light falls on plaster, how a frame’s composition can evoke calm or unease, how one successful shot can tell a story better than a thousand words. Here lie not only answers but questions. Technical notes sit alongside quotes from philosophers, and «revelations» about the nature of beauty alongside practical lighting diagrams. All of this is an internal dialogue, laid bare in the hope that it will resonate with someone else.
Practice and theory of architecture and interior photography.
99 questions and answers useful for beginner photographers, and for all the curious.
1: Where did interior photography even come from? About the origins.

Knowing HOW they solved problems of light and perspective in ancient times makes you appreciate modern tools differently (lighting ?, cameras ?, lenses ?, production ? ). Today we have access to books on photography and architecture from practitioners ( books ? ) — their condensed years of experience. They allow you to avoid «reinventing the wheel».
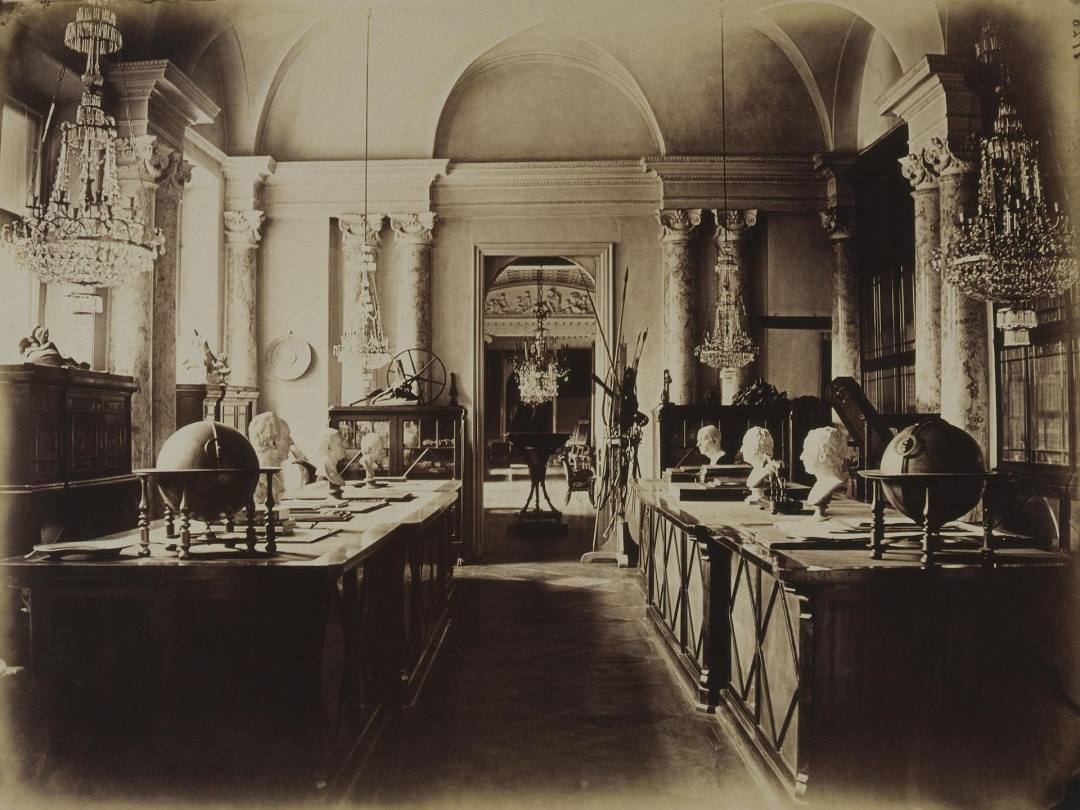
As soon as WHF Talbot in the 1840s managed to «tame» light in his library, the process of documenting spaces began. At first — as experiments, as a miracle and for memory, for evidence, and finally, for history.
As early as 1852, by order of the US Library Committee, an order was placed to photograph the Capitol. The first conscious architectural photography (by John Adams Whipple and John William Ratty). It’s just impossible to find them online. «National Treasure of the USA».
 Real life, combined with architecture and shot by order of the «City of Glasgow Improvement Trust» entered history in 1868. Photographs by Thomas Annan are in the public domain. Planning the demolition of dilapidated housing, the authorities wanted to preserve the memory.
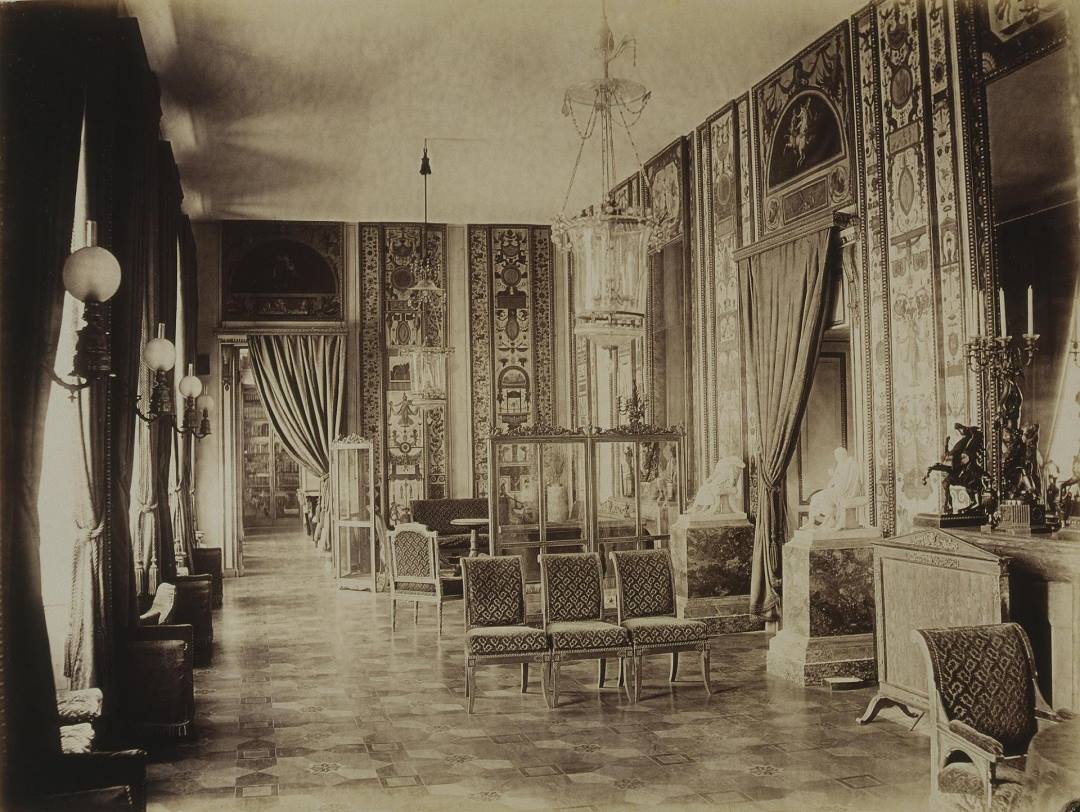
Not many years passed and in the early 20th century, masters like Frederick Evans saw in the interior not just walls, but a space for the play of light/shadow, almost mystical. Magazines picked it up — and the commercial genre was born.
2. Why know this history of the interior-architectural genre?
It’s important to understand the process and its development. This is the foundation for conscious creativity. It provides the realization that it’s something more than just «photos of rooms». Studying the tradition, you find in it many aspects: documentation, art, and a social perspective. This is how you find your own humble place in the movement of art and humanity as a whole.


3. What is the essence of the difference between the work of a professional photographer and a beautiful photo on any person’s phone?
The short answer is: every object came into being as a result of great human labor and, of course, money. This demands respect.
The essence of my work as a photographer is that I «filter through myself» any interior. And, thanks to analysis, artistic self-education ? and so on, I produce a product that works for business objectives. That’s all. Amen. Nothing more. I set this mechanism in motion. And I’ve been doing it for over 20 years, finding new and new joys in the work.
4. How to photograph bathrooms and toilets, kitchens and studios, living rooms and restaurants, shops and storage rooms, bedrooms and basements?
Questions of this type are a dead end. Because the question is not in the name of the room. Although size plays a role already at the finish line. The method of work stems from the task.
5. What is the terminological difference between «interior» and «architectural» photography on the world market?
In the English-speaking segment, the division is clear.
• Interior Photography: Work for the real estate market. The main task is selling or renting the property. Emphasis on layout, functionality, creating desire.
• Architectural Photography: Work for architects, designers, developers. The main task is presenting the author’s concept, artistic value, details, work with light and material.
6: What is the fundamental difference between shooting for an architect’s portfolio, working for hotels, shopping malls, and, of course, for selling real estate?
That’s the whole secret. For the architect I show what is. For the hotel — what is promised. For the realtor — what they want to see. The main thing is not to confuse a document with an advertising flyer. Otherwise, you could end up shooting concrete with fresh renovation in the same frame — it would be an architectural comedy horror.
7. «What real/unreal benefit does working with a professional photographer bring to an architect?»
My business function is to fill the architect’s bank with powerful arguments for conversations with clients. A private client rarely reads blueprints — they think in ready-made images. Visualization remains a picture for them, while a photograph of a realized object is proof and a ready-made sample. This shortens approvals and revisions.
My photographs change the direction of the dialogue with the Client.
But if we speak more simply and down to earth, then the lion’s share of an architectural photographer’s work consists of retouching mr. Provodoff.
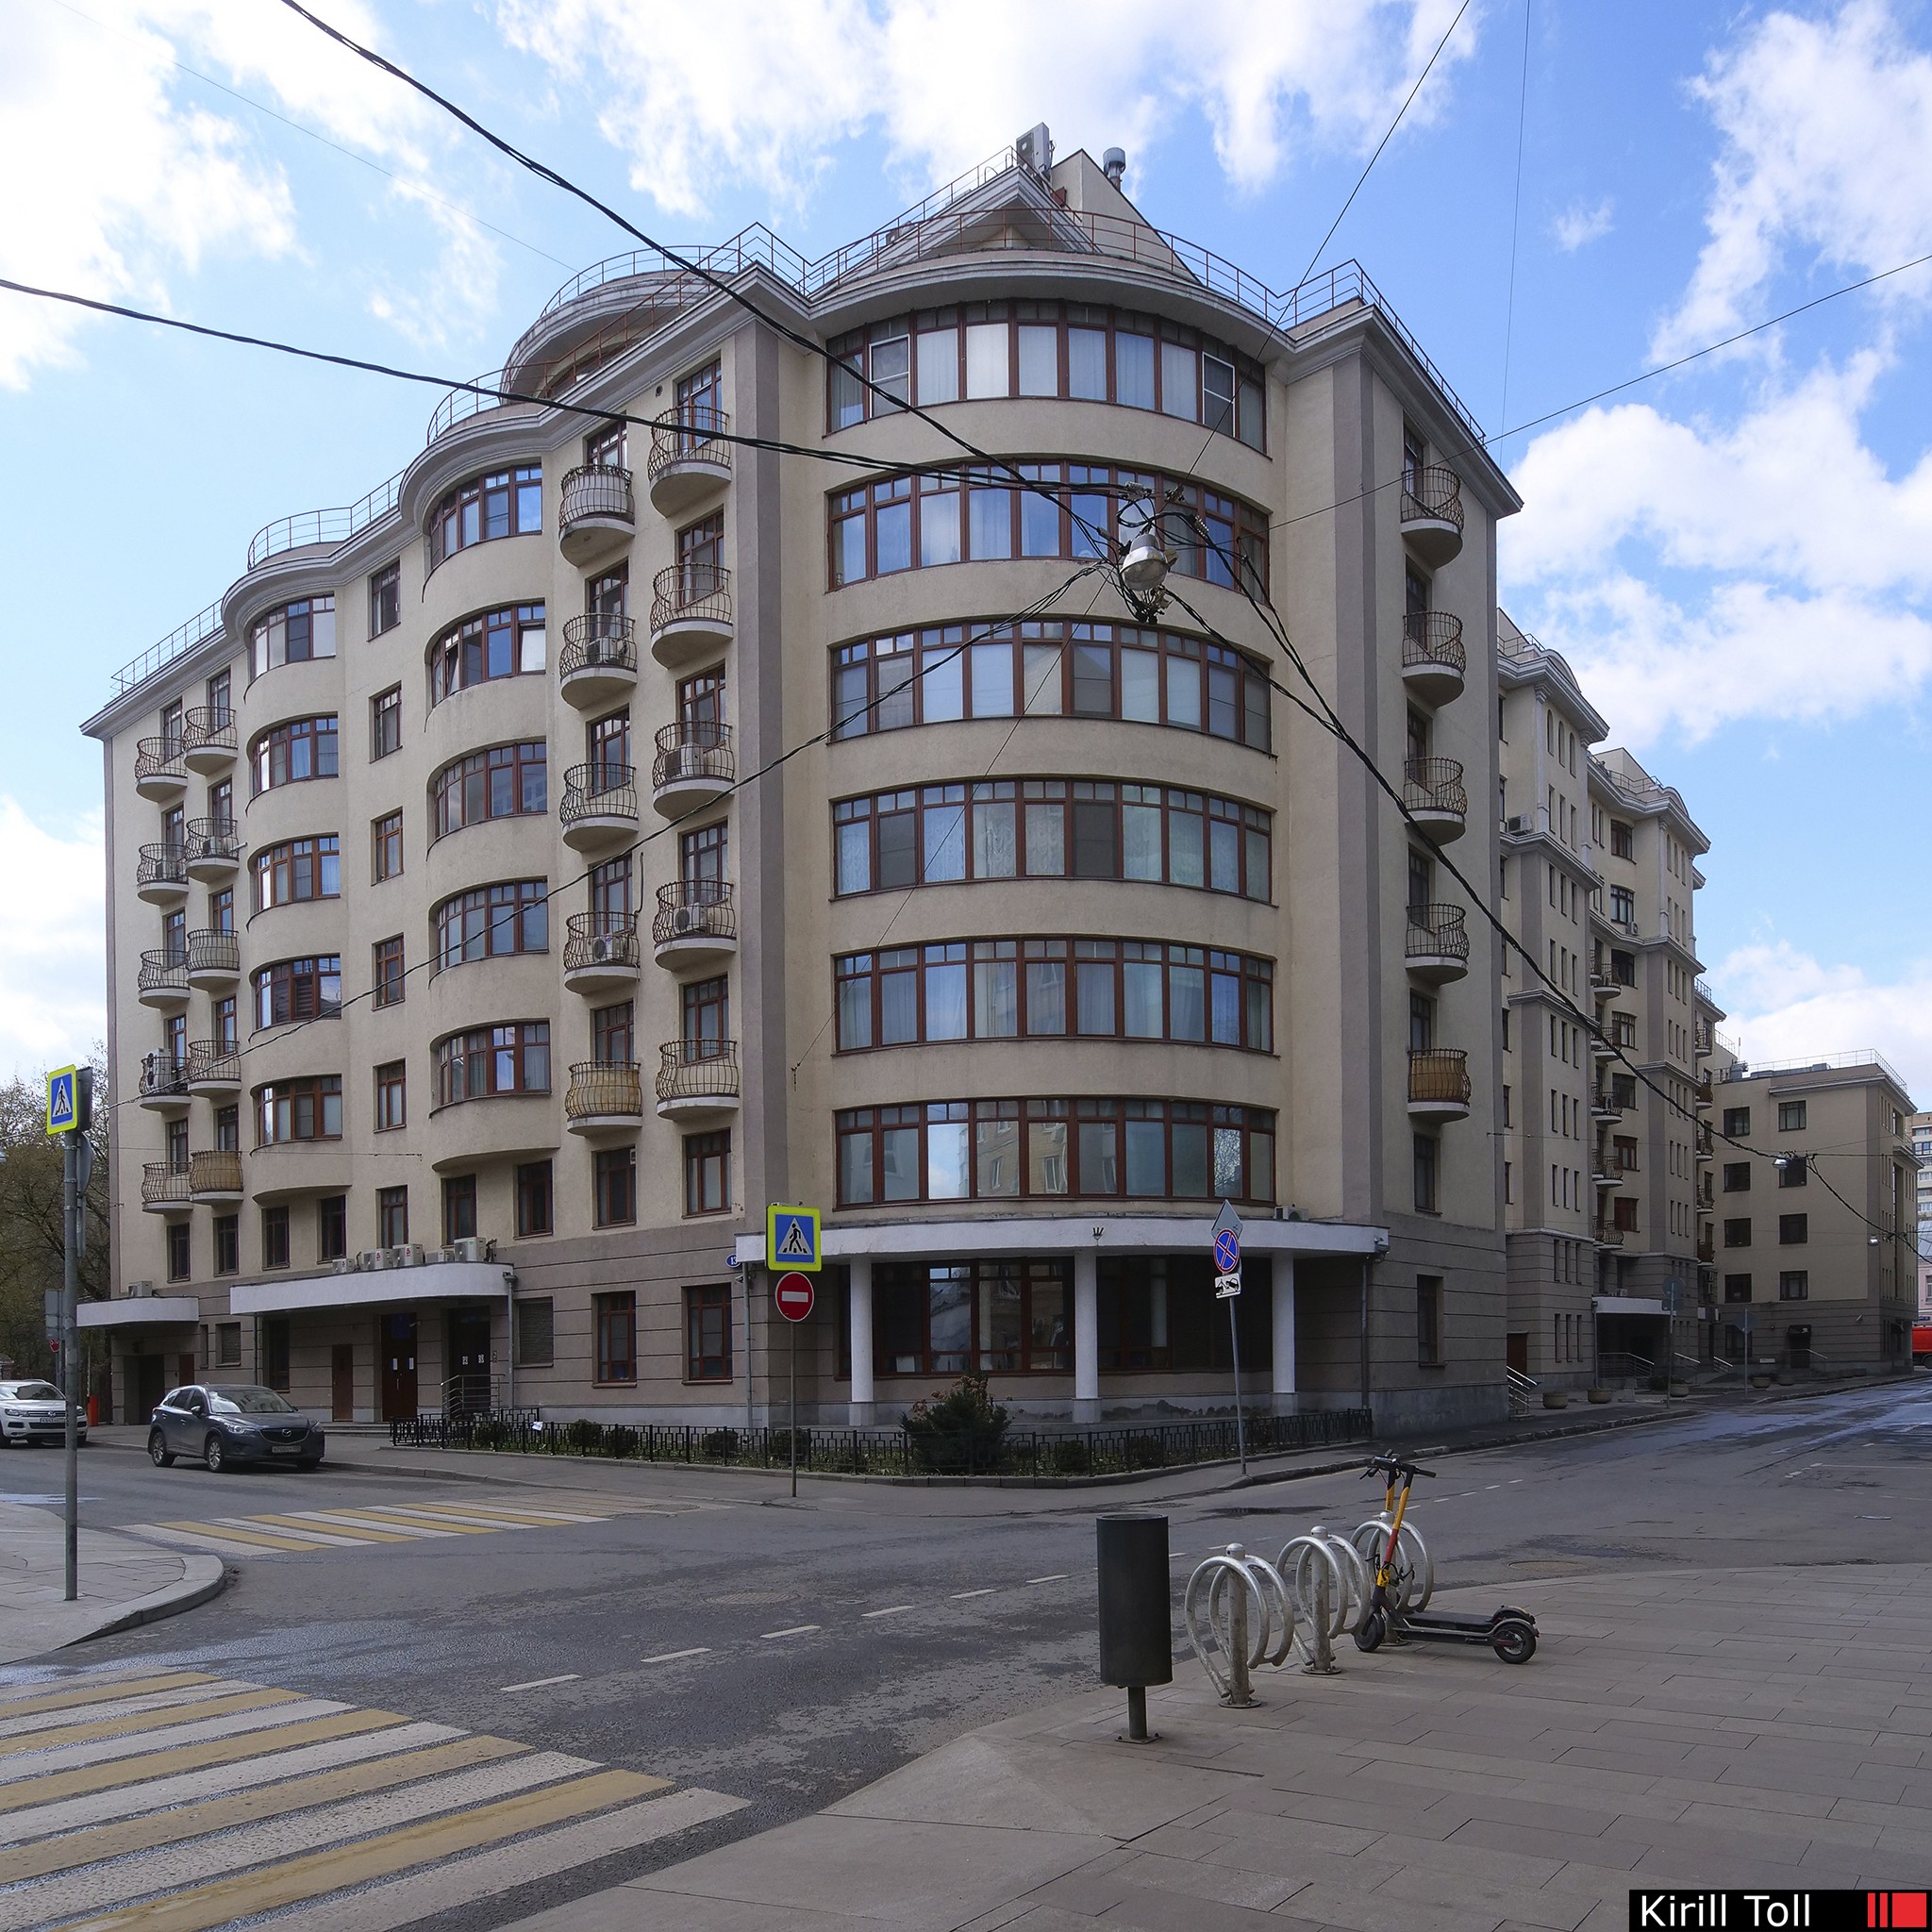


Even considering subsequent processing, the wild amount of wires and other visual clutter — as in Moscow or St. Petersburg — severely limits the choice of angle.
Even advanced AI tools for wire removal give a «so-so» result.
8. What is the «longevity» of architectural photography and how to achieve it?
It is the ability of a shot to age with dignity, like good design. Life of a shot can be killed by excessive enthusiasm for processing ?. It brings the image closer to 3D visualization with a fashionable «wow-effect». Longevity stems from respect for the original. In practice, this is, for example, using moderate focal lengths ?, and careful, unobtrusive retouching, restrained weather. Such a photograph becomes a document of the era, not an advertising flyer.
9. What is the benefit for a private realtor in a photographer? If there is a good phone?
The benefit — is not in replacing the phone, but in replacing the result. Strong photos are a marketing tool. Their impact is directly related to the photographer’s experience (The 10,000-hour Rule ?). These photos attract buyers who are interested and ready for dialogue. These photos reduce empty showings. My skills in making an image visually justify the price. This launches the sale in the first hours, not weeks.
You delegate to me an important block of work on creating the first and most important impression — so that you can focus on what you are strong at: managing the client and the deal.
Large agencies use a conveyor belt of freelancers with a minimum rate for shooting and retouching ?. My work is the opposite. I solve each project personally and answer for the result with my name.
This honesty gives rise to what goes beyond the deal — a mission. This is what distinguishes a realtor-strategist who sees in each sale not an operation, but a path.
10. How is it done in other countries with shooting for sales?
10.1. In the USA everything is arranged differently. The profession of a real estate photographer there is part of a system that works for results.
10.2. In Japan there is no mass, almost assembly-line, class of «realtor» photographers as in the USA, where it’s a huge industry with clear standards, software for automatic HDR-panorama stitching (like Matterport) and high competition.
11. How to start a dialogue so that we understand each other from half a word?
«How to write a brief for interior photography?», — this is a common (or synchronous) pain for clients («the photographer didn’t understand anything») and beginners («the client themselves doesn’t know what they want»).
A clear brief is the foundation of a justified price and 80% of success. It starts simply: divide the object into zones (locations). Decide if there will be people in the frame (strict interior «awaiting a guest», atmospheric «ghosts»? or specific models). Show me samples — photographs that inspired you. This is the key to visual priorities.
12. If writing a brief is a problem, what to do?
If formulating the technical task is difficult, we have two paths. First — I can propose a ready-made vision, based on my experience in similar projects. Second — we conduct a preliminary meeting on site or do a trial «sketch» shoot. Such a draft often itself suggests the logic of further work.
Regular clients already know: some of the strongest shots are obtained precisely when I go beyond the initial agreements. But the most direct way to clarify the task is conversation. Call, and together we will determine what you need, even if you can’t formulate it precisely yet.
13. How to write a brief correctly? What points in it are critical?
 There are primary things, I’ve outlined them in 5 points. A full checklist for detailed preparation brief ↴ is available for download.
1. Zoning: Divide the object into key locations. Each zone is a potential shot or even a set of shots.
2. People in the frame: Decide between options: strict interior «awaiting a guest»; lively «ghosts» ( how to get ? ); specific models. For real estate for sale, people are usually unnecessary.
3. Time of day: Every time of day creates its own advantages, difficulties, and formats for a particular place. Offering one solution for all objects for all tasks would be strange, and here a position needs to be developed.
4. Visual samples: Show photographs that inspired you. I repeat, this is an important point.
5. Format: Discuss needed proportions in advance: vertical for social media, horizontal for panoramas, square. This affects composition.
14. Why does the «average» client ask for «as many photos as possible» and how to react to this?
This is a request from the fear of «missing something». The photographer’s task — my task — is to gently but professionally explain that a presentation is a story, not a warehouse of duplicates. Especially since each duplicate needs processing ?.
Well-chosen shots guide the eye and reveal the object clearly and concisely. And similar photos with minimal differences in viewing angles and perspectives only confuse. The value is in visual development, in selection by meaning, and quality of execution, not in the number of files. It’s not hard to take many shots. It’s hard to find the right ones and bring them to the level of realization.
15. How to understand how many photographs are needed?
 • For an architect or design studio: The number of images stems from the number of authorial finds, details, angles they want to present. An architect, as a rule, sees this entire list immediately. Multiply the list by 2-3 and that’s the number of shots.
Sometimes one or two photos are needed.
• For selling apartments: Optimal 25-35 shots per property. A simple room — 2-3 photos, a large zoned room — 2 per zone. One clear and attractive image is better than three similar ones that tire the eye. Photos that will lead to a viewing are needed. Excess shots «disperse» the impact. Bringing to a real viewing is very important because the decision is made by the real buyer in reality. At the same time, it’s important to bring the right audience, otherwise the number of showings will increase excessively and this will only be an extra load.
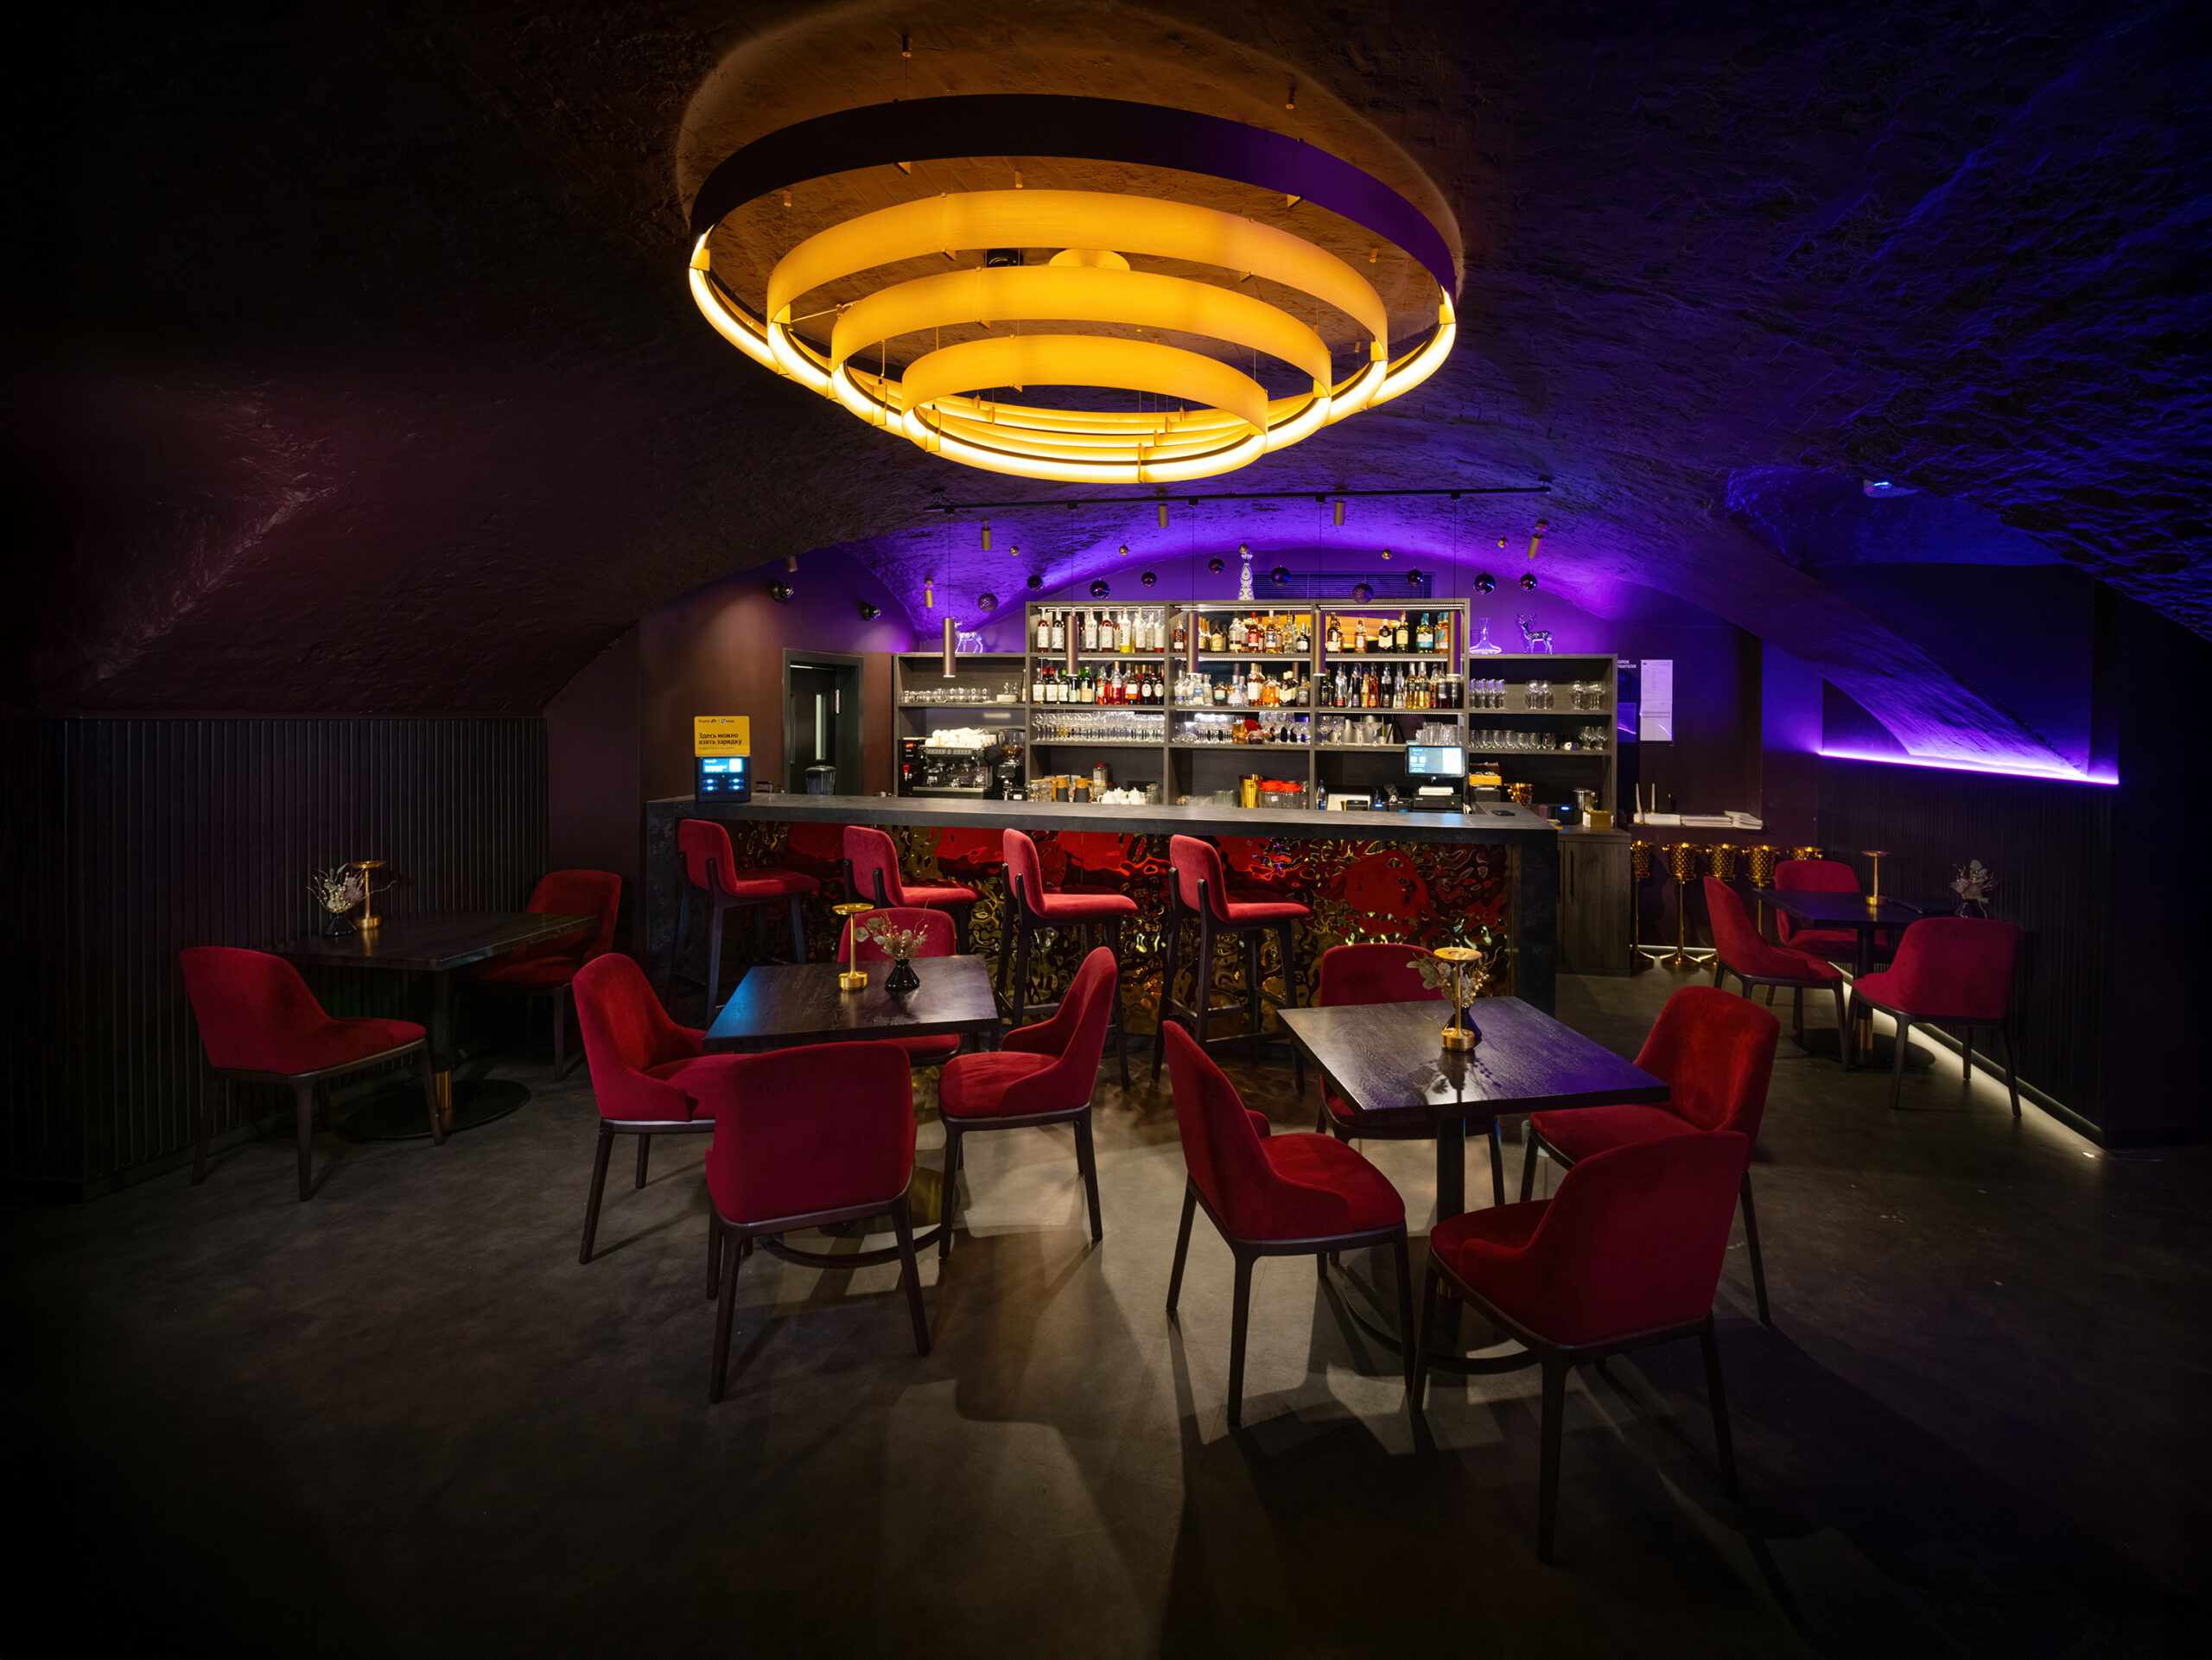
? From experience. Far from every shot is one shot. A photo of a bar is obtained from 7 files with additional lighting ( ? ). Of course, such work takes a larger shooting volume of time.
16. How much does the work cost? What is the fatal mistake when choosing a photographer «by price»?
Yes, my website also has a «price list ?«. But it is not a public offer because we’re not selling candies. «Quanto costa?» starts working after discussing the brief. In complex cases, it’s advisable to see samples that inspire the client for the photo shoot. An honest dialogue begins with discussing goals and task volume. Sometimes understanding of nuances arises in the process. When all the specifics are laid out on the table, the price flows from it transparently and reasonably.
Conclusion. Clients pecking at cheapness find behind it either «optimized» quality, or an unexpected switch to other sums «due to complexity». This is not a photography problem. These are the costs of a market consciousness where price has broken away from understanding labor and its value.
17. Can a client become a «co-author» of the shoot? And is it needed?**
Ideally — yes, and that’s the magic of the best projects. A client-co-author is not the one who dictates from which angle to shoot. This is the one who deeply understands the essence of their object. An architect showing hidden interconnections. A boutique owner explaining brand philosophy. Such dialogue elevates the work to another level, helps find interesting «tricks». But it’s a big rarity. More often the client is a customer hiring an expert to solve a task. And that’s also great. Co-authorship is a gift, not an obligation. And everyone has their own tasks.
18. What does a professional photographer expect from a client as a partner?
For a photographer, it’s important to understand that the subject of discussion is not about the number of «shutter clicks», but about impact on business objectives. I do this with the help of technology and through the prism of artistic practice. Sometimes I need the Client’s help.
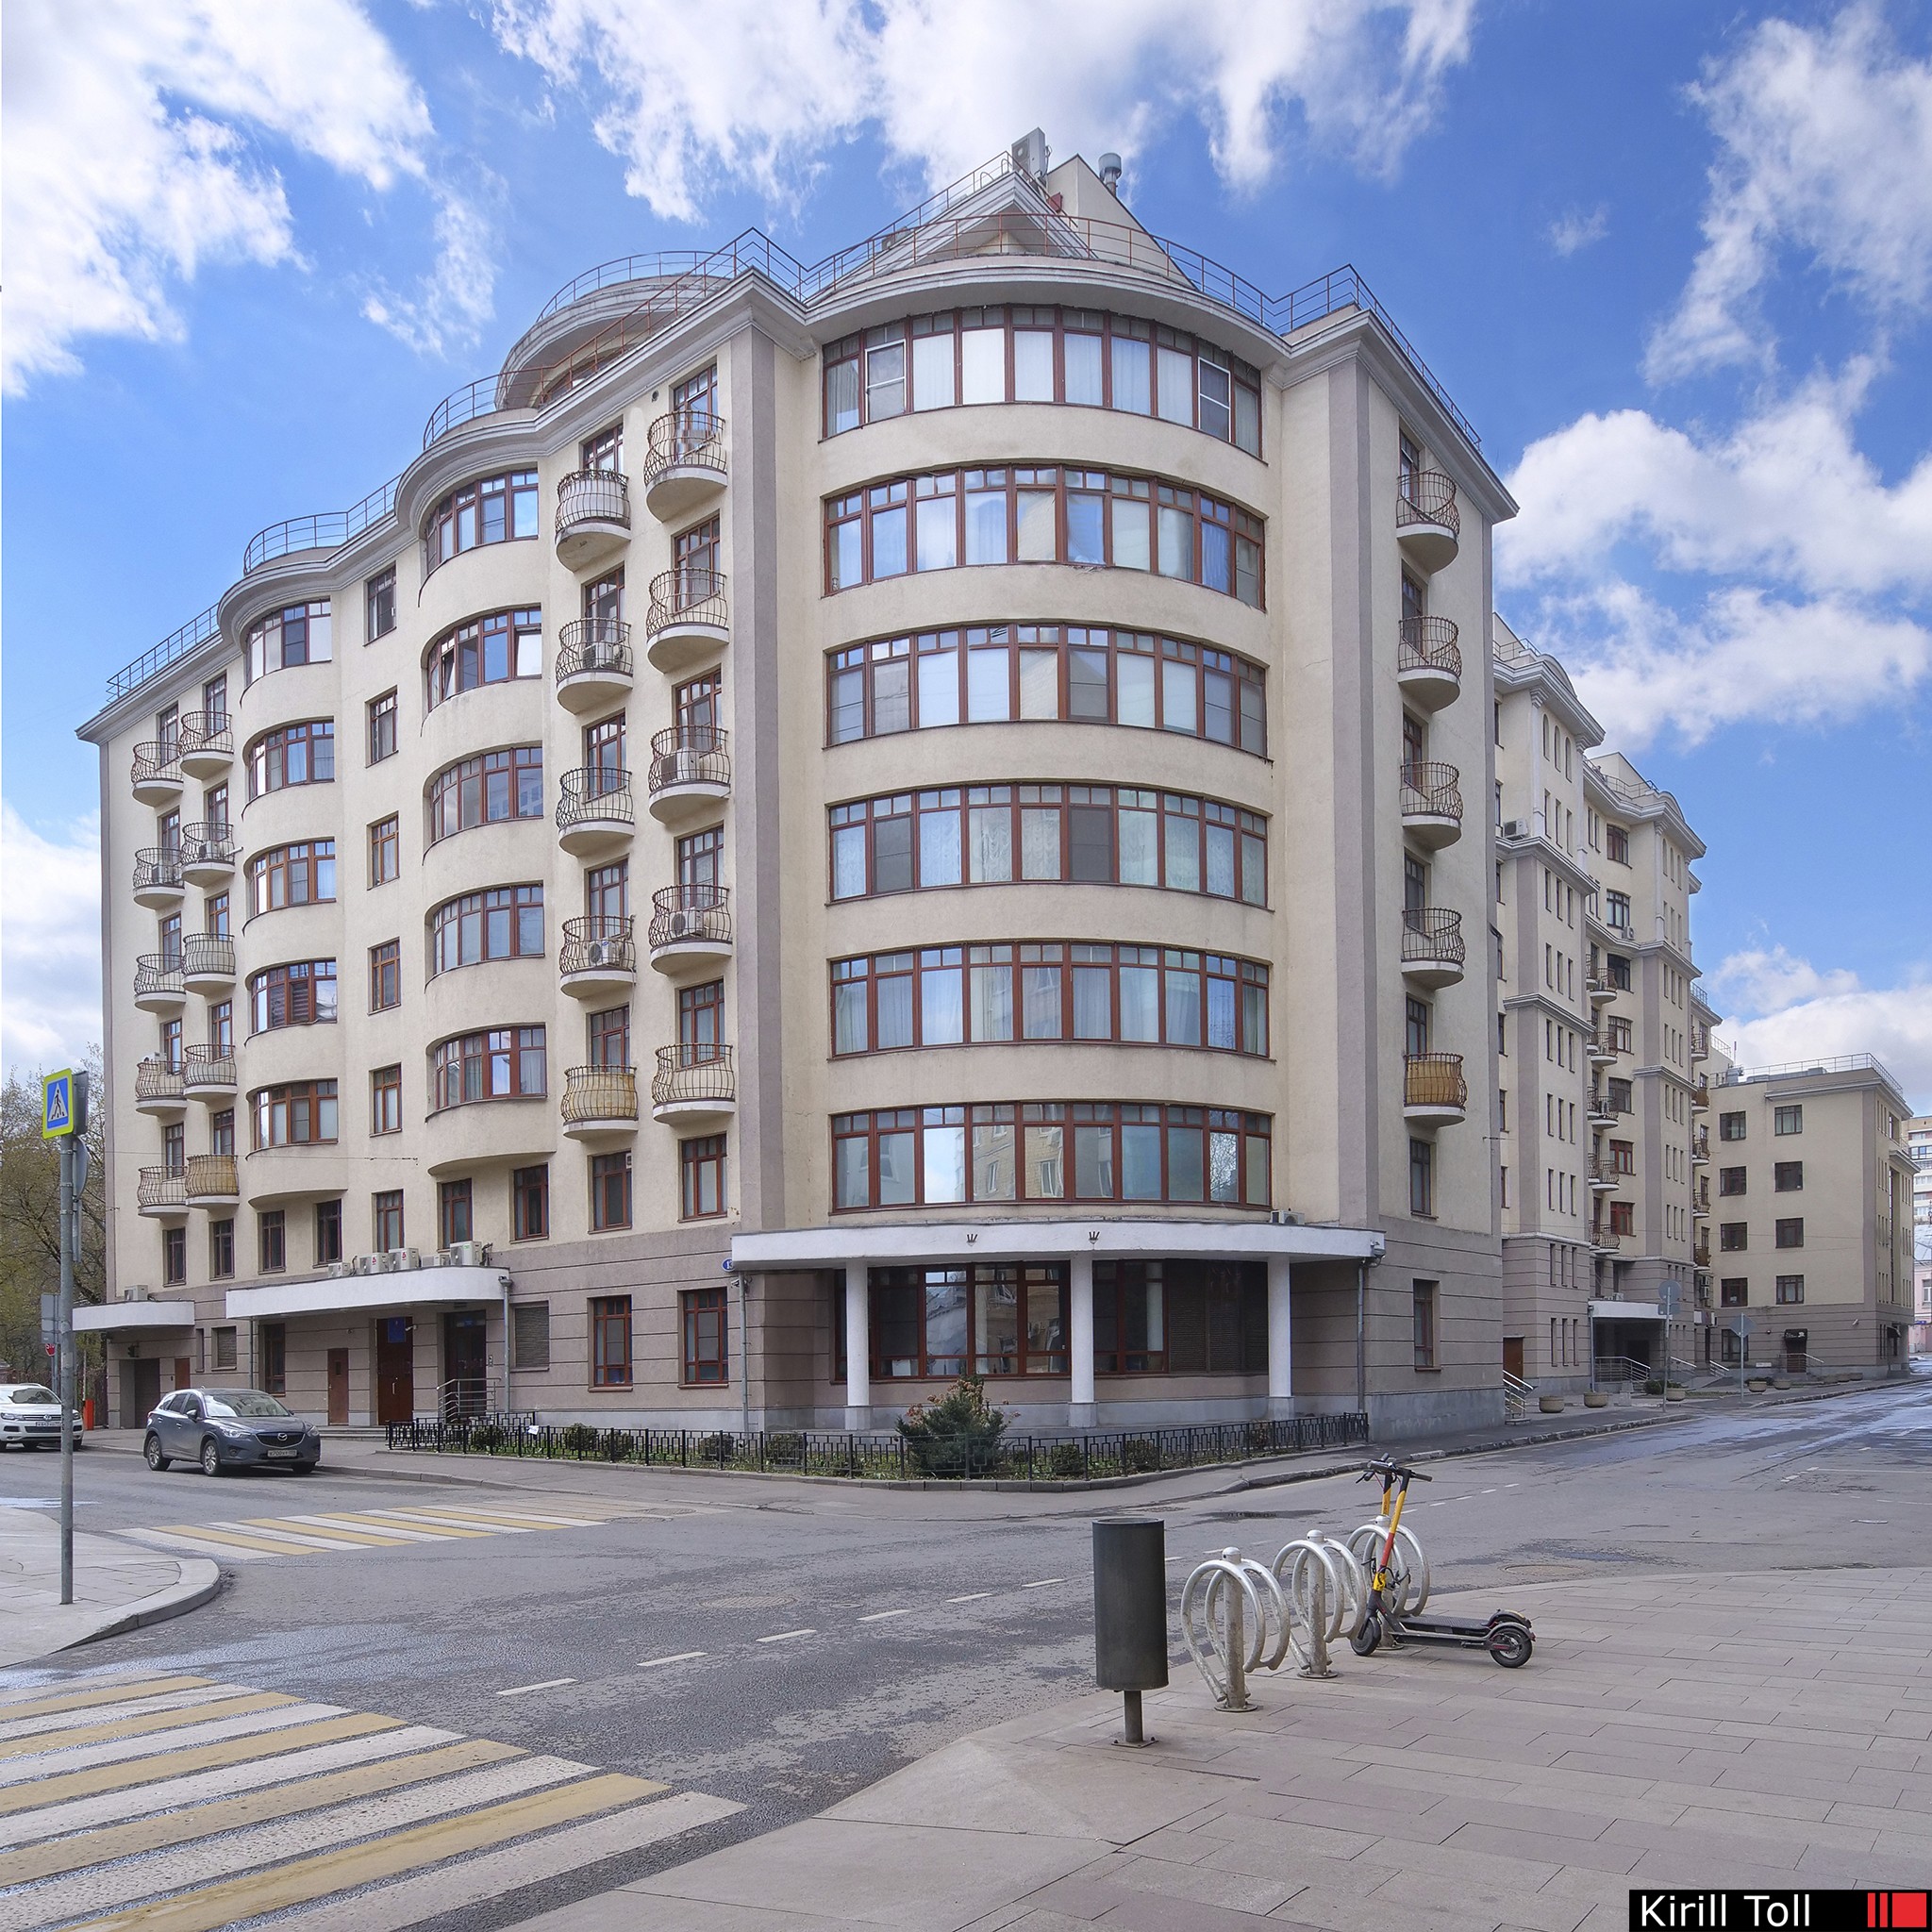
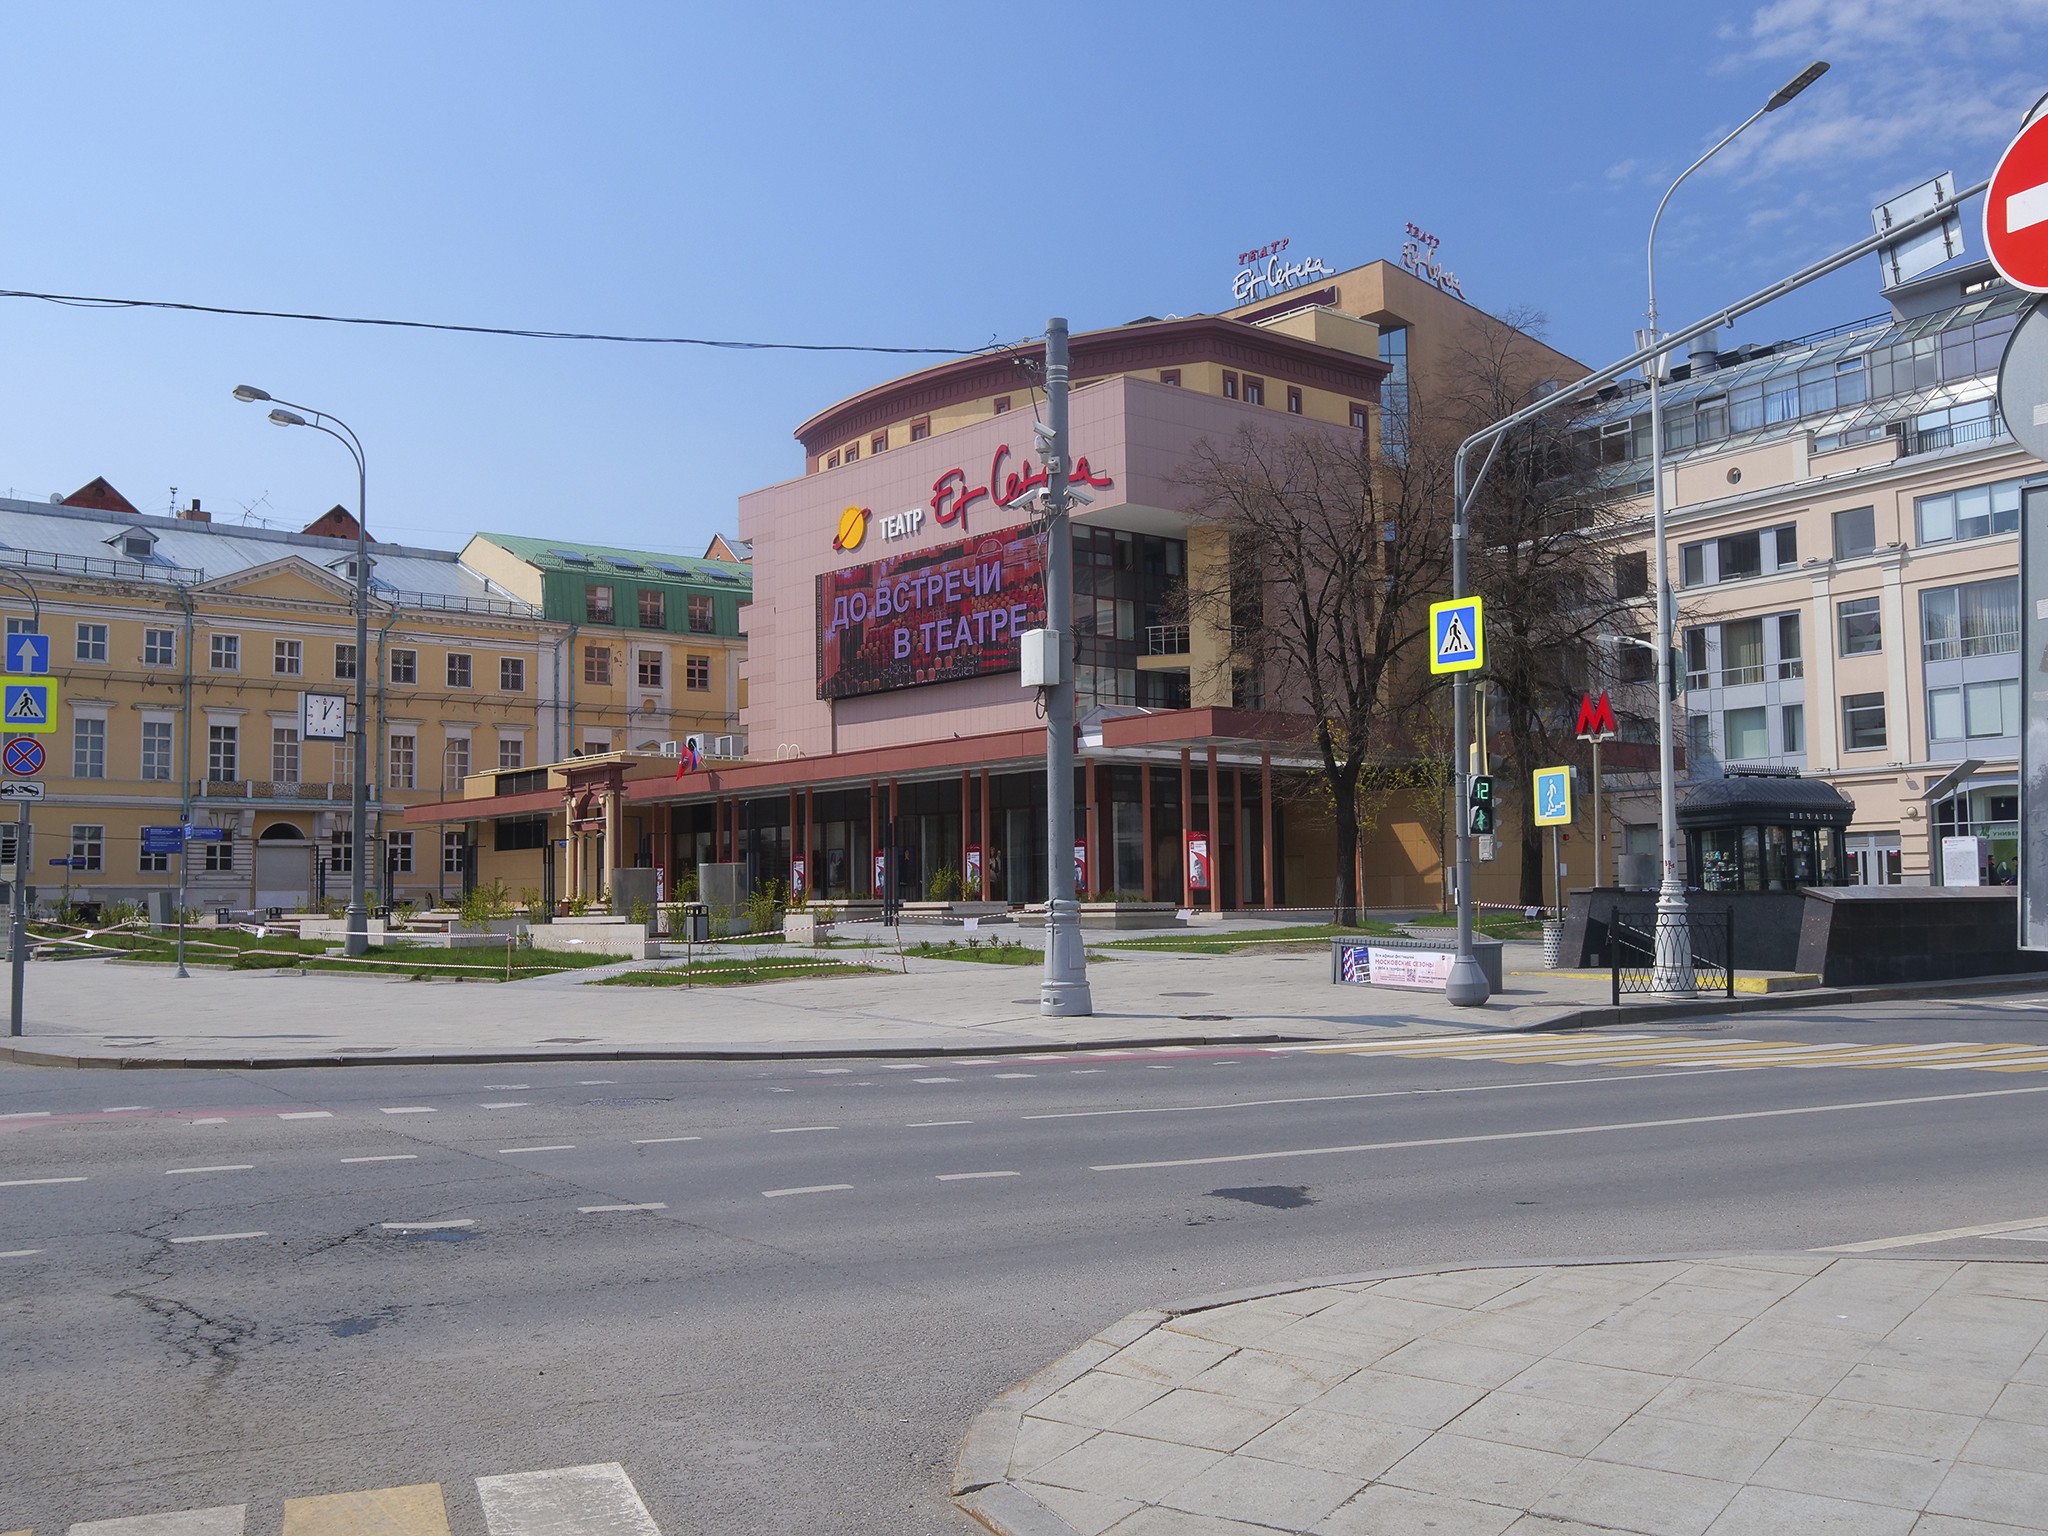
? From experience. Needed a shot of a building facade in central Moscow. The desired angle is always packed with a parking strip along a narrow sidewalk.
That’s how real partnership is born.
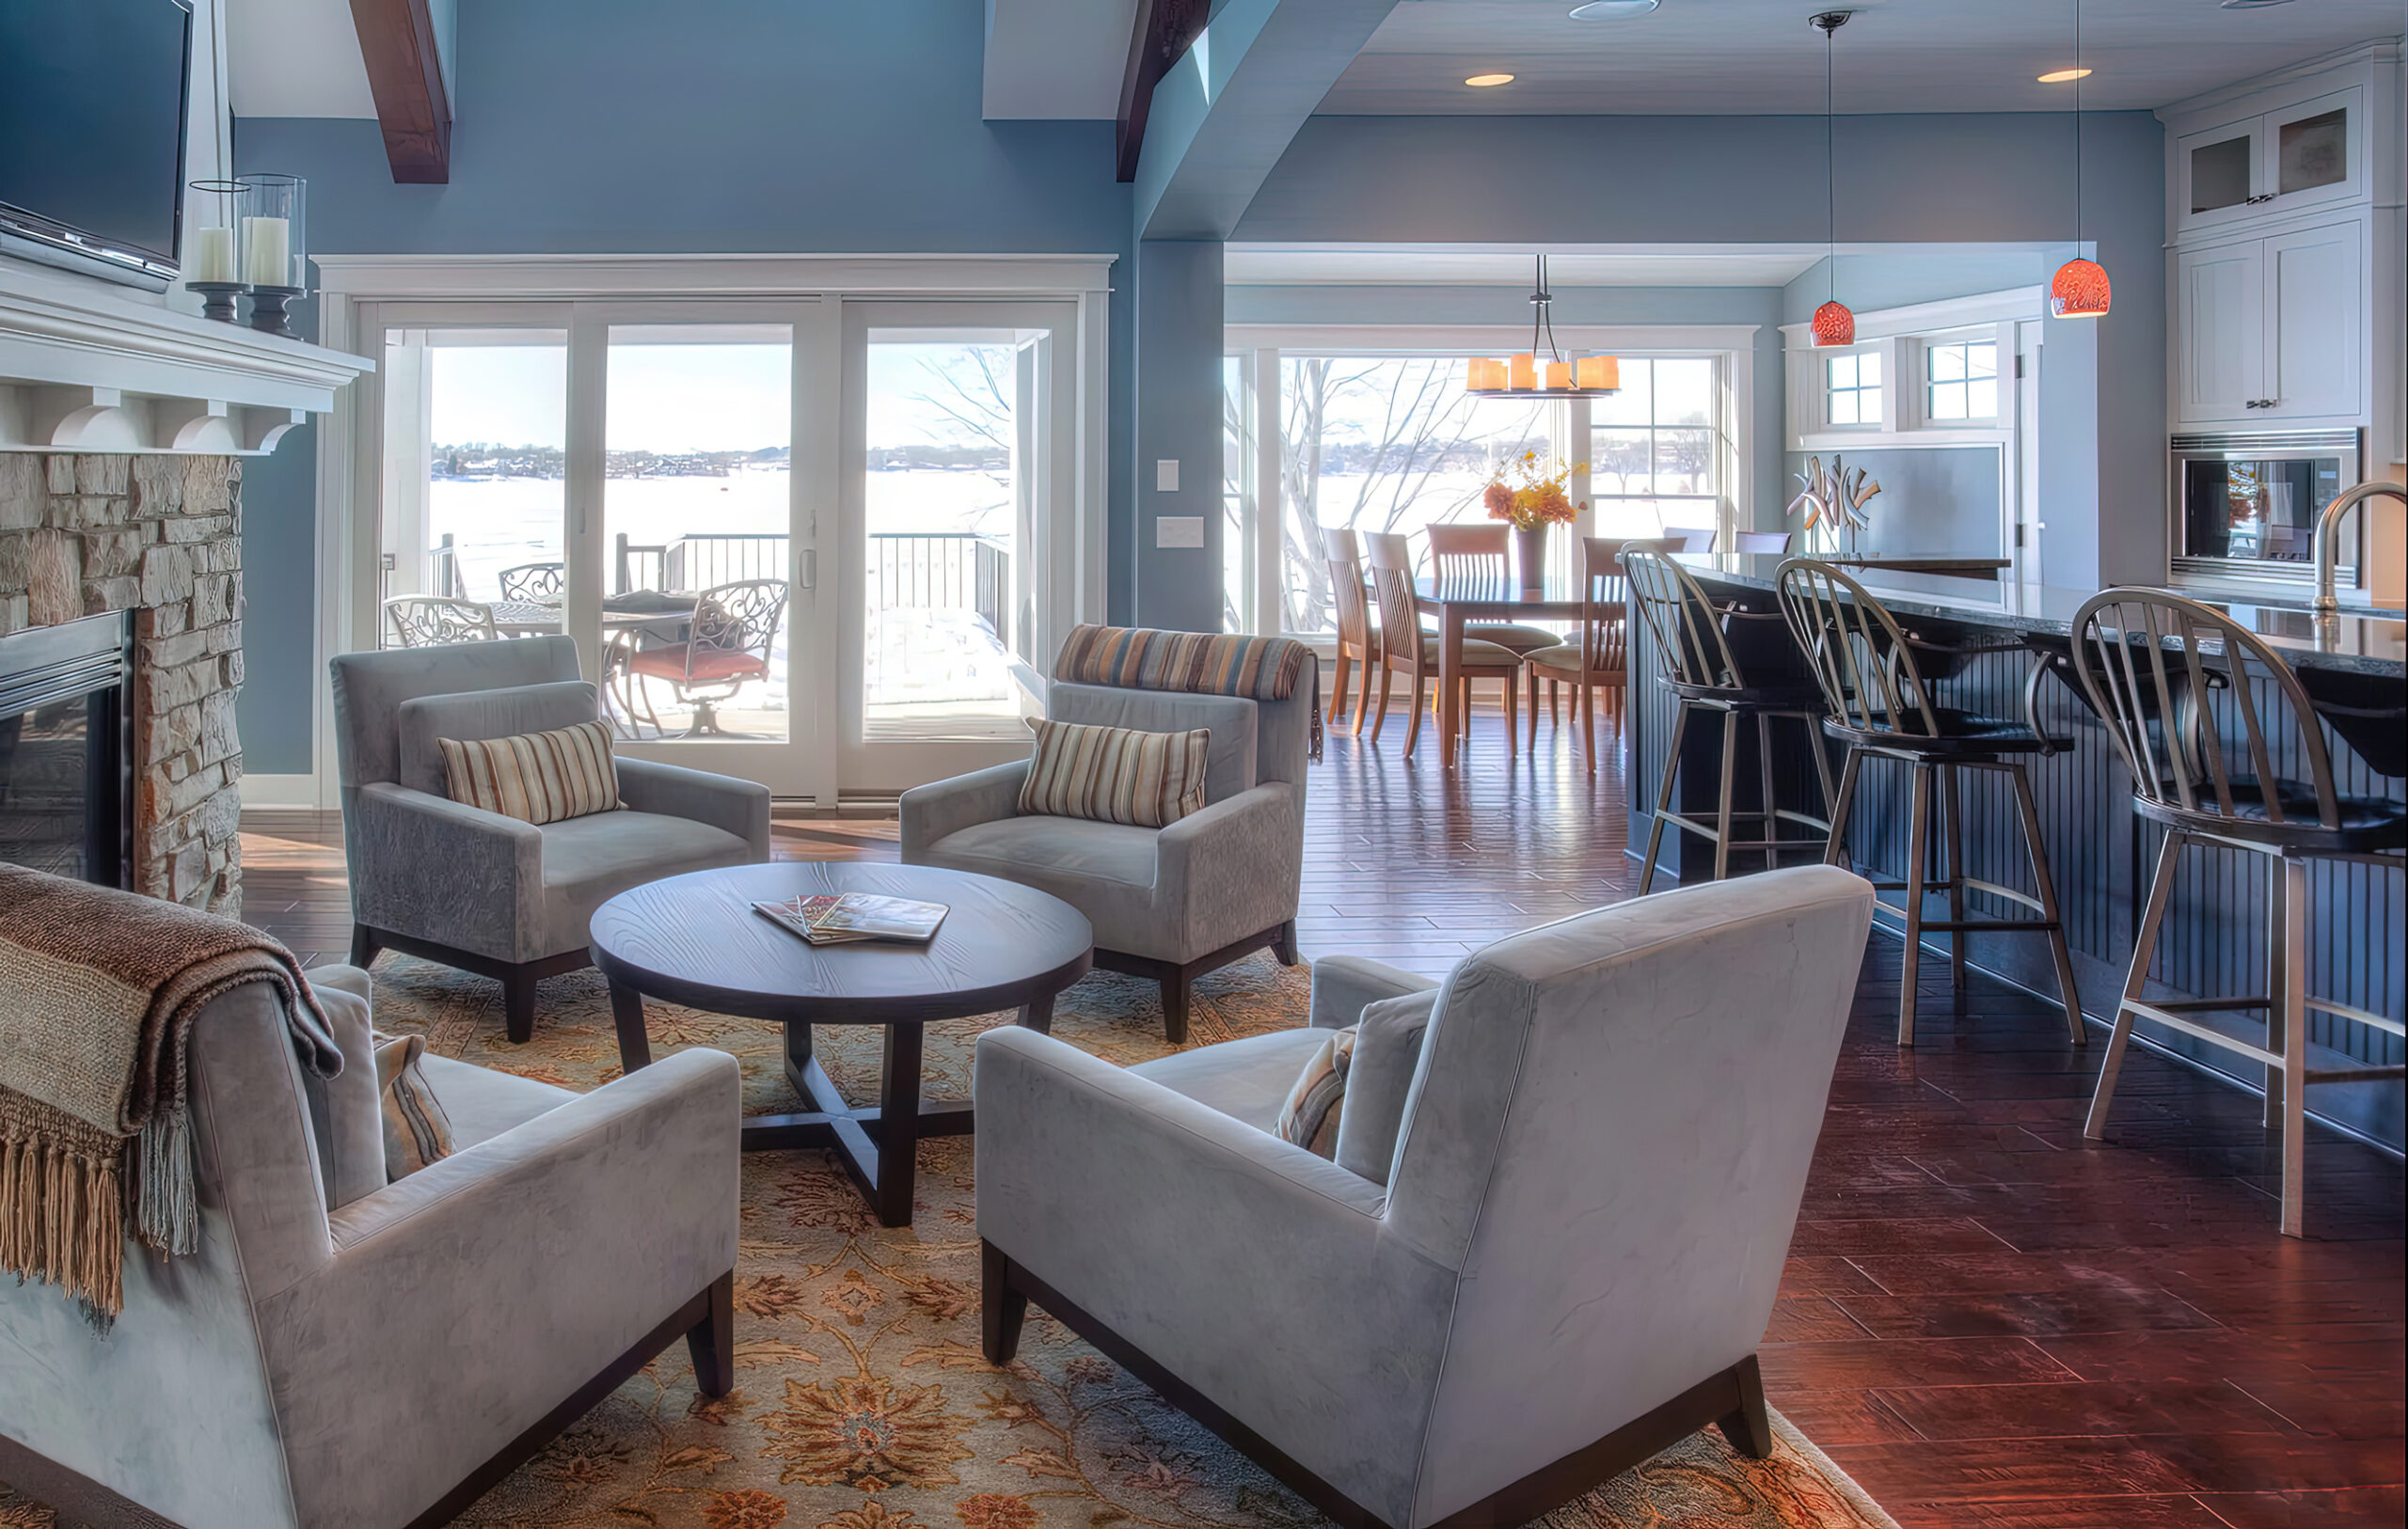
19. How to make an interior look «alive» in a photo?
«Bringing an interior to life in a photo» can be done in two ways. The first is rather jokey but works. There are two fundamental paths: the quick digital and the deep classical.
Here’s the essence: add to the frame a hint of recent human presence. Not a staged model, but a trace of presence.

-
What to place? A coffee cup on the table, an open book, forgotten glasses on a chair, a carelessly thrown blanket, a bag by the sofa.
-
Why? This creates a narrative — a micro-story. The viewer involuntarily completes it: «Someone just left… was reading here… was resting.»
-
Your «atmosphere» checklist: Have innate feel? Great! If not — act by the list.
Lay out 2-3 items, photograph, remove one, take another shot. Compare. The main thing is not to overload. One ax in the wall (father-hardcore!) can tell a story, while ten details create chaos.
All the above will turn into kitsch if «cleaning» in the frame is not done. Before adding life, remove visual clutter:
-
Step 1 (during shooting): Ruthly «cut off the excess» with the viewfinder frame. Move the vase, remove an extra pillow, adjust the curtain. ( On composition rules ? )
-
Step 2 (during processing): Retouching ?. Remove dust specks, protruding wires, accidental reflections.
Result: Every item in the frame should be in its place and guide the eye. Light — harmonious, lines — straight. Technical perfection is just an exercise. But without it, there will be no art. A story brings a shot to life, and cleanliness and structure give it power.

Off-camera will remain the effort to create harmony in the frame and exercises in technical retouching.
20. Is staging needed for shooting for an architect’s portfolio?
For architectural photography, decor is part of the author’s concept. Decor in such projects is the final touch, the finishing note, and the photographer must become its perfect conduit. I don’t «enliven» emptiness, I document completed work, adjusting the placement of objects in space. Yes, there may be no decor. It all depends on the architect’s concept. Nevertheless, maybe some of the remarks I write below for the sales market will be useful.
21. How critical is staging an object before shooting for sale?
 Absolutely critical. The most talented photographer in an empty room will only make shots of emptiness. Decor helps to feel the scale, functionality, lifestyle.
![]() Note. Specialists from the Real Estate Staging Association calculated that staged homes sold (or rented) 68% better in 2007, 85% better in 2008, and 78% better in 2009. Clearly, the added value to the sale price significantly exceeds the costs of the property’s photo shoot.
Note. Specialists from the Real Estate Staging Association calculated that staged homes sold (or rented) 68% better in 2007, 85% better in 2008, and 78% better in 2009. Clearly, the added value to the sale price significantly exceeds the costs of the property’s photo shoot.
Investment in staging and professional photography is not an expense, but a multiplier that many times increases the return.
 The most brilliant interior photographer will only be able to make photographs of an empty room in an empty room. However, even here I’m ready to offer something as an example.
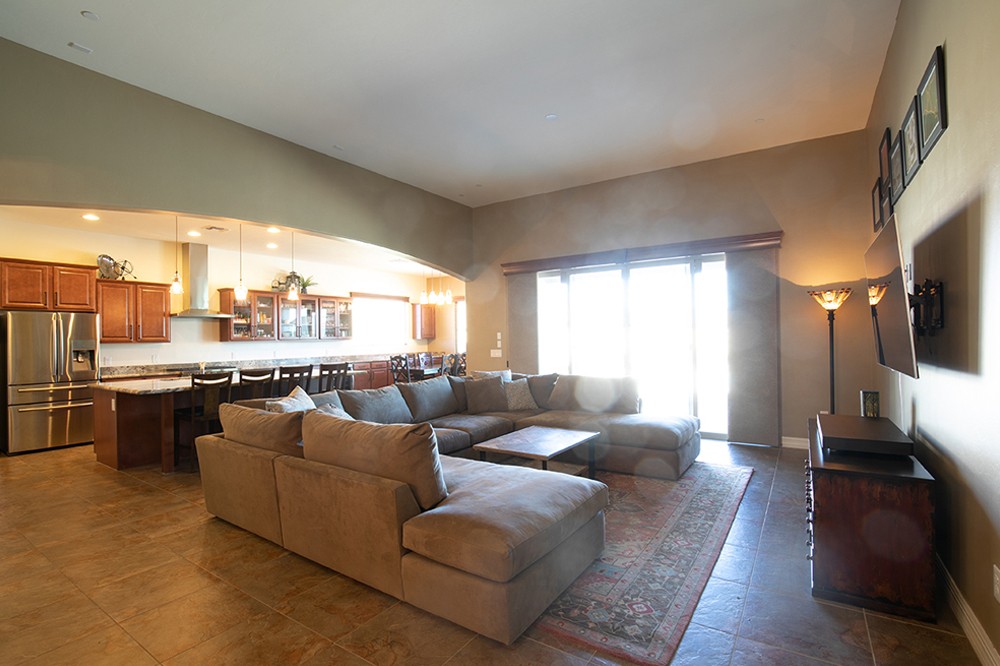
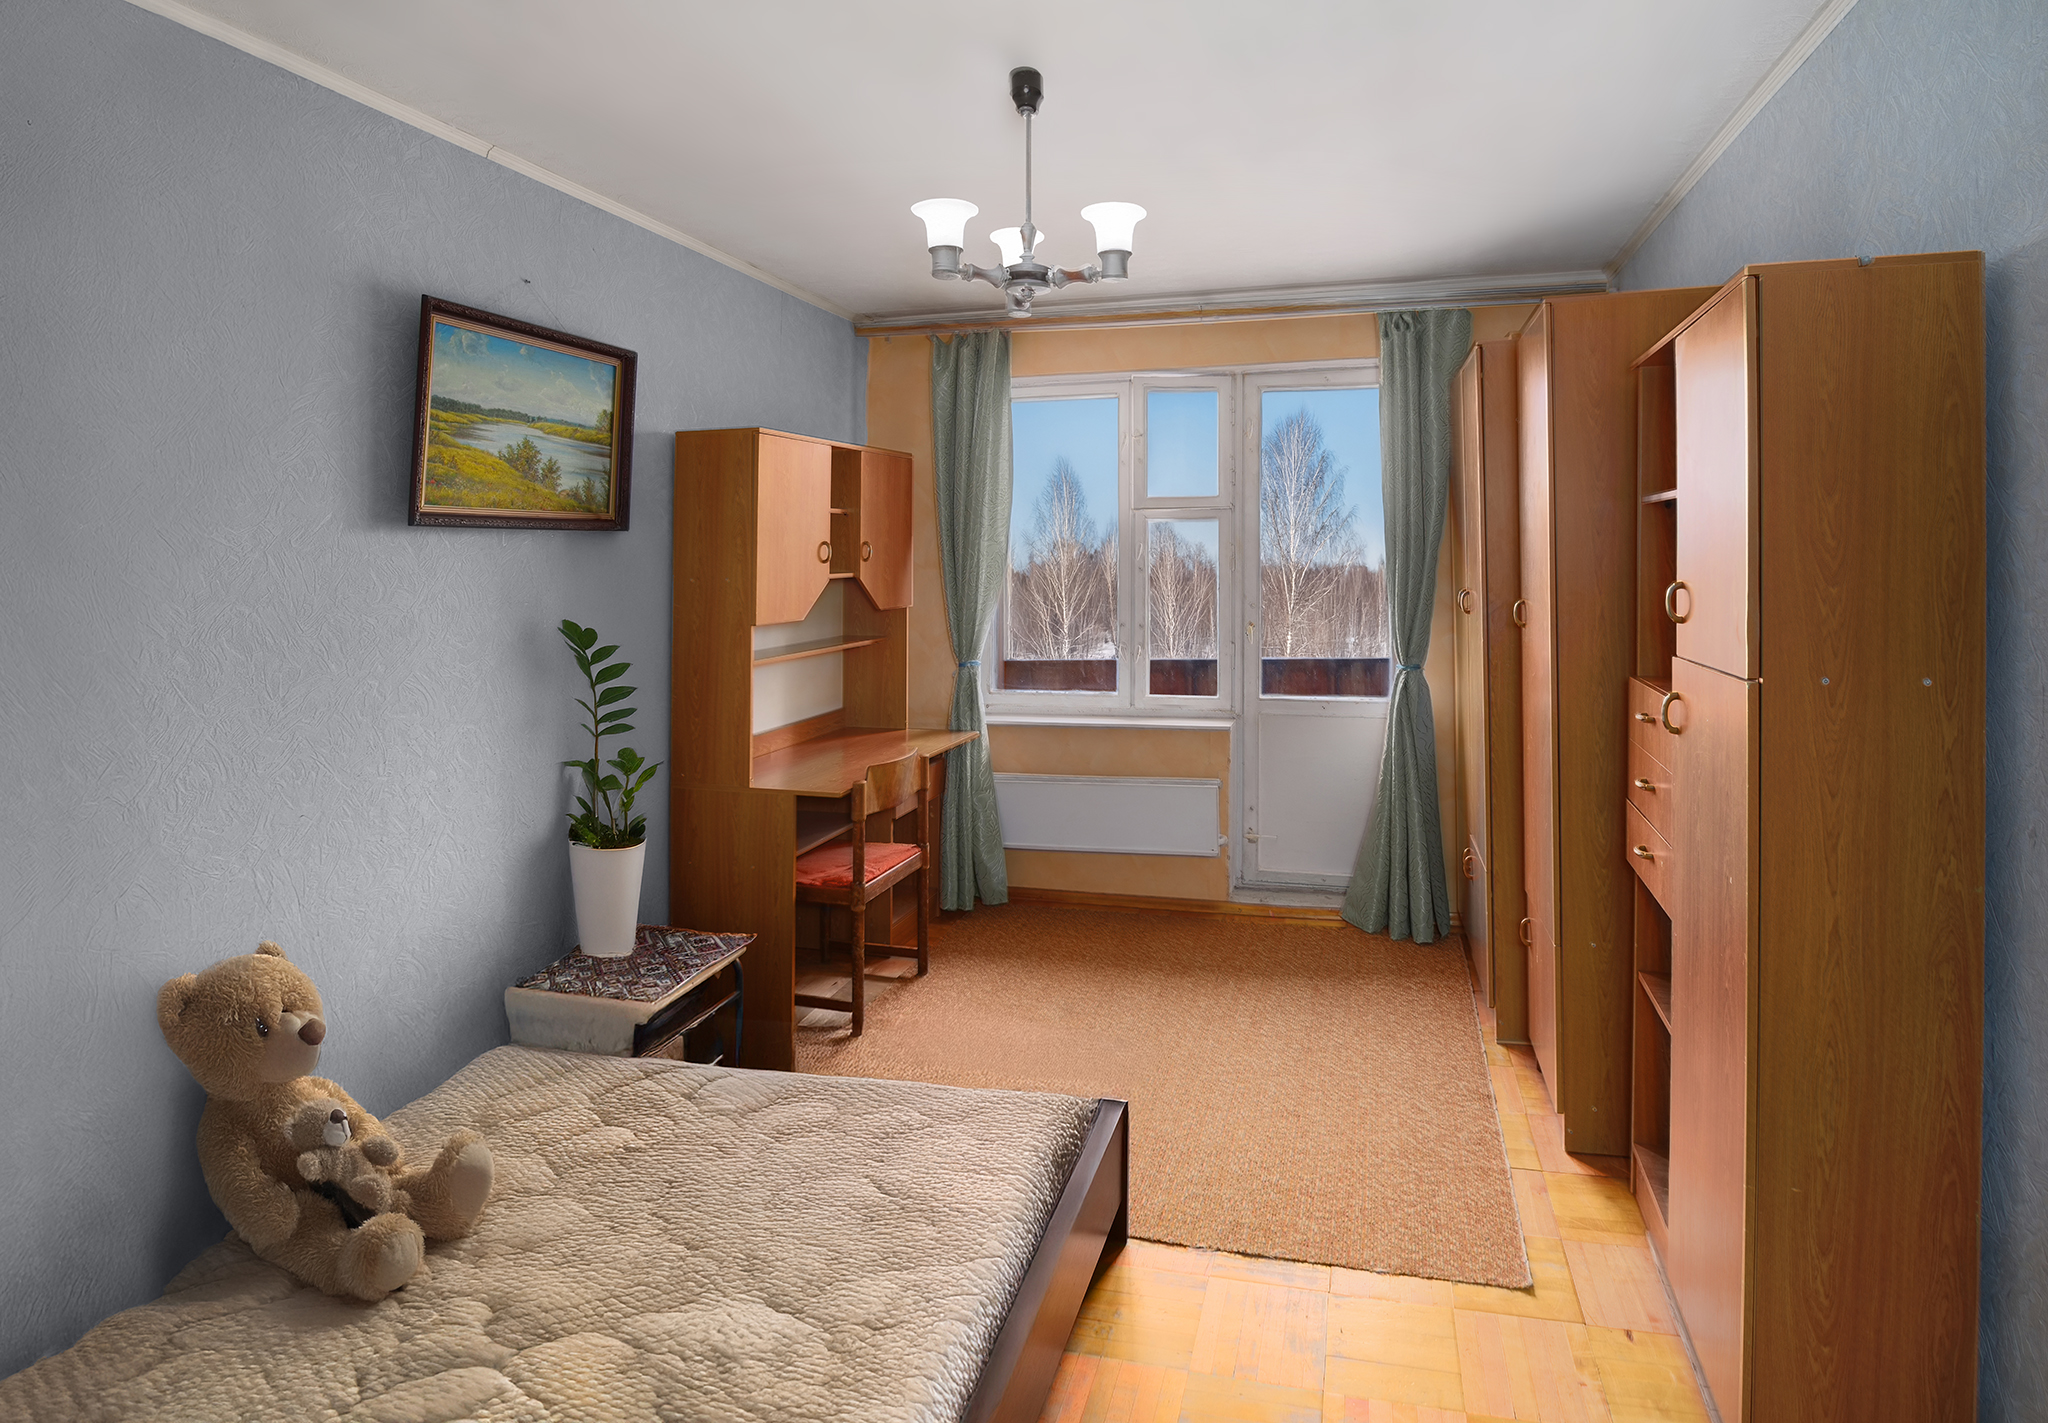
? From experience. A completely empty room with a balcony acquires living charm from a few items: curtains, clean windows, a poster, a chair, a rug, and plants.
22. How to present an absolutely empty space («concrete walls»)? Is there any point in shooting it?
For example, for one client of such shoots, I set up two easels with paintings depicting the company logo. This enlivened the space, gave a sense of size, and … the logo was present on the image even on platforms where logo-ing photos is prohibited.
Want intrigue? Create it in the frame. Everyone will be interested, and competitors will cry. Photos of emptiness work for a narrow audience — investors or buyers who think in plans and square footage. But even here a point of reference is needed.
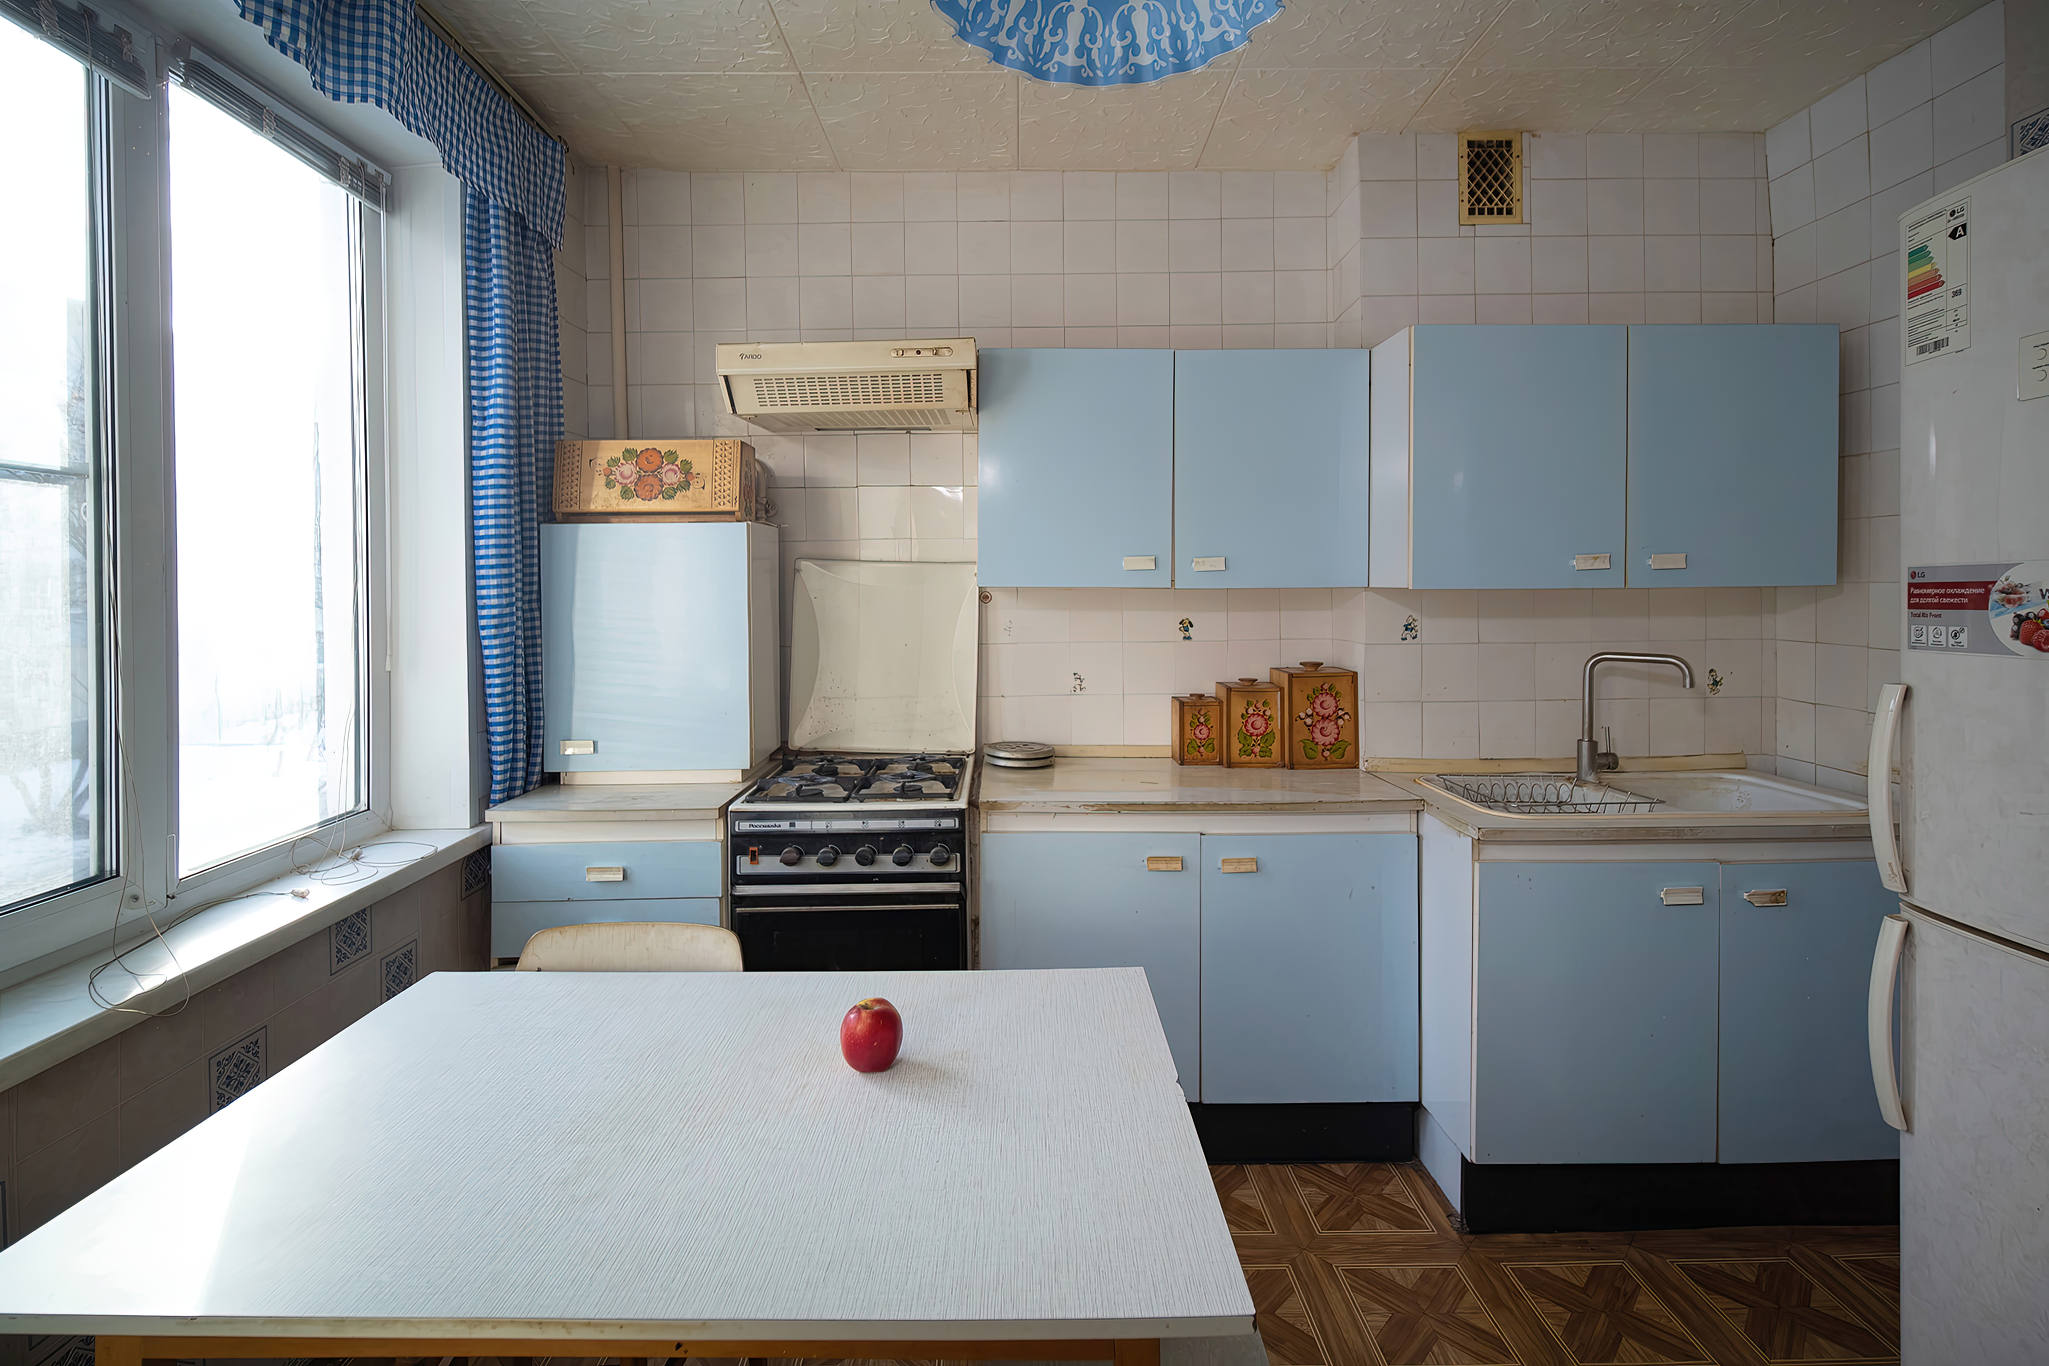 ? From experience. An unusual situation happened in the winter of ’23. I was hired to shoot a budget apartment in Ryazan. I was surprised, quoted a price, and the client agreed. I brought a handheld battery-powered lamp and an apple. Here it is in the frame. I worked with pleasure. Saw Ryazan.
23. How to stage an interior with minimal budget, where to get decor, etc.?
✅ Start preparation with simple things: check lighting fixtures for functionality and uniformity of light bulbs. All bulbs should shine with the same intensity and color temperature, all shades must be in place or turned to the camera with their best sides.
? The main technical part of preparing for an interior shoot is eliminating details that distract the viewer from our goal. Remove wires, power strips, extension cords, ironing boards, and large photo frames. In essence — cleanliness and furniture, which, if necessary, should also be redistributed or have its arrangement corrected.
? Dirty windows are enemy number one. Next, the process moves towards simple positive elements – flowers, fruits, comfort items, as mentioned above. And a minimum of small, space-fragmenting elements. Beauty and harmony defeat emptiness and anarchy.
 ? It is desirable to remove from bookshelves those books whose spines sharply stand out from the general row of books.
Pay attention to details that distract from the interior itself: pillows, cushions, flower pots and vases, figurines, icons, candelabras, and similar things that convey what will be superfluous for a potential buyer.
If not removing, then harmonizing the arrangement of these items is very important. For example, group books by color, and remove outlier colors. More details later.
✅ Having identified the basis in the apartment space, we find places for accents that we will fill consciously. There shouldn’t be many of them, and each plays its role. If you forget this, anarchy will appear in the interior.
![]() Note. During any space filling, monitor the room’s color scheme: it’s desirable to avoid items that completely stand out in color or brightness from the space.
Note. During any space filling, monitor the room’s color scheme: it’s desirable to avoid items that completely stand out in color or brightness from the space.
✅ What to do before visiting a store for decor? Before visiting a store for decor, compile an EXACT LIST OF LOCATIONS to fill. Otherwise, you are doomed to buy extra things.
— On the kitchen table – fruits (light or dark) maybe in a vase or flowers (a flower) in a vase (a selection of suitable flowers).
— In the room on the sofa – place (beautifully) a forgotten magazine (book), a blanket (color), a pillow or pillows.
— An empty wall – a clock or … Note. Some light items can be attached with double-sided tape.
— An empty room corner – a floor vase with dried flowers or flowers.
✅ About the «first photo» in a presentation. Marketers consider the first photo of a presentation especially important. If the client holds their gaze for 2-3 extra seconds – that’s a significant step towards success — forming interest through a bright emotional accent in the frame. It can be trivial – flowers and fruits, but other objects are possible, e.g., a balloon under the ceiling, chess on a coffee table, a bright gift box with bows, etc.
So, our goal is to form a feeling of comfort on the property, using a minimum of actions and accessories. Having set the goal, we divide the implementation into simple components.
✅ What items are convenient for creating accents or other types of filling and where to get them?
First of all, there are many cheap items from IKEA, FIXPRICE, LERUA. Items purchased in stores can be returned if their packaging and functionality are not damaged. Refunds are faster if paid in cash.
There’s another possibility: ask friends and neighbors. They will gladly lend you some accessories for a few days.
Here are some useful things from the mentioned stores. Take them not as a given, but to start the imagination: vases, flowers (can be artificial), toys, gifts, kitchen utensils, etc.


 I’ll return once more to the space of an empty wall, if you have one. I already recommended wall clocks and masterpieces. But an inner voice asked for specifics on the topic. And I can’t stay silent, I’ll give a simple and cheap trick worthy of attention.
For a ridiculous sum of 200-600 rubles, you can buy a publication of 12 paintings by great artists on excellent paper in A2 or A3 size. Such a publication is called … a calendar.
It’s enough to trim the edges, insert into a mat or frame or glue onto a flat white background – voila! You have a gallery of wonderful painting at home.
Remember the rule: A minimum of thoughtful details is better than an excess of random items. One large painting on the wall is better than ten small ones, unless «that’s the style».
24. Is it acceptable to use AI for «finishing staging» during processing? Add a vase or painting to an empty wall?
At the current stage of technology development — it’s a tool I use in every processing session ?. Yes, it has many limitations — and creating decor in AI is not its strong suit. However, some items are quite suitable.
Relying on AI decor for a serious project would be a mistake.
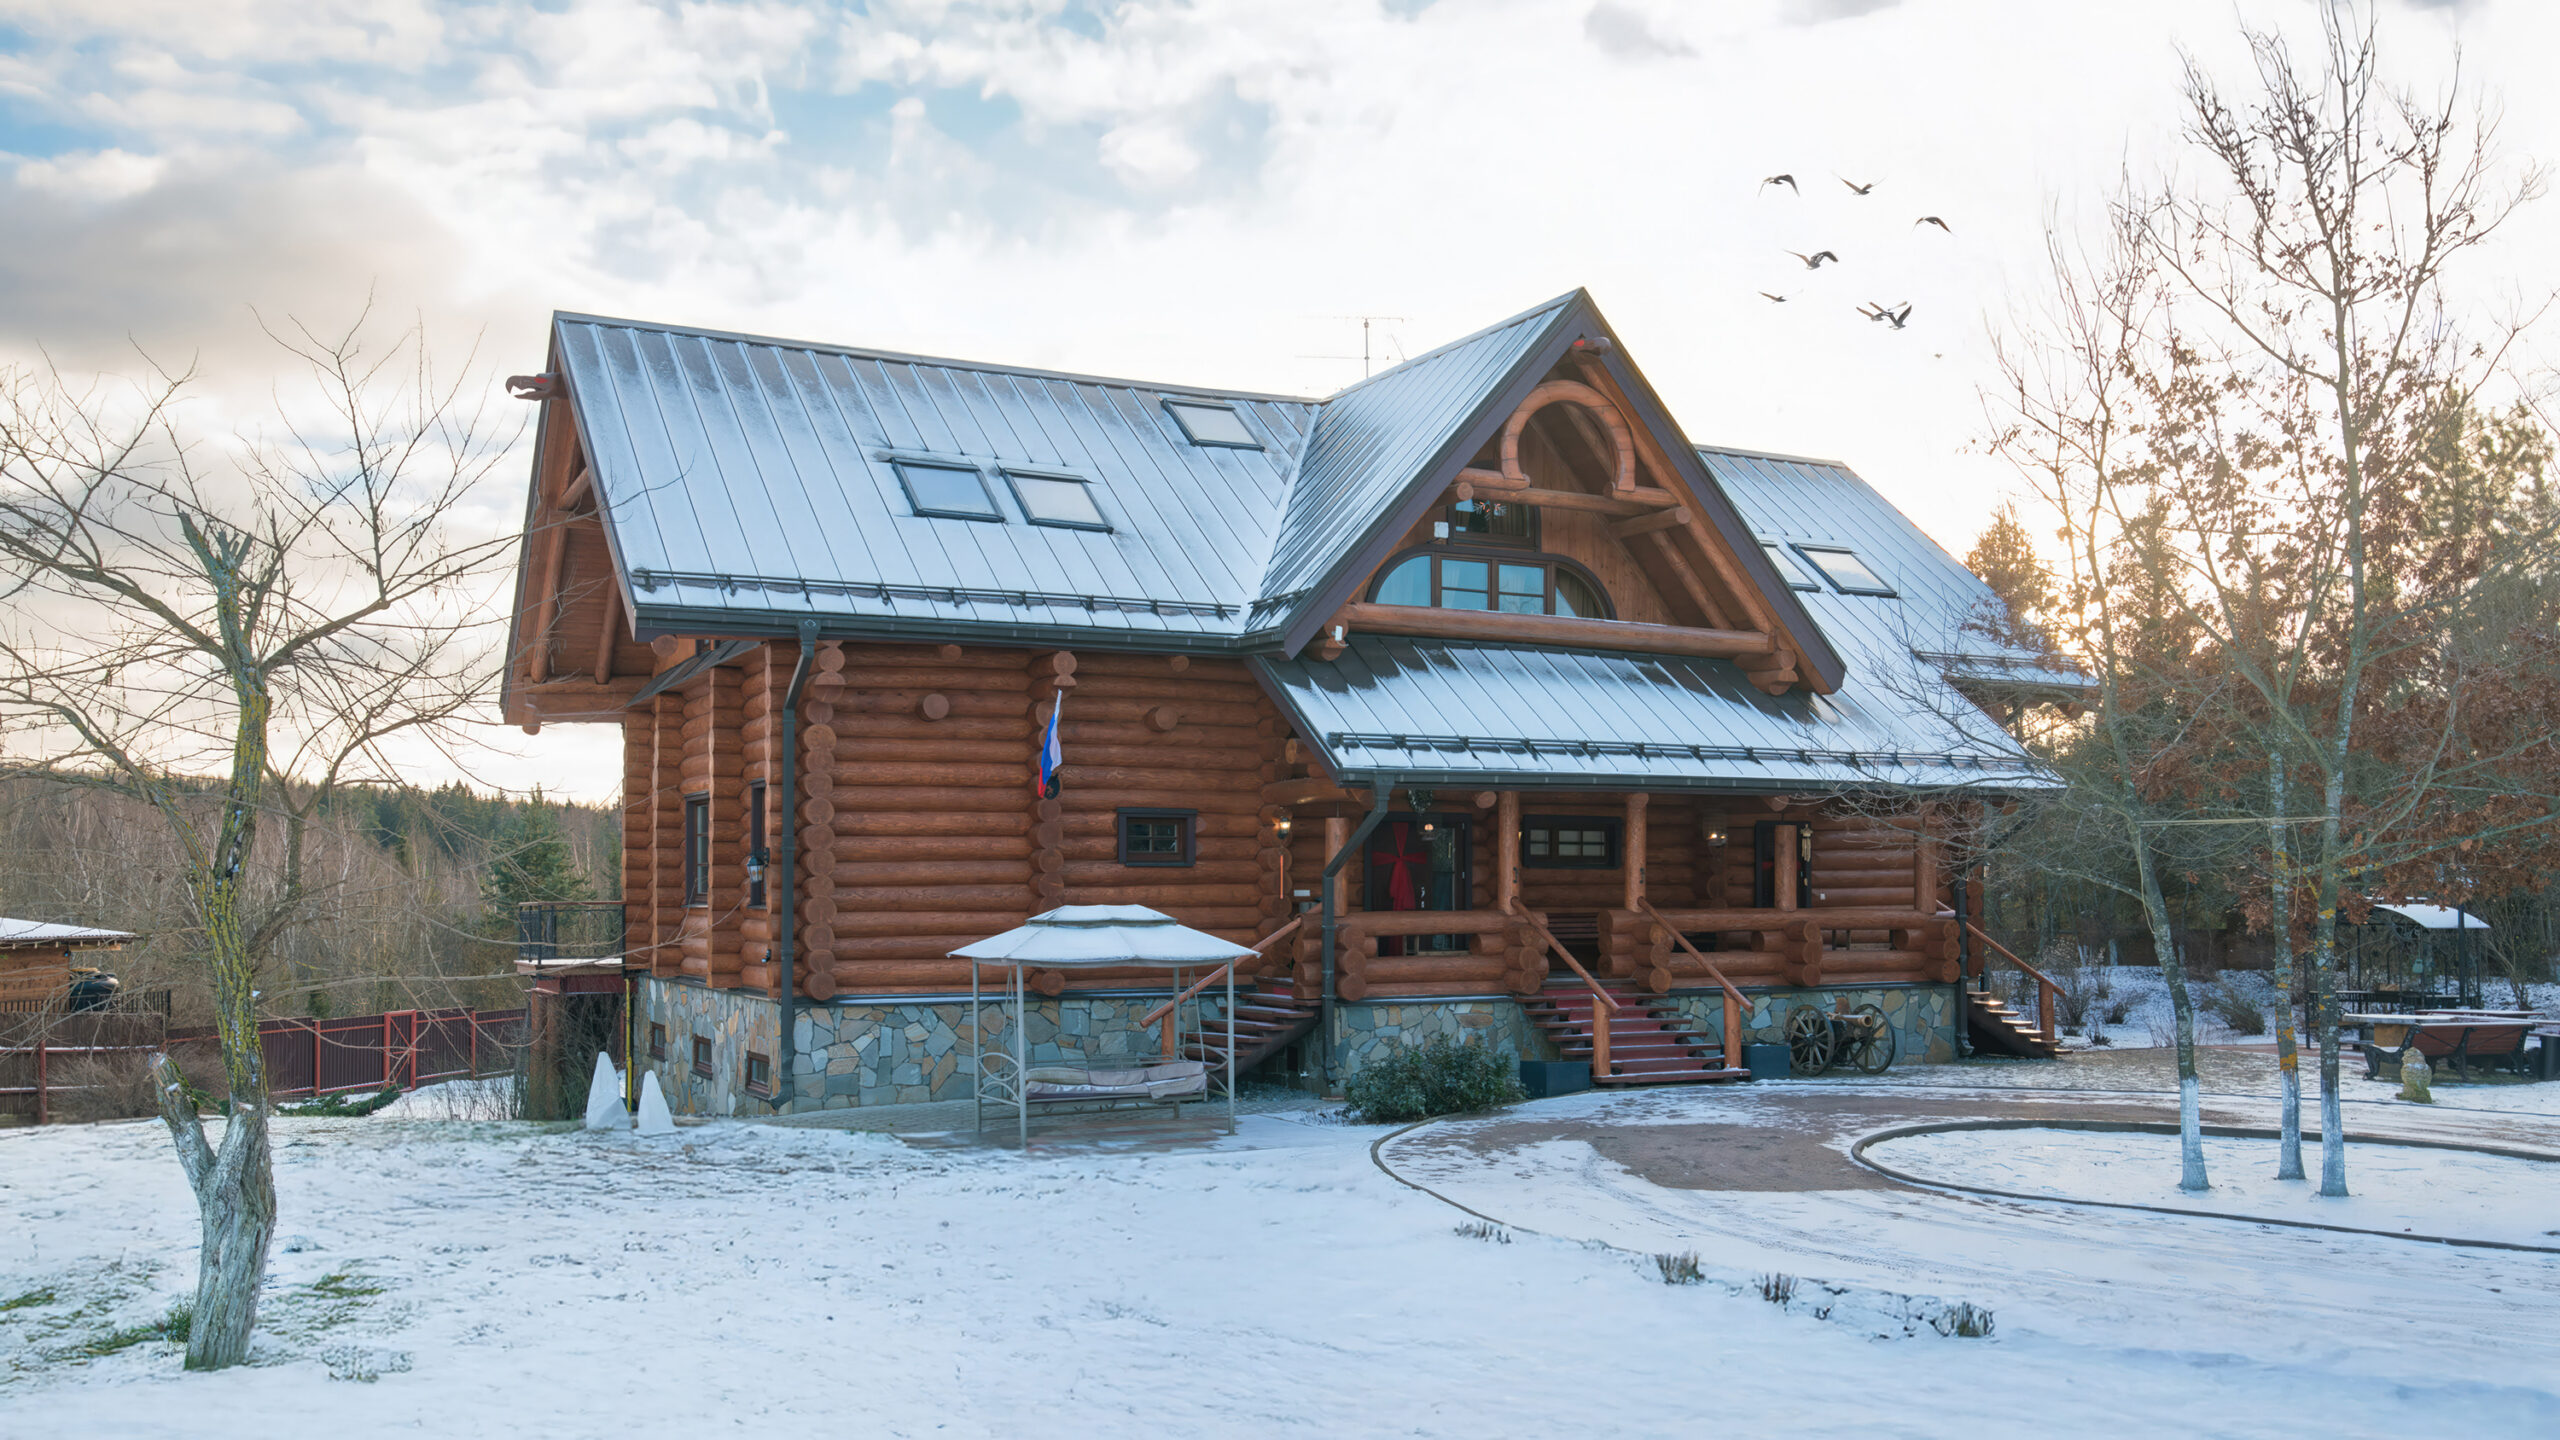
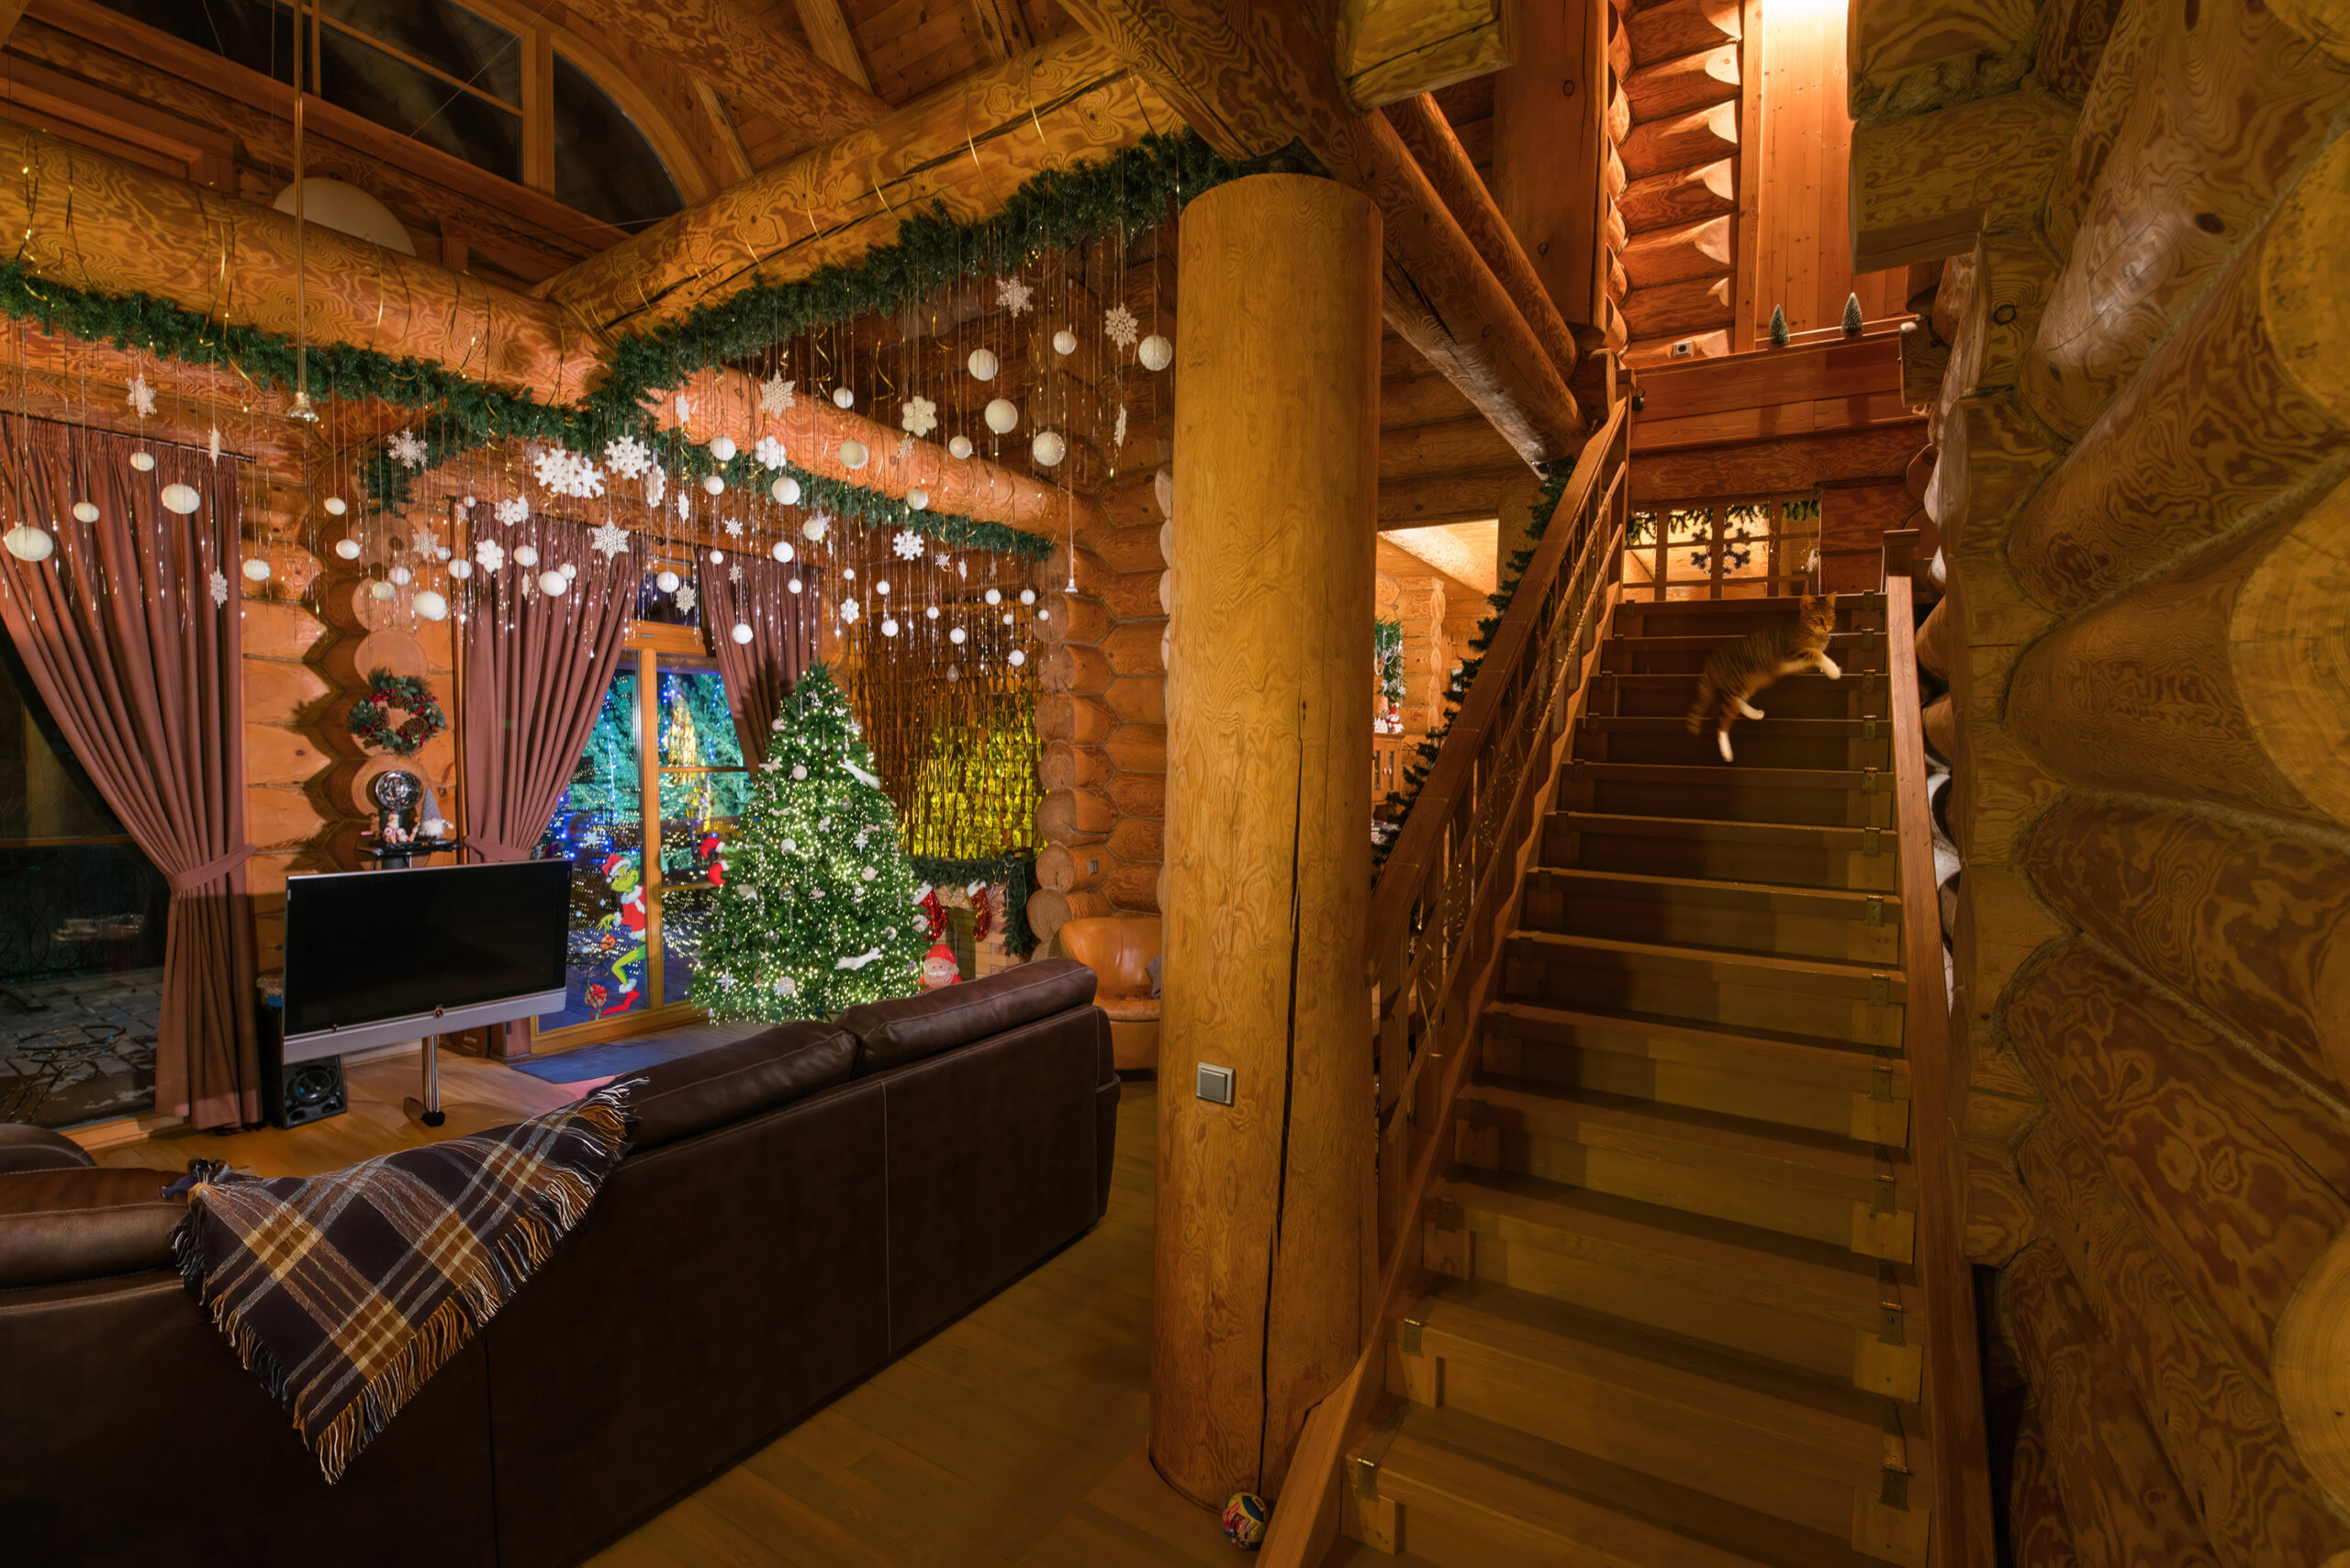
Nevertheless, I love to play. The frames below have a share of AI. The photo with the house was refined because the sky was practically absent — I had to shoot against the light. That’s how it was. And I tried to carefully, subtly, organically finish the sky. And I couldn’t resist. Made birds. And in the second frame, pure integration is the blanket and «ghost cat».
In general, with generation there are two problems and the first is significant.
1. The consistency (repeatability) problem: If you added a vase in three photos of one room from different angles, it should be the same vase. AI can’t handle this.
2. The naturalness problem: Generated items often look «cartoonish», with unnatural light. This will be solved in a year or two.
-1-1--hq-scale-1_00x.jpg) AI is bad at handling the naturalness of animal poses, lighting consistency, creates a feeling of fakeness. And for designers and architects, such AI is blasphemy, it’s a fake. But for a number of realtor tasks, AI can «place a blanket», «put a vase with dried flowers», etc. That’s a valid move.
AI is bad at handling the naturalness of animal poses, lighting consistency, creates a feeling of fakeness. And for designers and architects, such AI is blasphemy, it’s a fake. But for a number of realtor tasks, AI can «place a blanket», «put a vase with dried flowers», etc. That’s a valid move.
25. How to correctly arrange decor in a frame so it «comes alive»? What system is there in the arrangement?
Decor comes alive when it works as a connected system of items. And what connects these items into a system is the mind of the photographer or designer. An artist, in a word. It’s important to find balance — so that each element stands in its place not by chance, but compositionally.
But all these schemes in the final analysis are meaningless without «visual literacy». And an attempt to build a frame by scheme without visual experience will be visible in a really weak frame. The 10,000-hour Rule ? is true here too.Visual literacy is an internal compass. It develops through constant practice: move an object, assess the change in balance, feel the moment when the frame gains stability. Schemes are just starting points. The real system is in your eye, which learns to see equilibrium.
 26. Who are «ghost people» and how to summon «ghosts» into an interior?
 26. Who are «ghost people» and how to summon «ghosts» into an interior?
When I talk about «ghosts», I mean light, blurred human figures that enliven an interior without becoming the main heroes of the scene. This is an effective way to show that a space is alive. «Spirits» don’t distract from architecture, don’t require model releases and approvals. The client’s employees gladly help because they won’t be recognized anyway.
? From experience. Sometimes at a location, besides me, there’s no one. Then I become my own «ghost». I set the timer, take a deep breath, and smoothly walk through the frame. As a result, I get the needed liveliness, and in the motion blur, not even my own mother would recognize me. It’s fast, free, and very effective.
By the way, about AI. Yes, now neural networks can draw similar blurred figures. But I, the old-fashioned way, prefer real physics of light and motion — the result is always livelier and unpredictably more interesting. Although sometimes I combine methods if there’s absolutely no one at the location to help.
27. What time of day is best to photograph architecture?
It all depends on the type of client. Developers typically need photos with bright, clean sky and «correct» sun position specific to the angle. Realtors also need a picture-postcard image.
Architectural bureaus value not so much sky brightness — you can’t surprise them with that — but the architecture itself and its details. Even an overcast day can give interesting photographs. Even midday sun in some angles draws «as needed».
28. What is the difference between a «frontal» and an «angular» angle?
The choice of angle is a choice of the language the photograph speaks. It’s worth saying at least briefly.
• Frontal (classical) angle: The camera is directed parallel to the walls. This is the language of clarity, order, balance. It shows the interior «as is», ideal for magazine publications and an architect’s portfolio. 80% of shots in professional shooting should be frontal. It creates a sense of stability and completeness.
• Angular angle (strictly at ~45°): The camera stands in a corner, showing two walls. This is the language of volume and dynamics. It reveals the depth of space, shows connections between zones. Key rule: Use it punctually, only where you need to emphasize -1-1--art-scale-0_80x.jpg) the volume of a room or a complex layout.
the volume of a room or a complex layout.
Of course, other angles are possible. The ability to work with shift movement (example nearby) or to predict trapezoidal distortion in advance during processing increases the variability of shots.
29. What is a «plan» in interior photography and why think about it?
Plan — is the degree of camera distance from the object, the scale of the story. Using the cinematographic system, we understand in advance what we are shooting:
• Long shot: The entire room, entrance to it. Shows context and scale.
• Medium full shot: Zone inside the room (e.g., seating group). Reveals functionality.
• Medium shot: Closer, emphasis on furniture details, light fixture.
• Close-up (Detail): Texture of material, decorative object, handle. Creates visual contact with textures and depth.
For a brief, this means: With an architect, we discuss the need for many close-ups of details and decor (for social media, detailing work). For real estate sales, the emphasis shifts to medium full and long shots to clearly show the space and layout overall and in detail.
30. How to choose frame orientation (vertical/horizontal) and proportions?
• Vertical orientation in an interior opens up space upwards and limits the horizontal viewing angle.
• Horizontal orientation — shows space in width.
In a brief, it’s important to define priorities in advance. They will be dictated by the client’s goals. For social media (Instagram), vertical shots are often needed; for a portfolio website — horizontal. An intermediate format is square. Its peculiarity is minimal dynamics. My preferences are a 3:4 or 4:3 ratio, although this is very conditional and there are many situations where other proportions (2:3 or 16:9) look better for the story.
.jpg)

.jpg)
Depending on camera height, we have the ability to emphasize objects on the ceiling or the lower part of the room. Transformation tools in the editor or shift movement solve the issue with «tilted» axes. Sometimes it’s convenient to generate the very edge of the frame for compositional purposes.
31. You talk a lot about «naturalness». Is a wide-angle lens natural?
An ultra-wide angle changes space, distorts proportions of objects and creates an unnatural, «screaming» perspective. Architects, feeling space, often see this as dilettantism. But a person gets used to everything.

A lens records reality within the framework of «straight linear perspective»?. Many believe that photos taken with lenses at too wide and narrow viewing angles significantly distort perspective familiar to humans. Thus, the question of the «reality» and «realism» of photography arises again.
What is useful for a modern photographer in knowledge about perspective construction in general and linear perspective in particular? Linear perspective is the method of displaying reality that a photographer works with almost always. So, it’s worth knowing this method.
Perspective — a method of displaying spatial objects on a surface (canvas, monitor, sphere) in accordance with geometric, mathematical, philosophical patterns inherent in this method.

There is a certain list of existing types of perspective, however, it’s possible the reader will invent their own, new method. So, look at the diagram.
Straight linear perspective
To enhance the effect of linear perspective, wide-angle lenses are used, and to soften it — telephoto lenses, which equalize the size difference between distant and close objects.
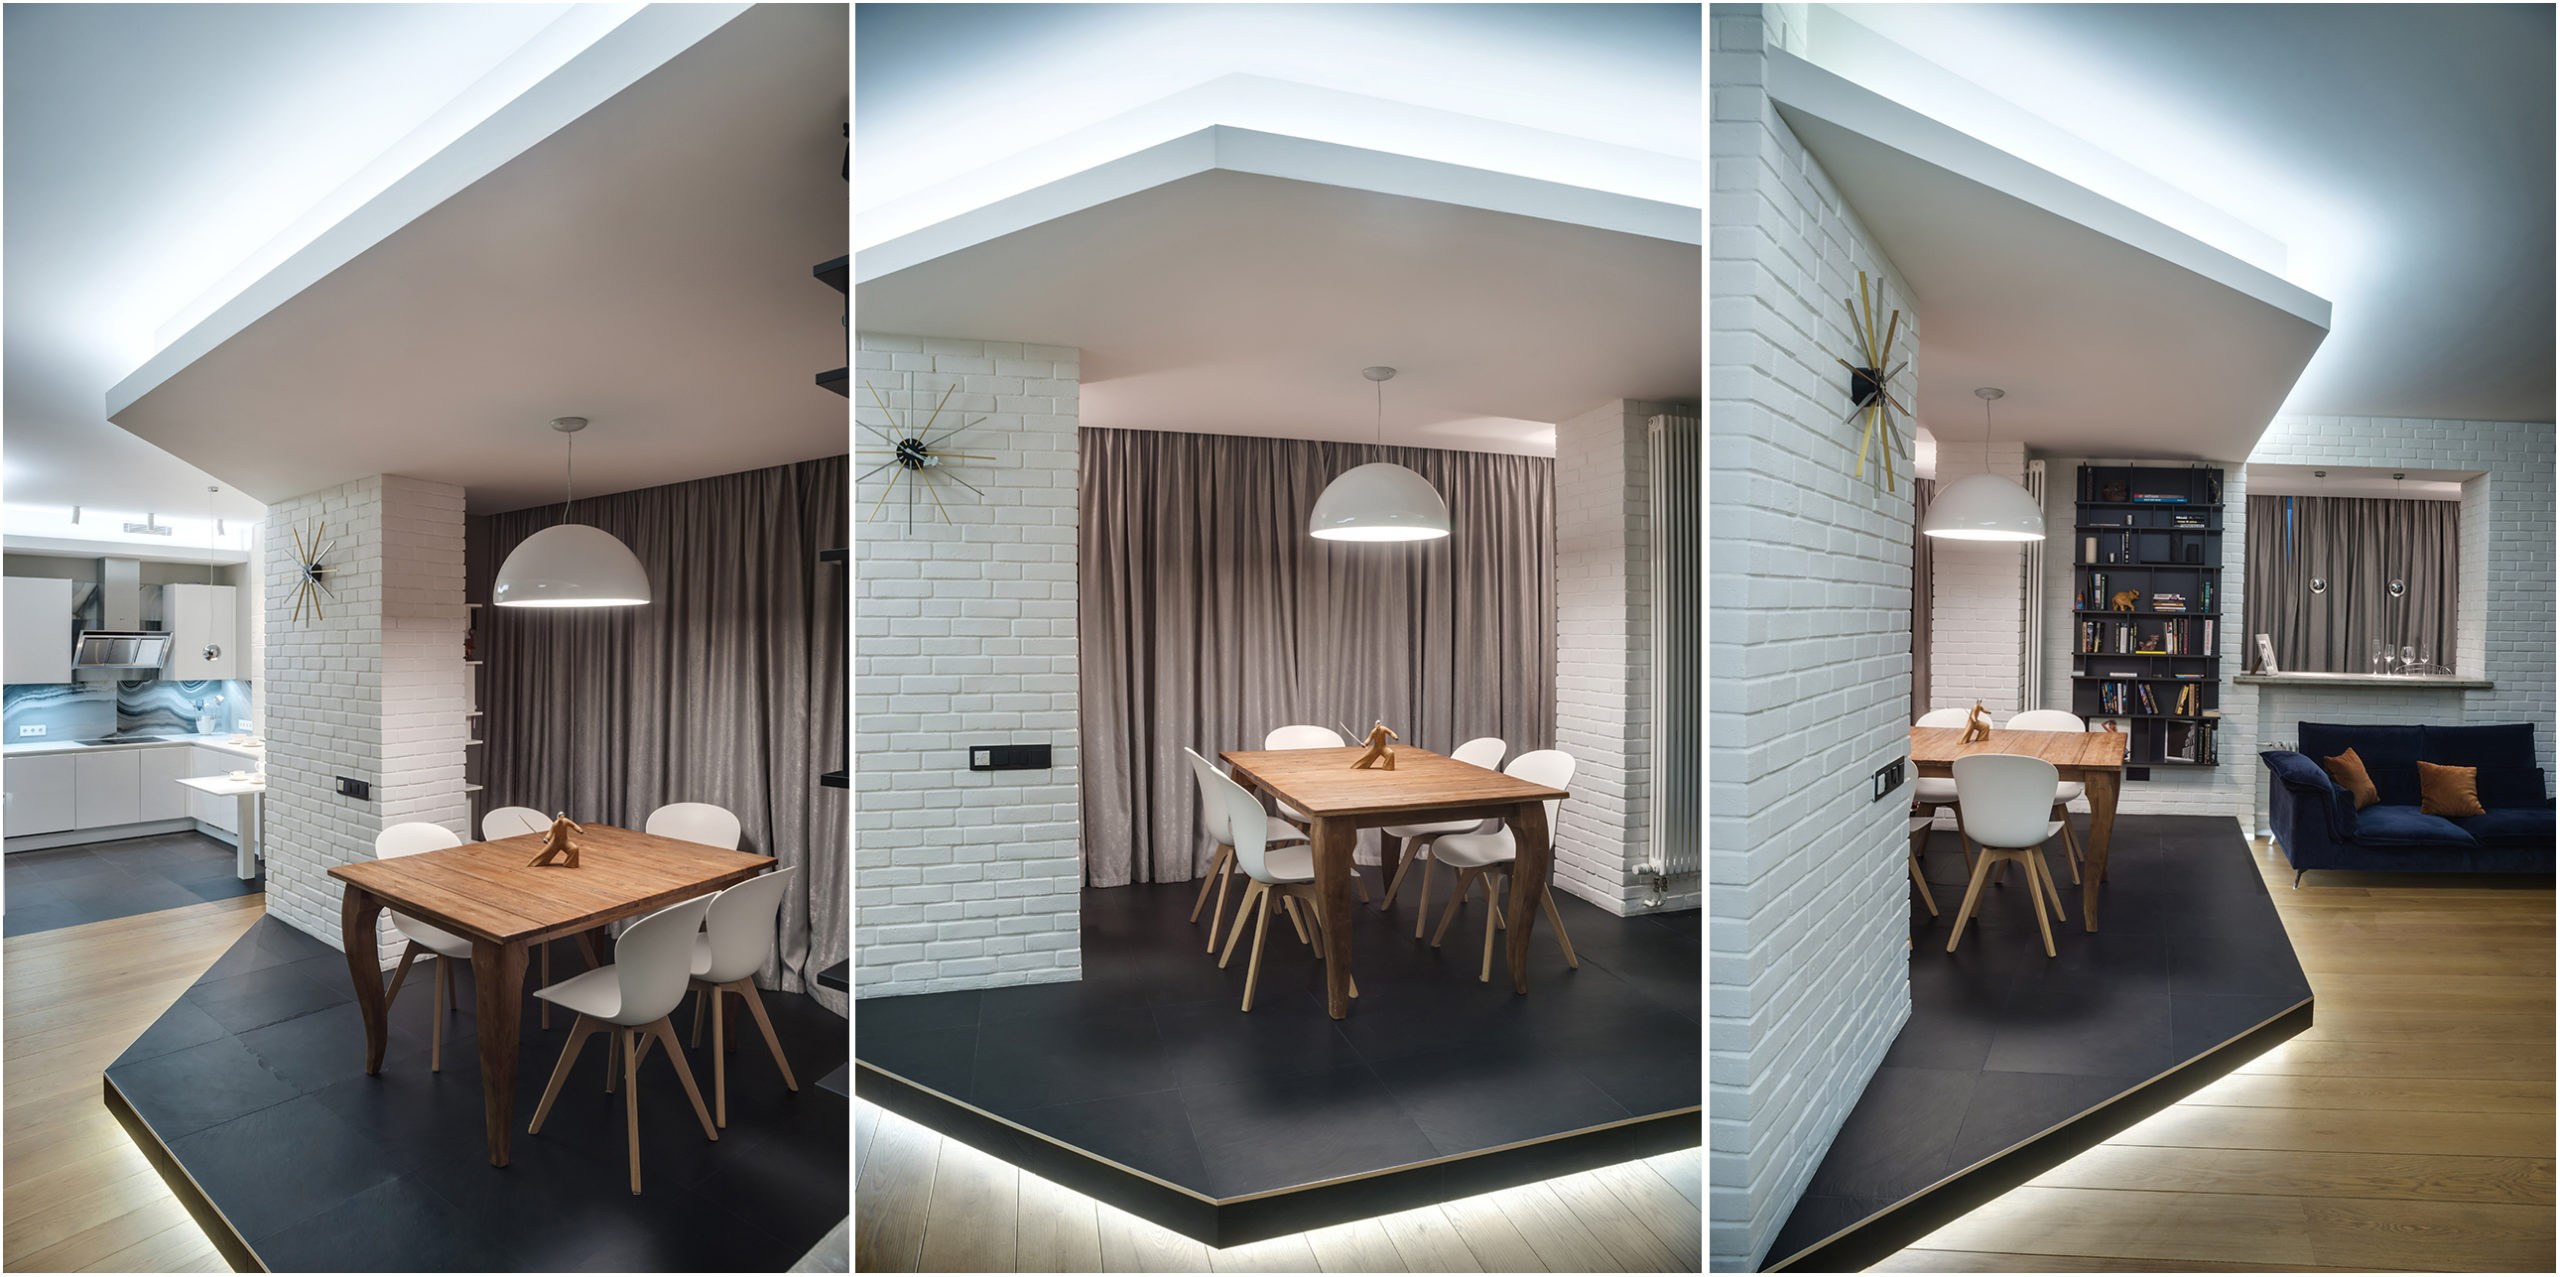
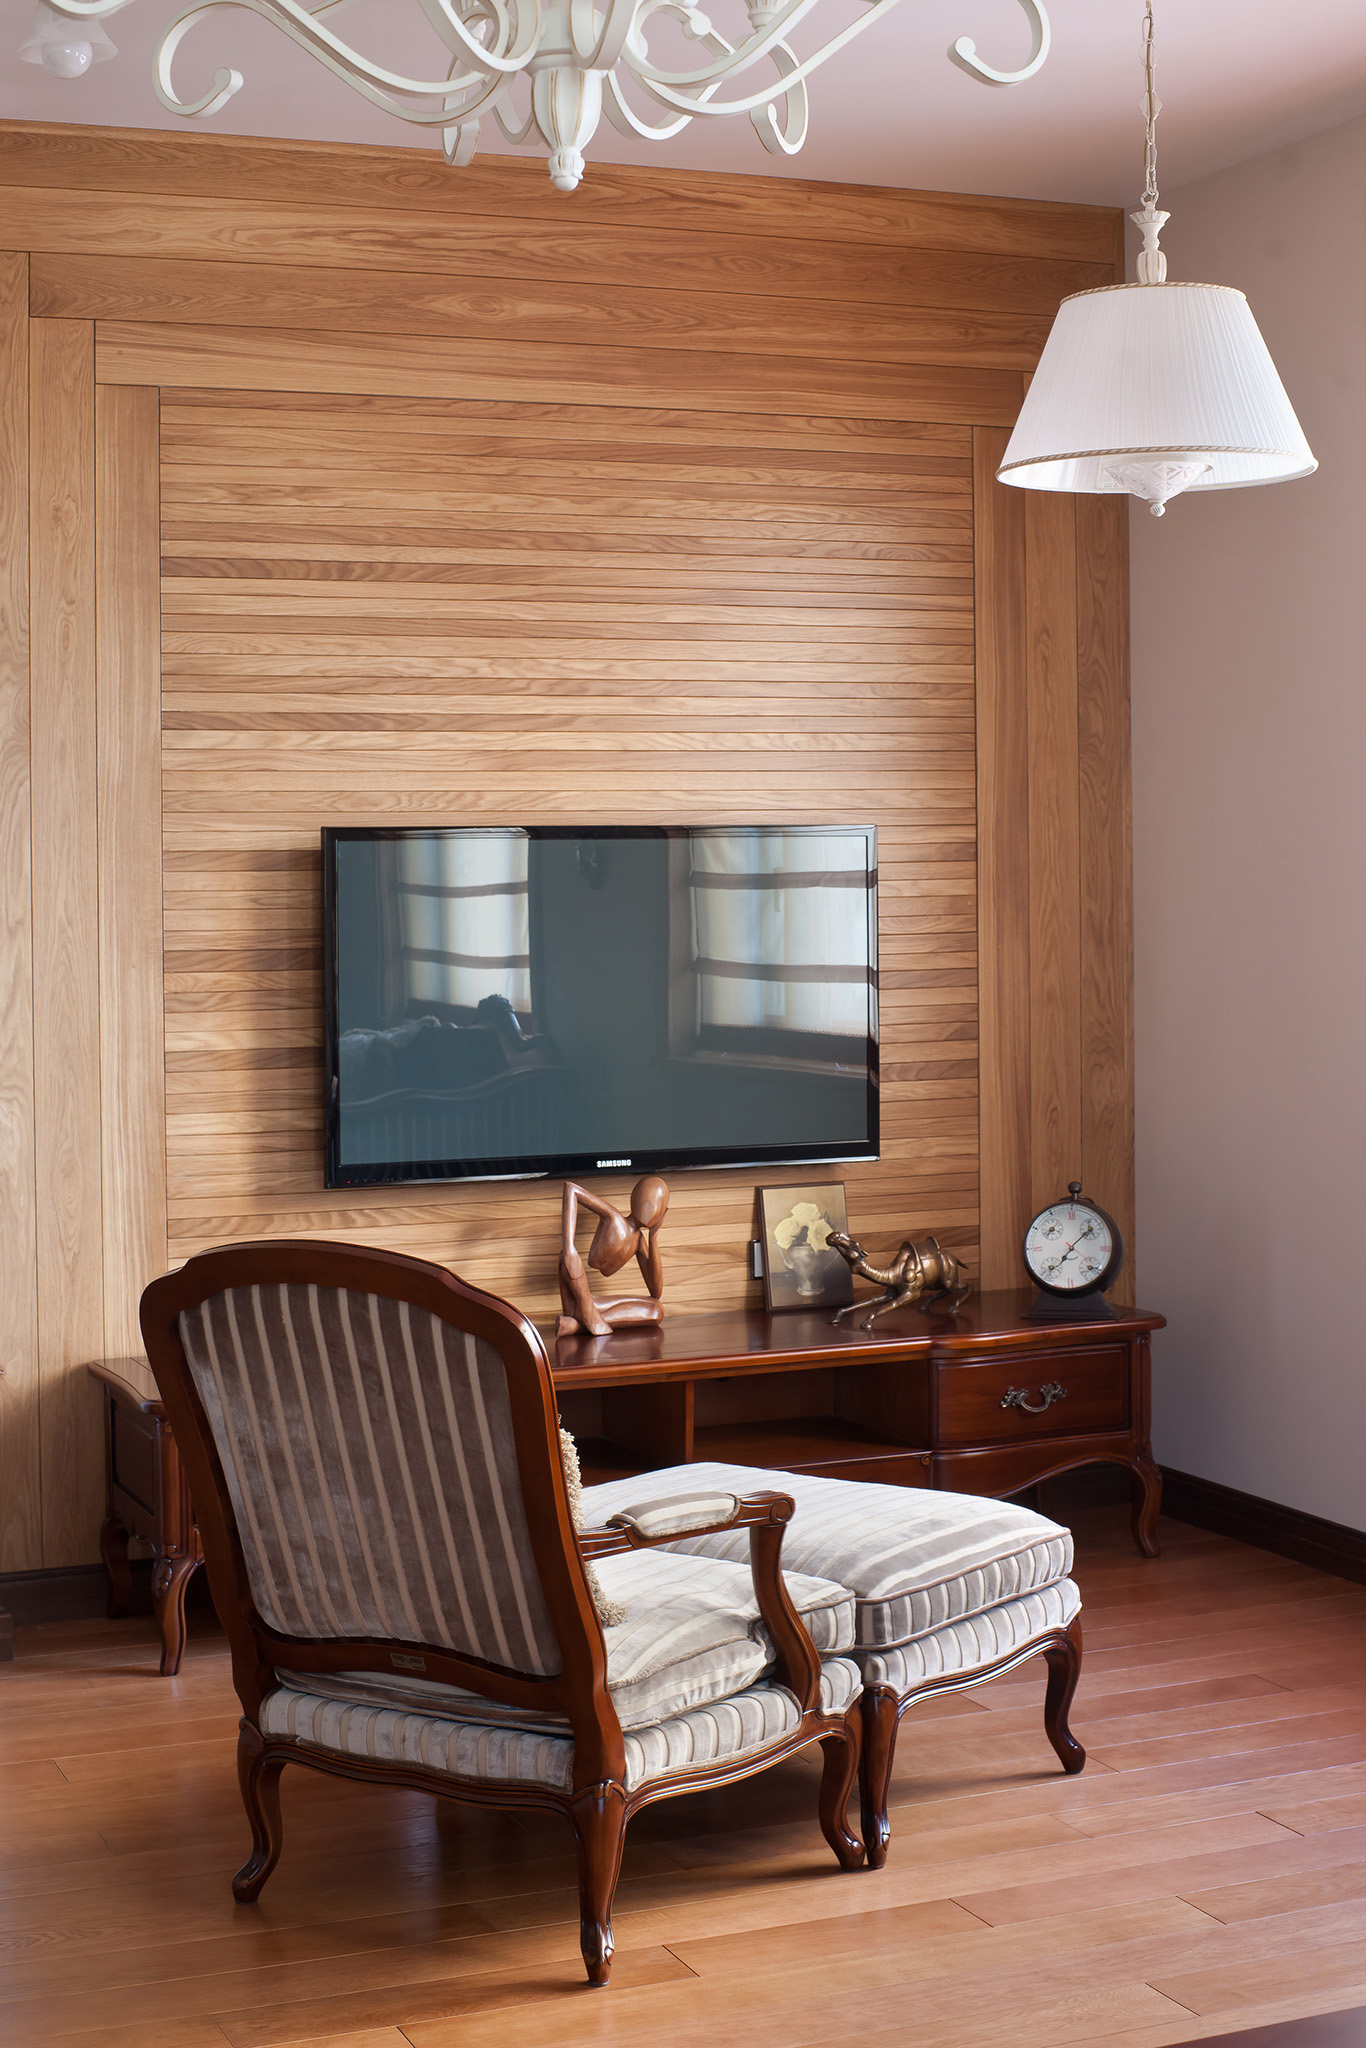
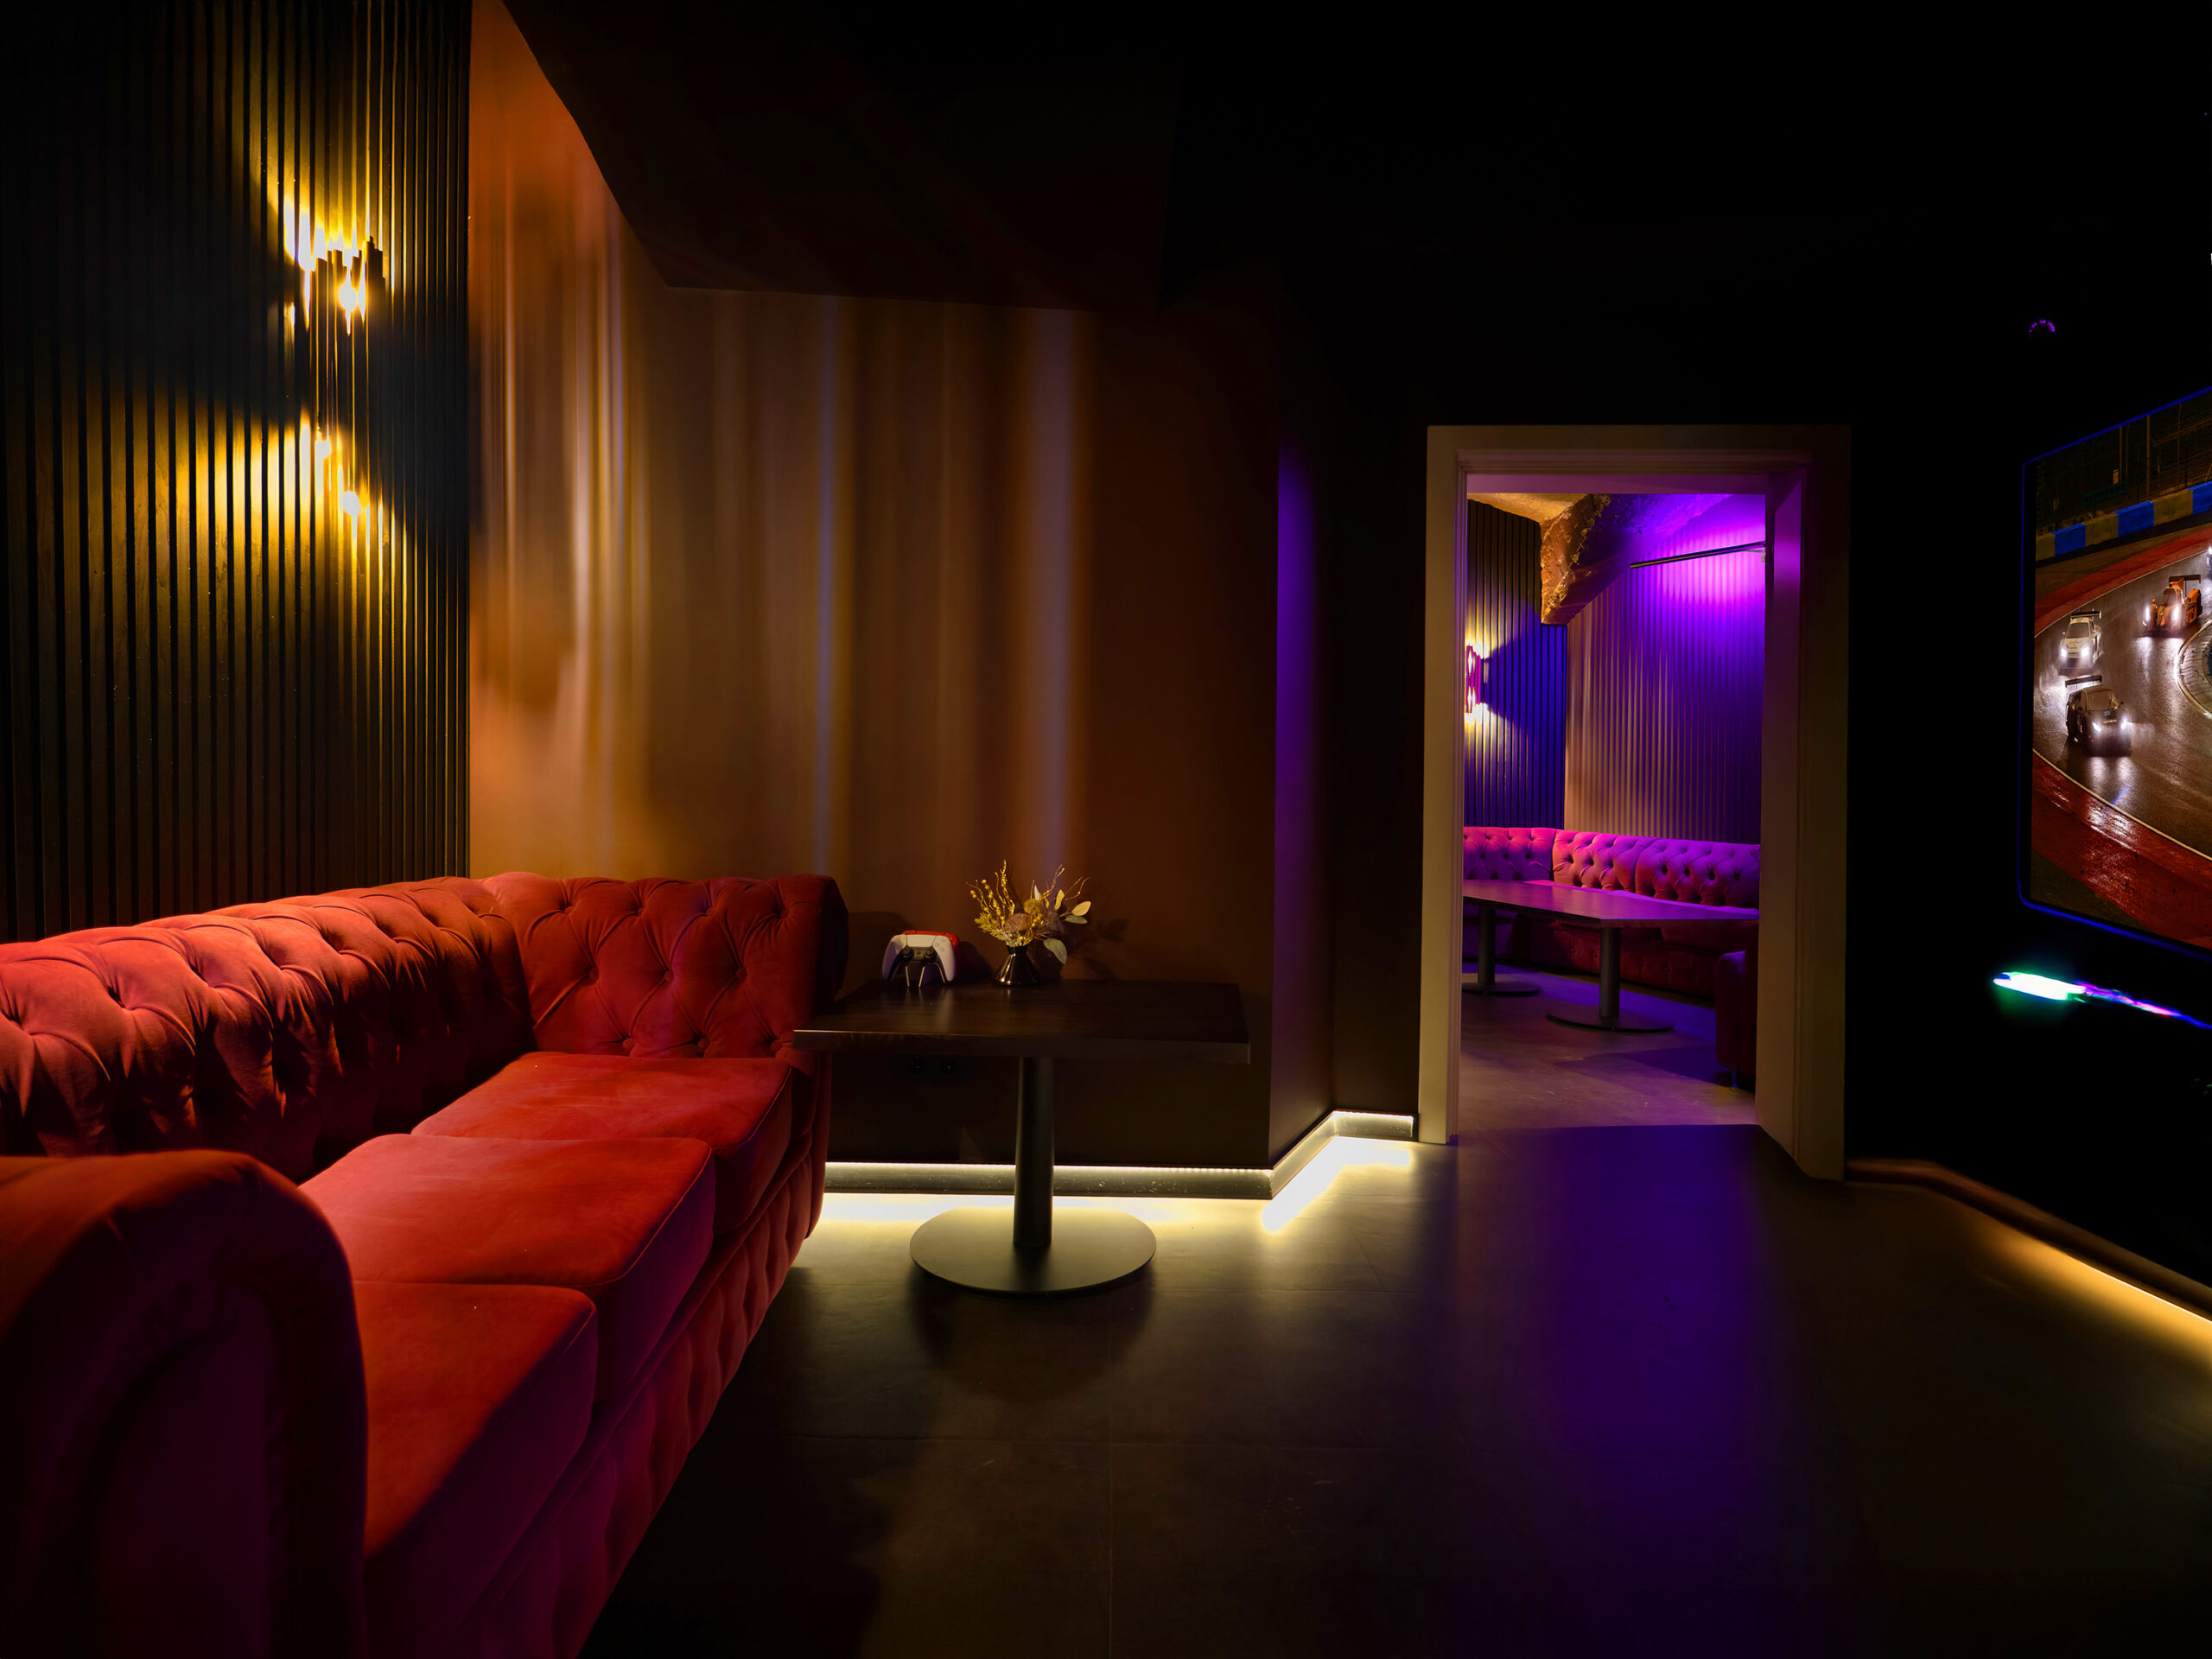
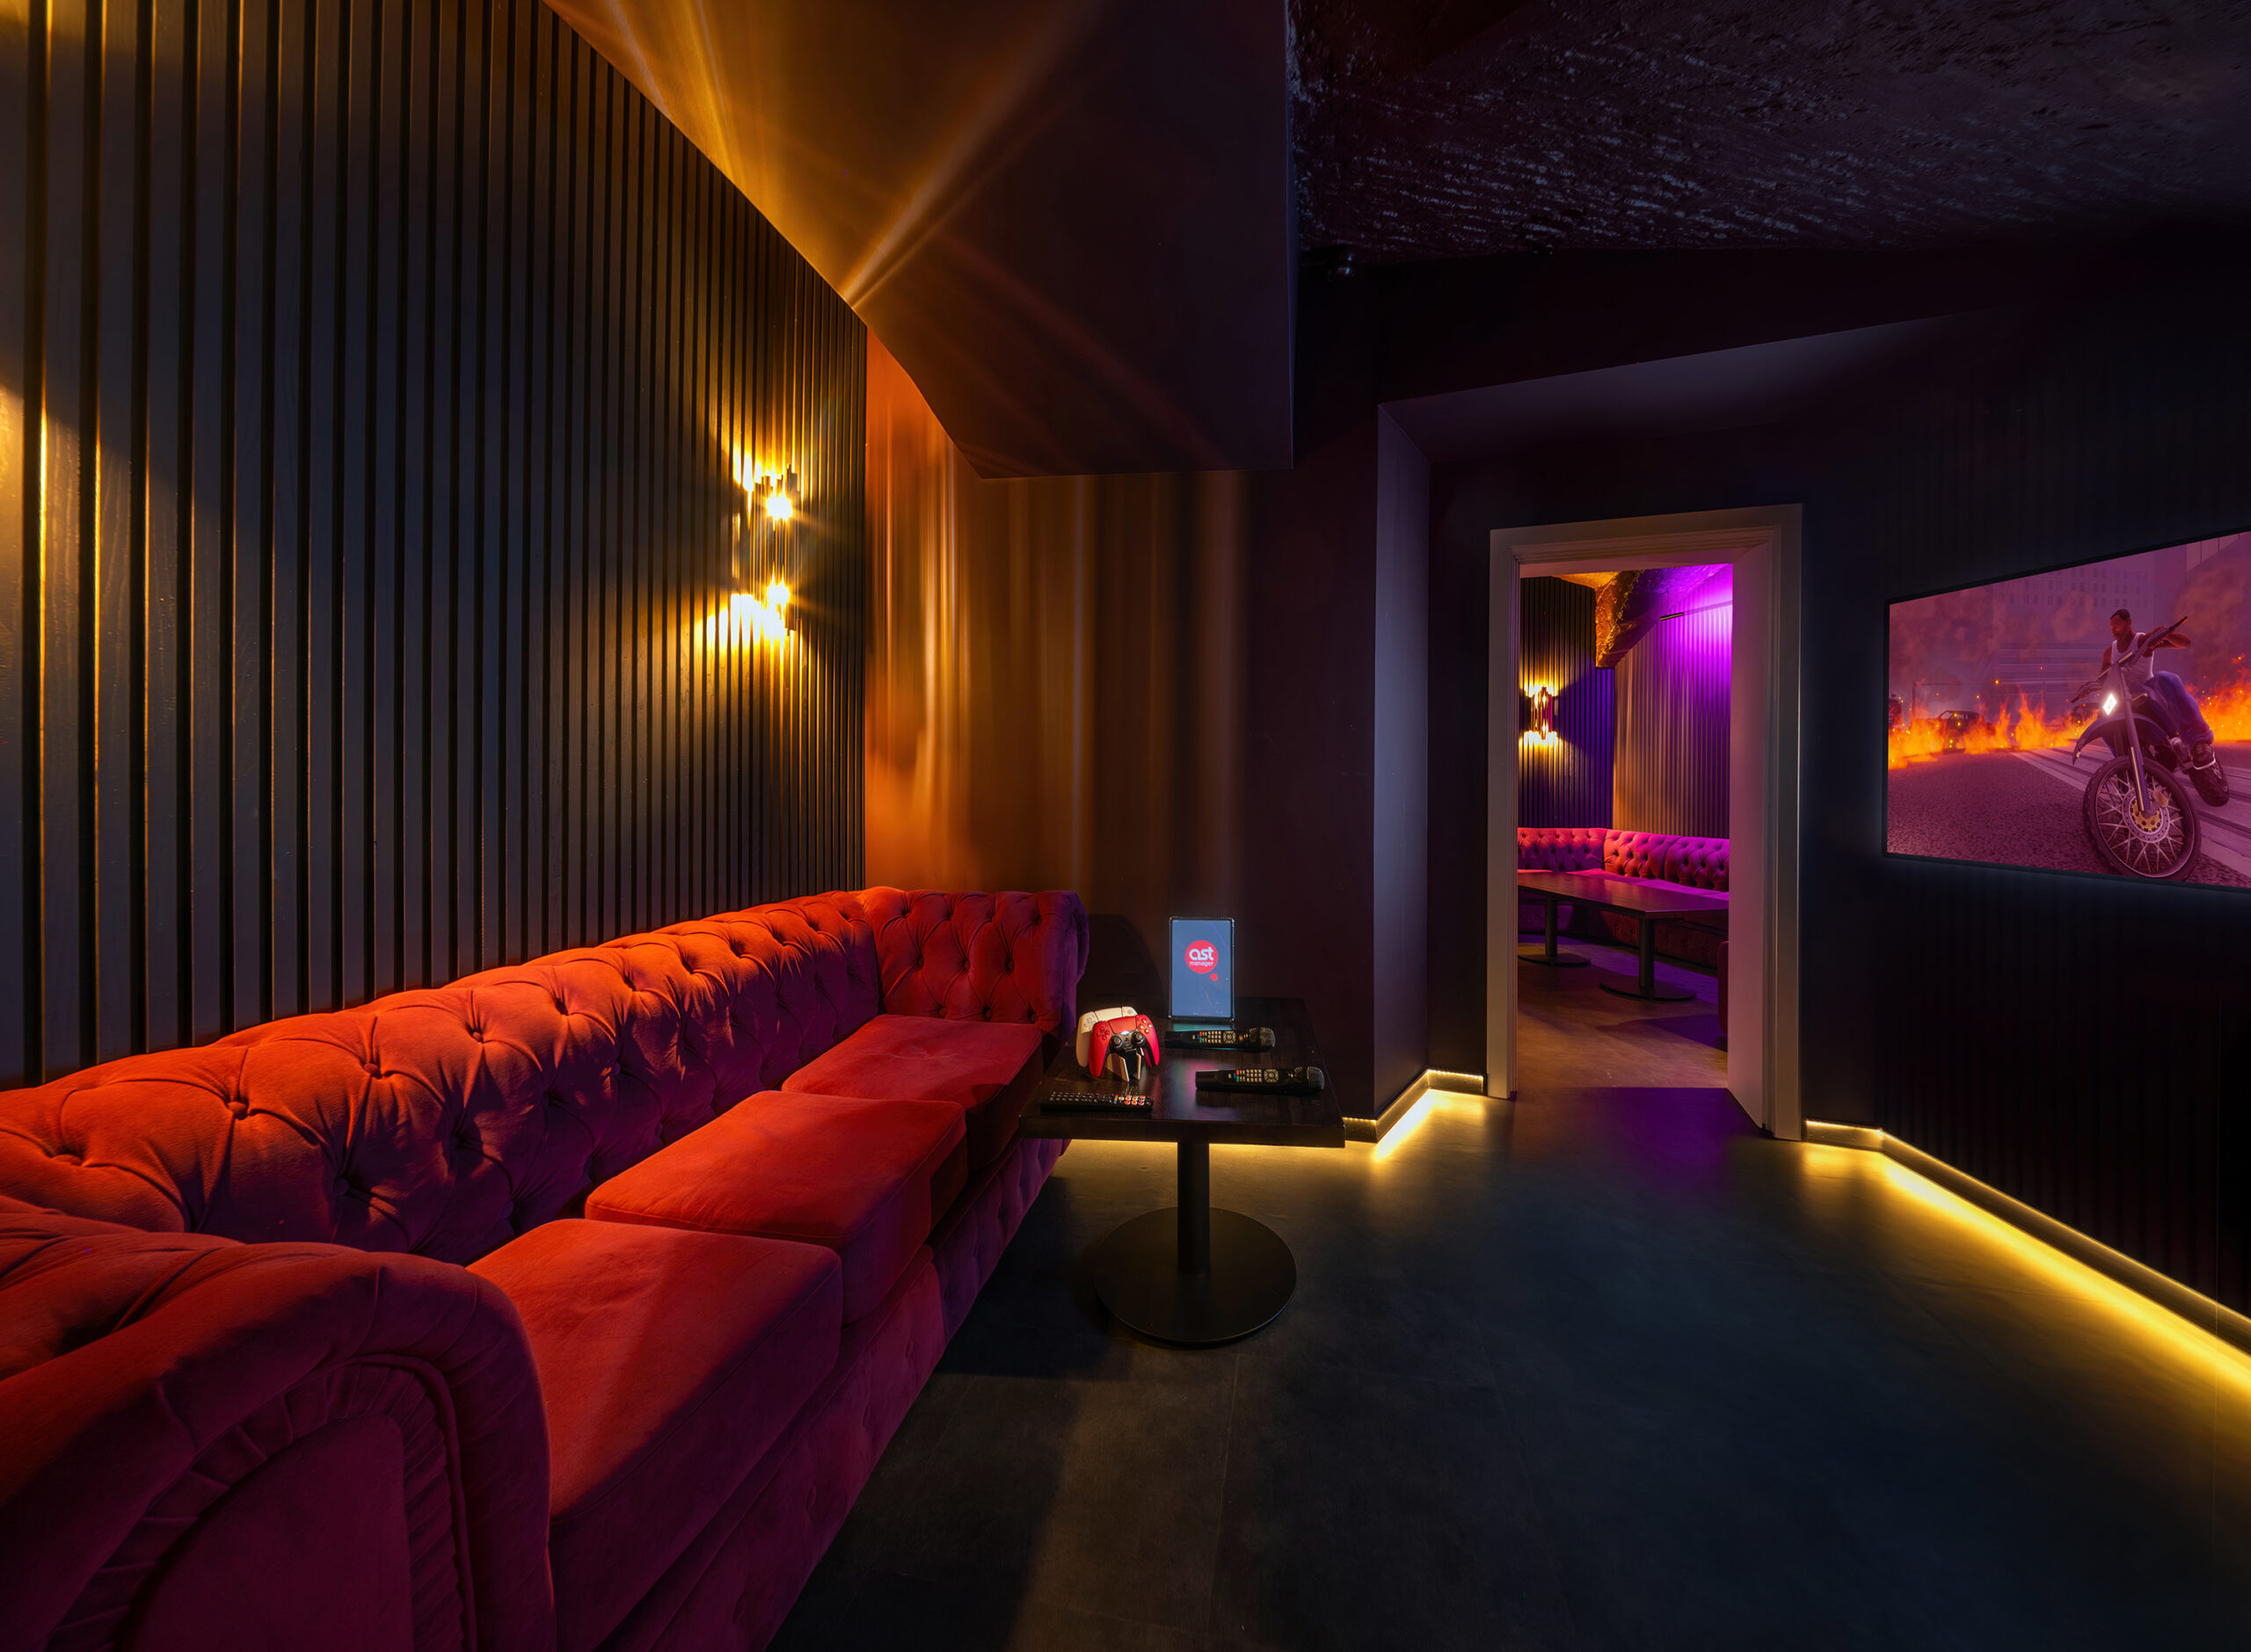
? From experience. Below are two photos of a club room. I took them. I don’t think these images show the premises. They are for something else. They show a certain club idea. Both photos are heavily «drawn». For example, there was a white door. It was very distracting. The TV panel almost didn’t fit even on the widest angle. I «finished» it. At the same time, the adjacency of these two rooms is shown, and each image immediately shows all options. On the left photo, the viewing angle is about 110°, on the right about 150°.

Vertical format is in demand because it’s convenient for mobile devices. A vertical photograph rarely gives a complete idea of the room. In the good old days, it was used for magazine covers.
? On the first photo, a focal length of 54mm was used.
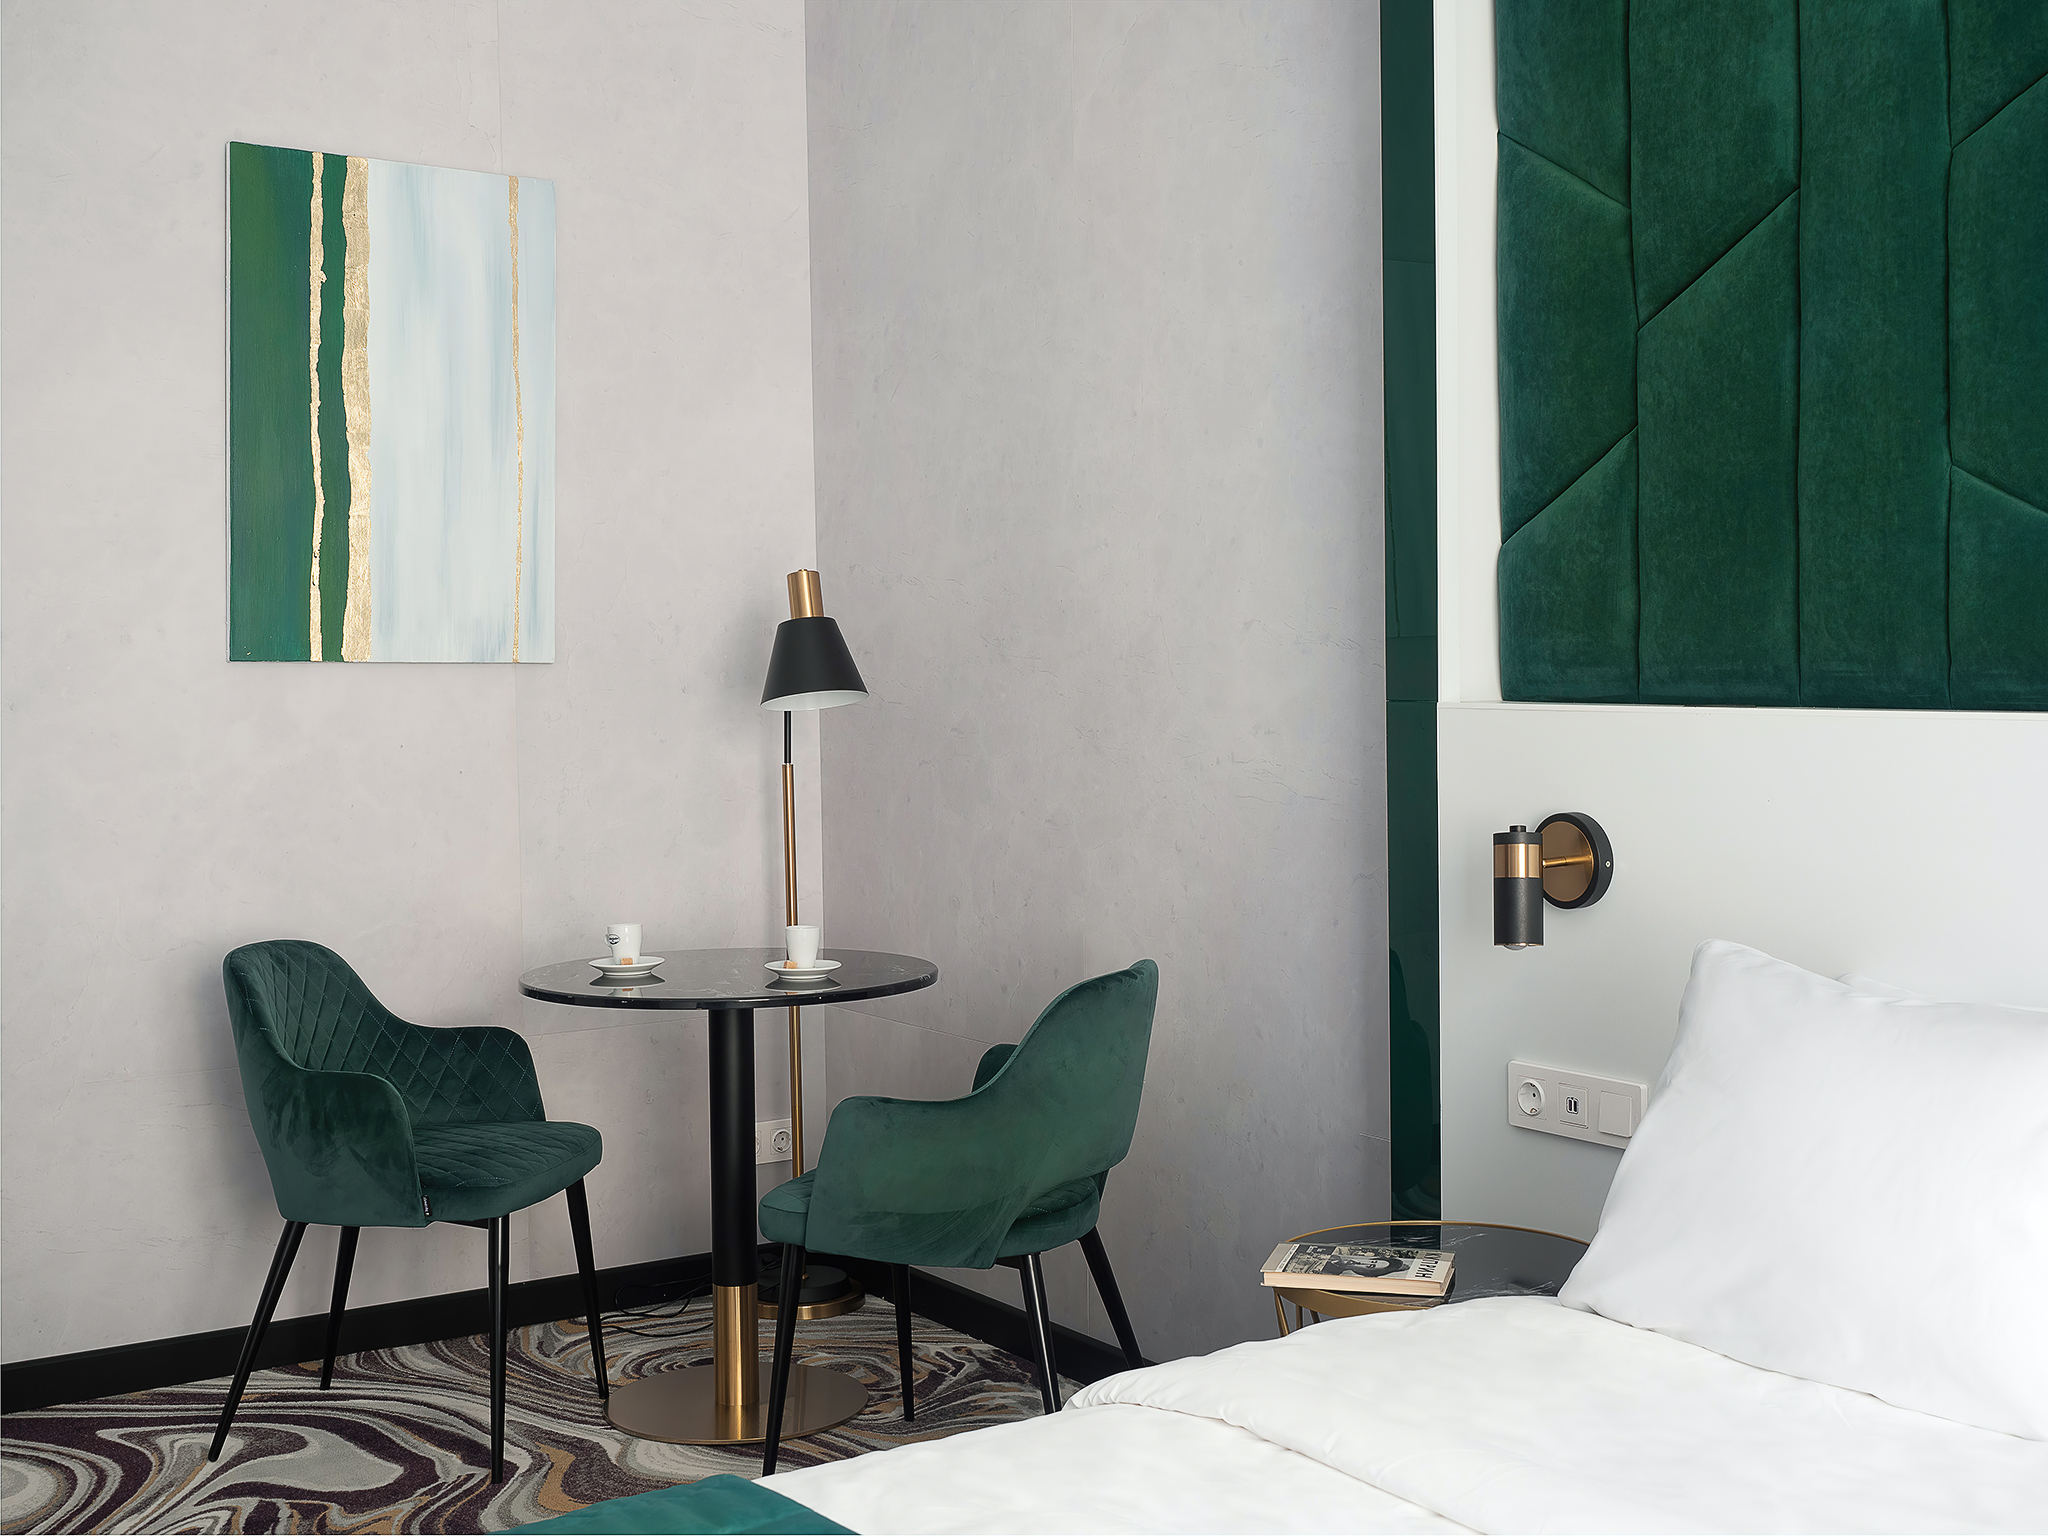
Cozy can be shown concisely by creating intersecting planes in the frame.
? Focal length 40 mm used.
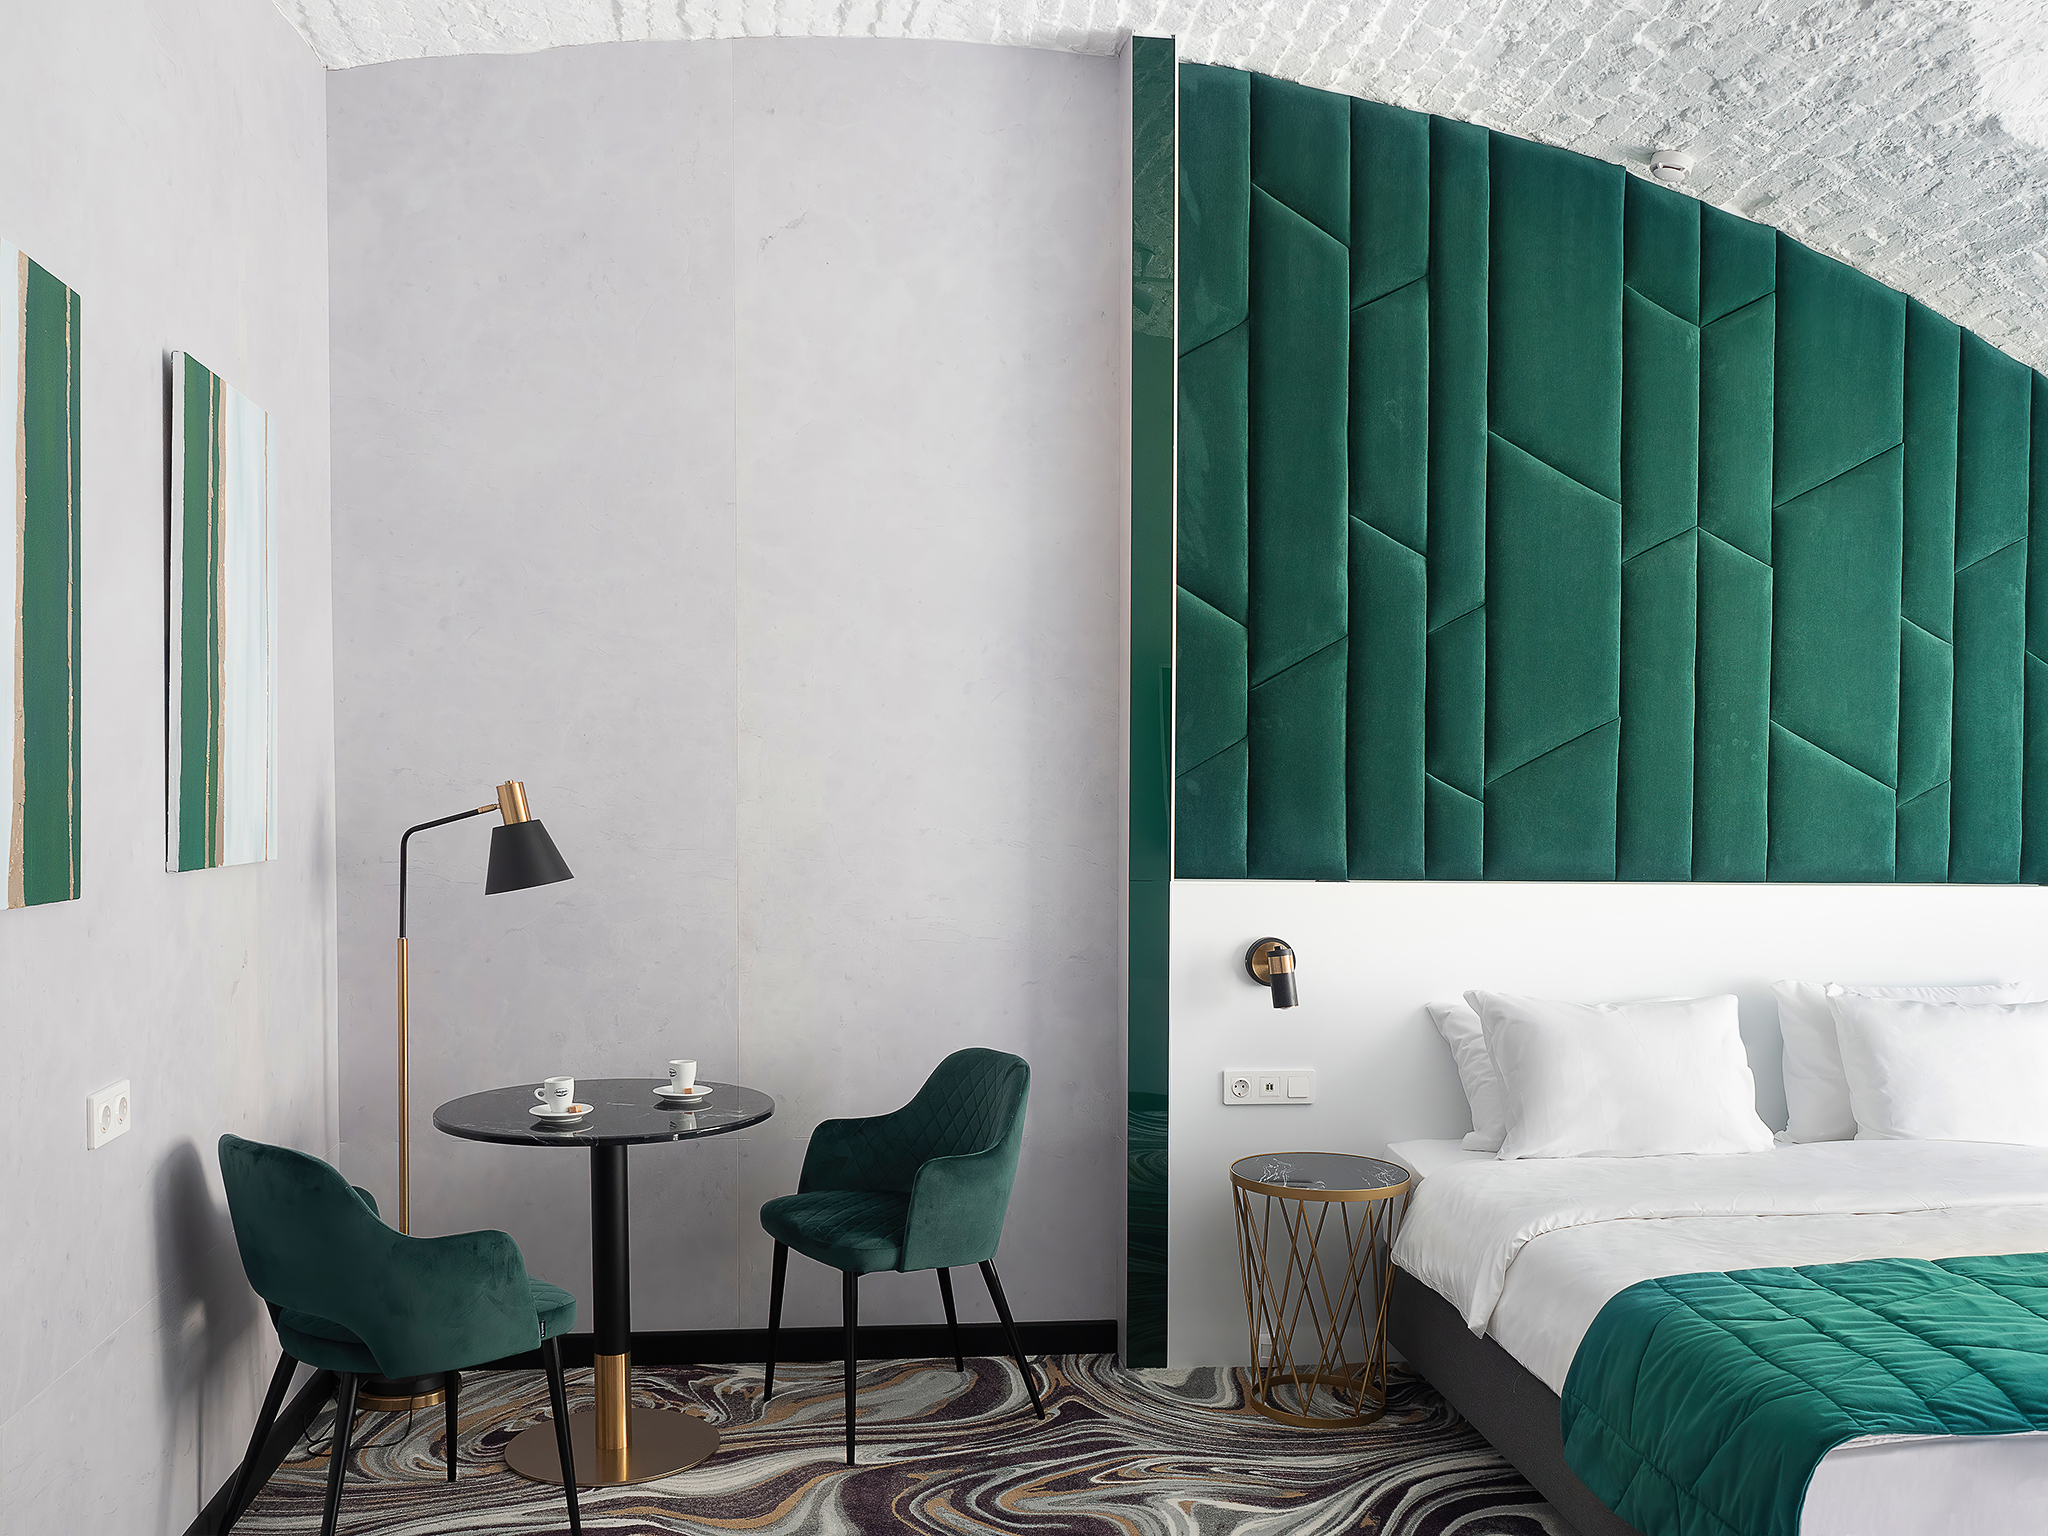
Adding items to the frame, the photographer enhances the interaction of frame parts. Here it looks like this: white cups — white linen.
? Focal length 30 mm used.
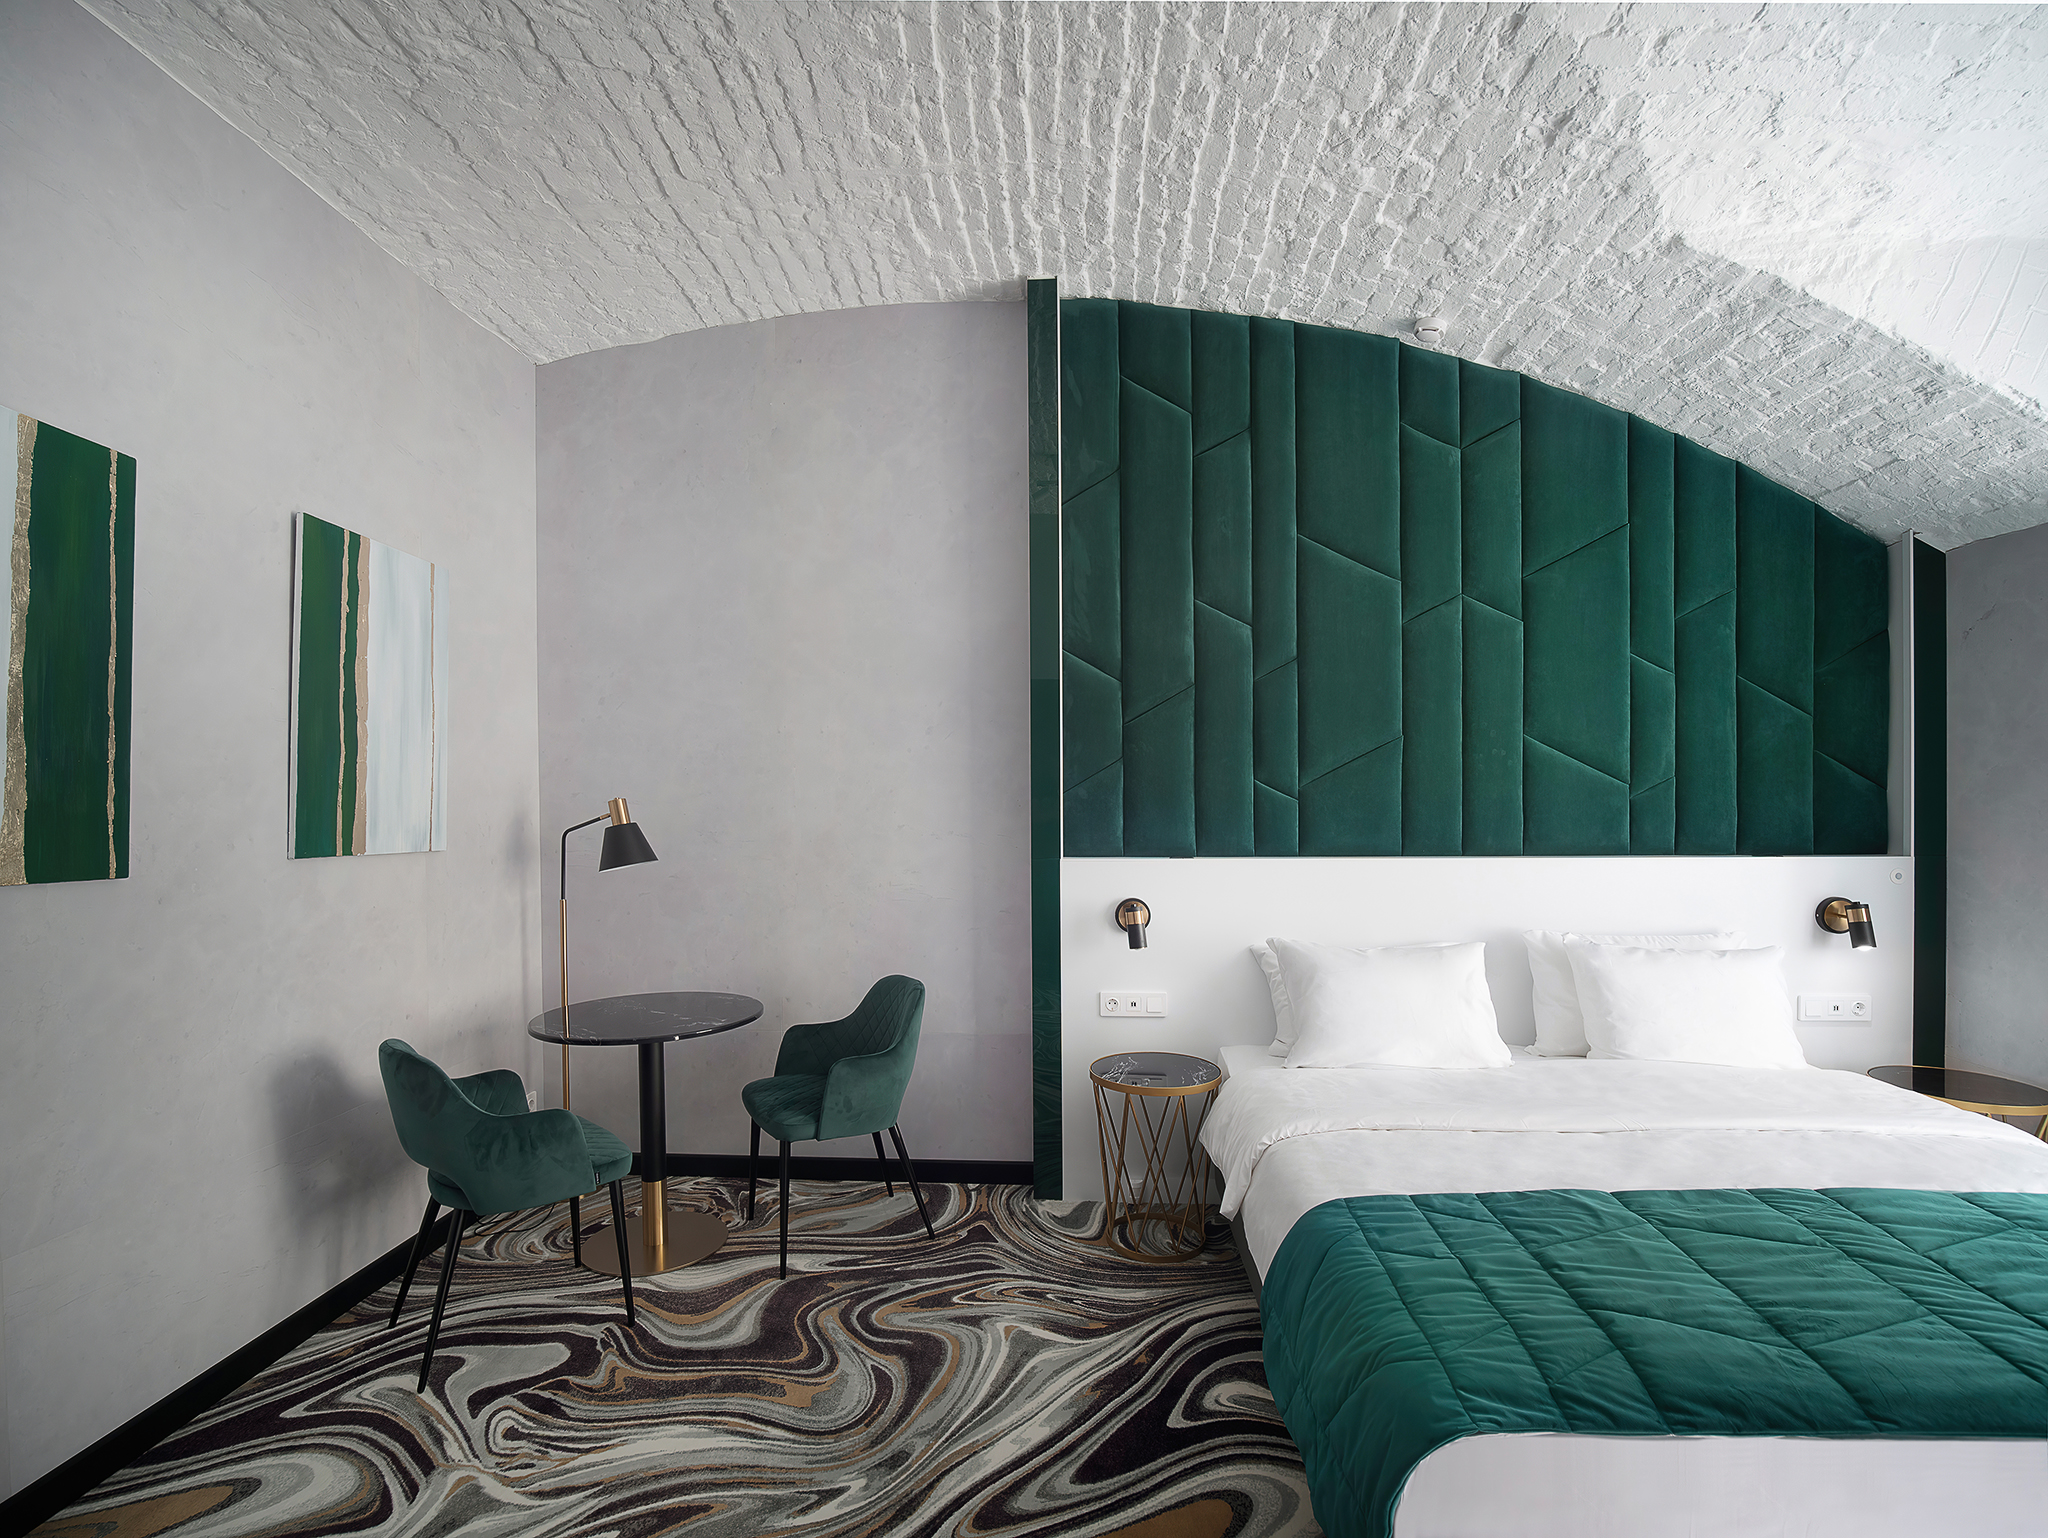
If necessary, you can always use wide-angle optics. In this shot, the designer’s work is shown as a combination of top, middle, and bottom.
? Focal length 15 mm used.
I strive for moderate focal lengths. But there are moments when a super-wide works great. For example, club interiors sometimes look great that way.

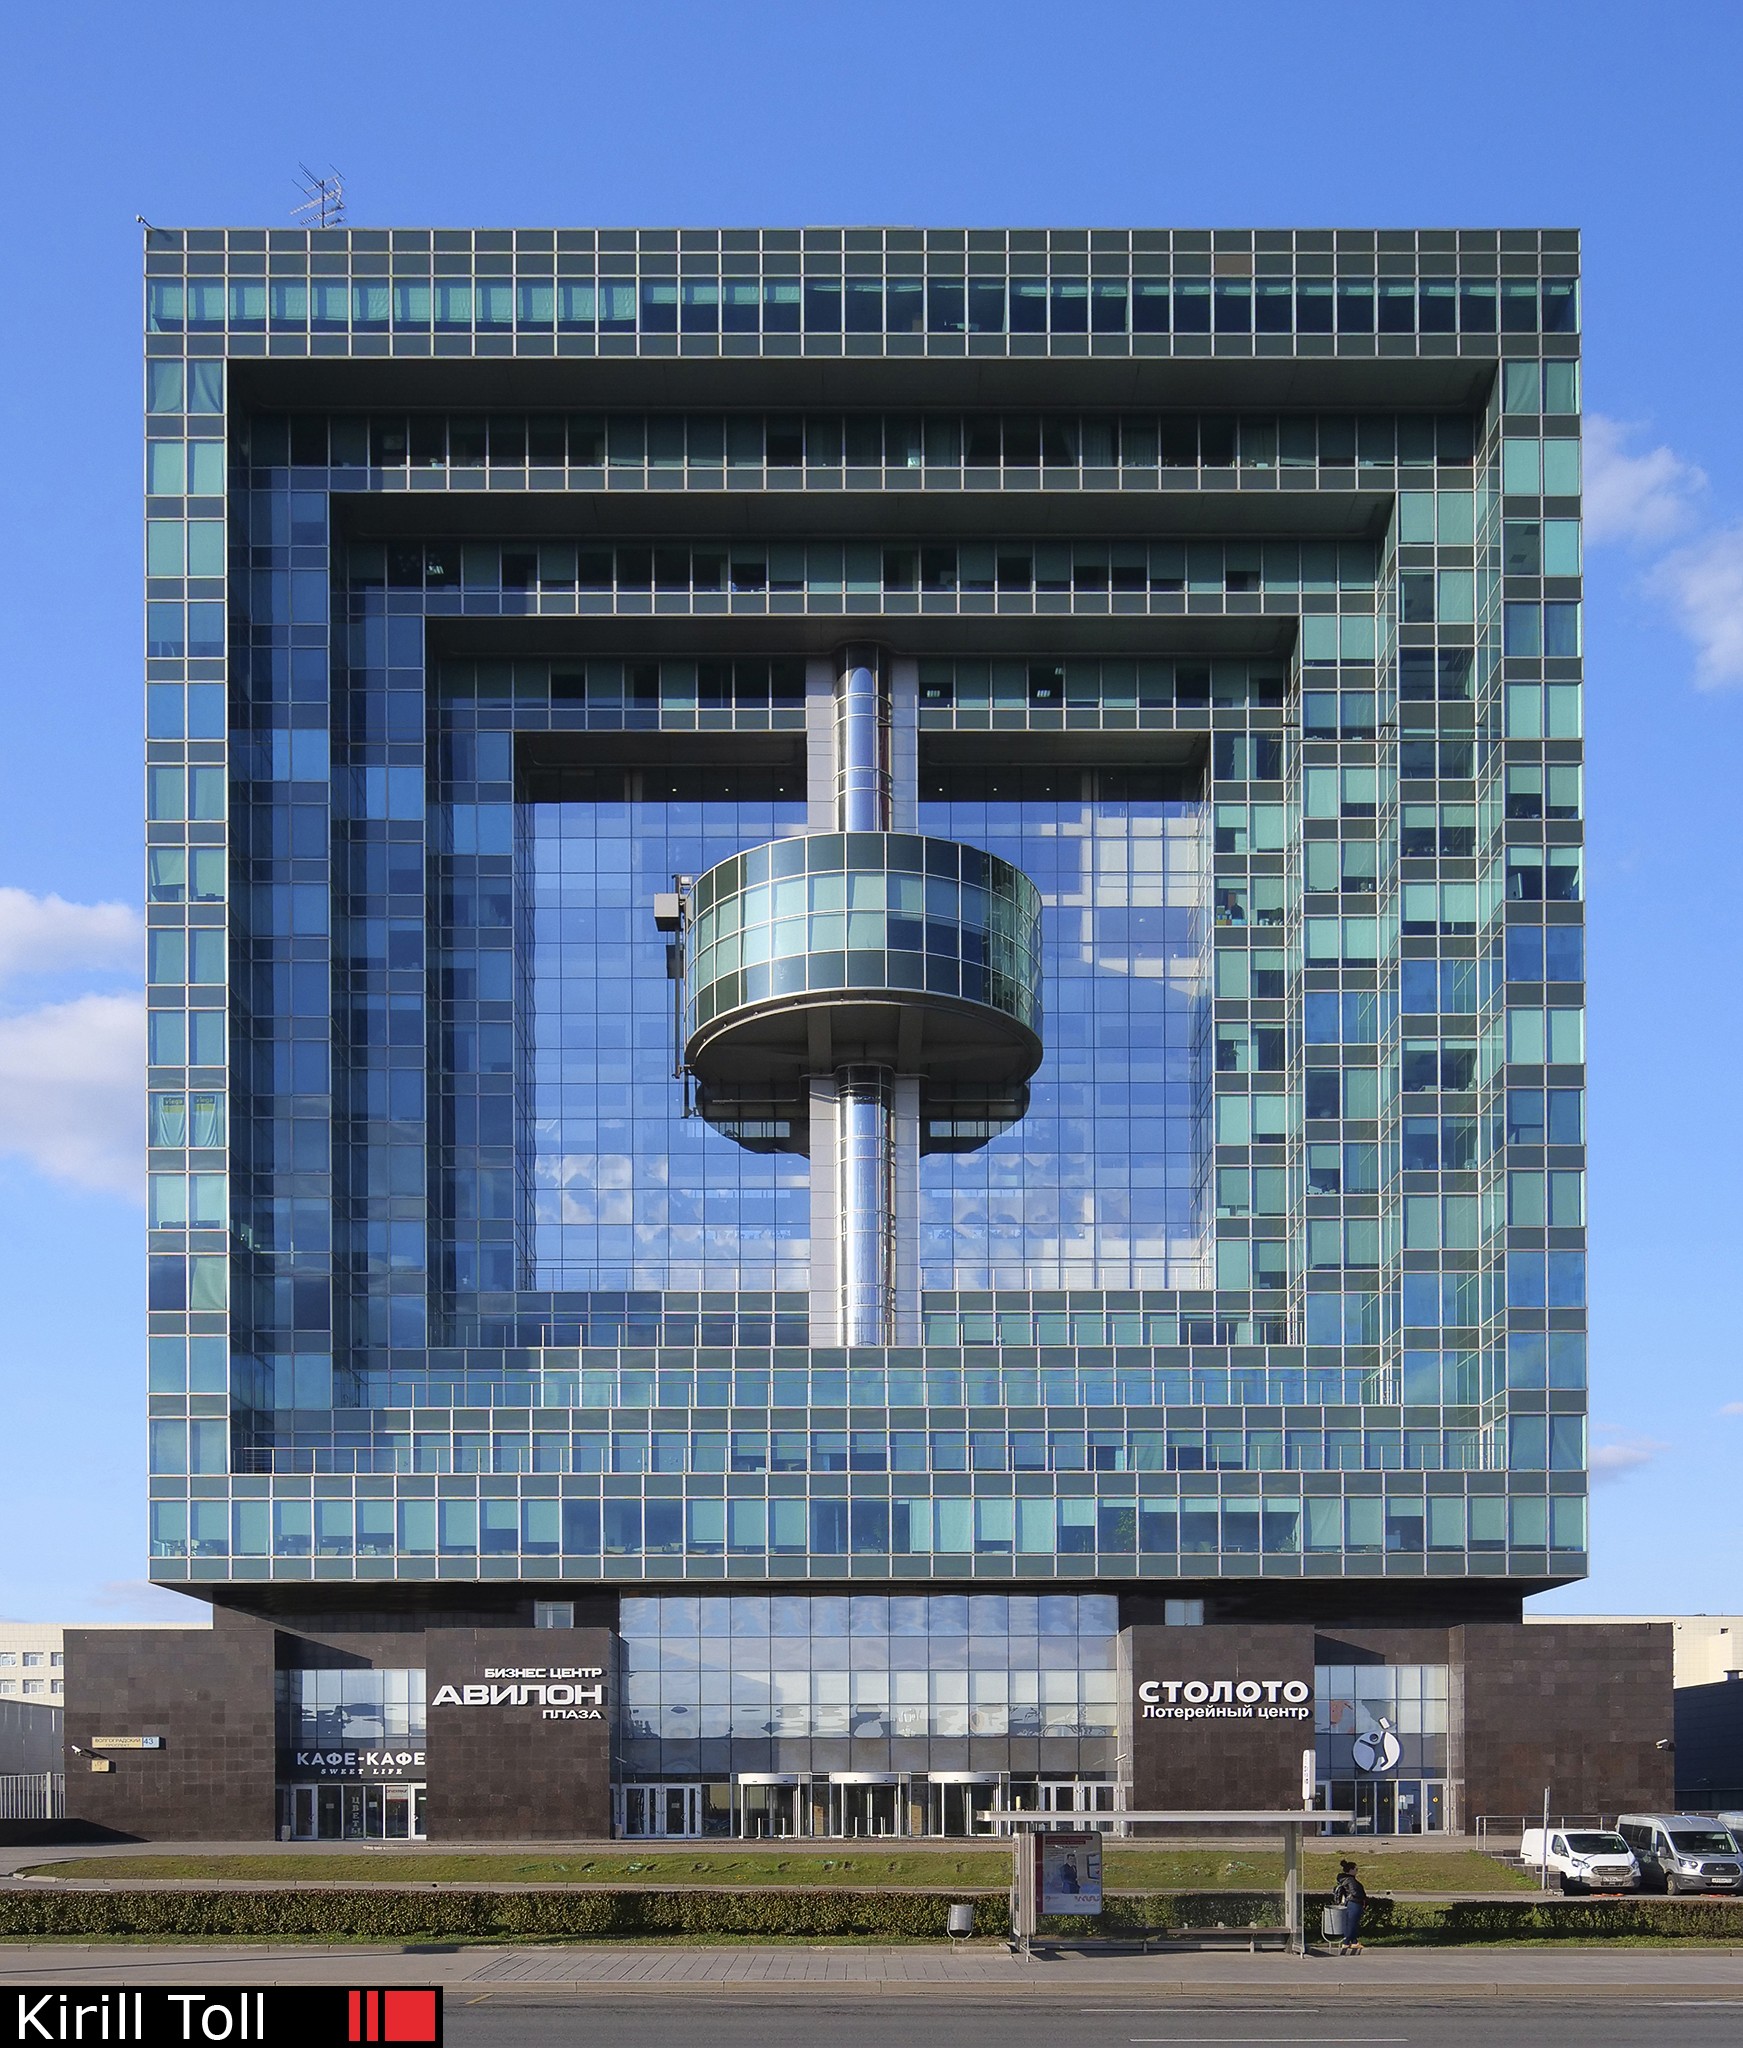
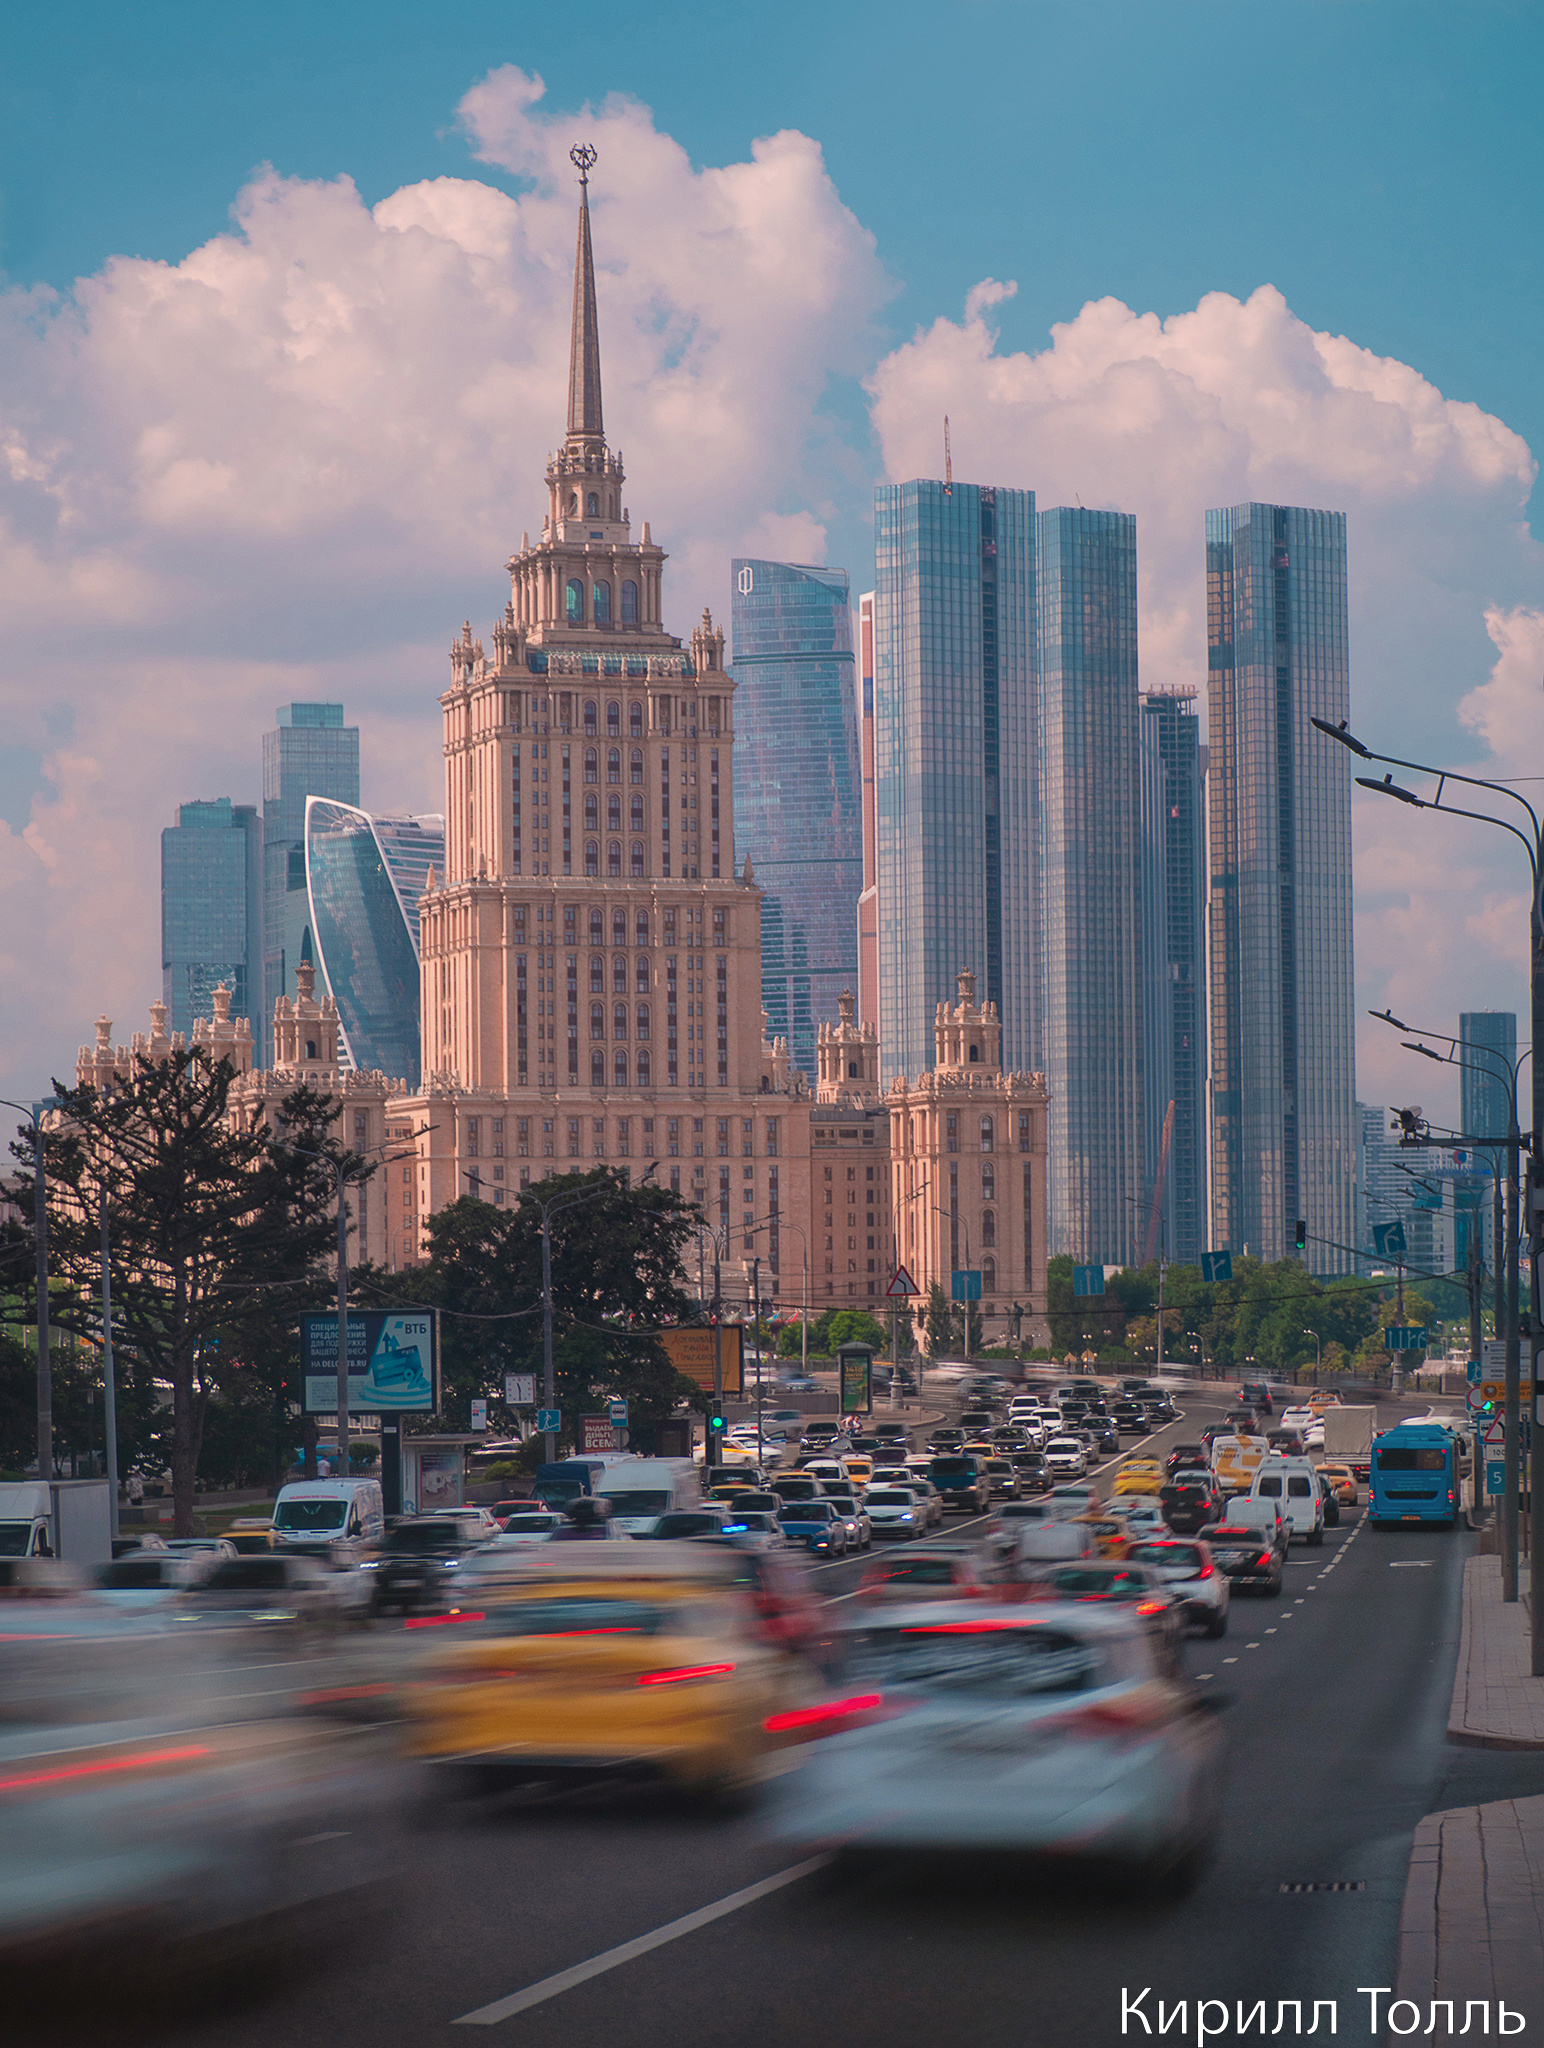
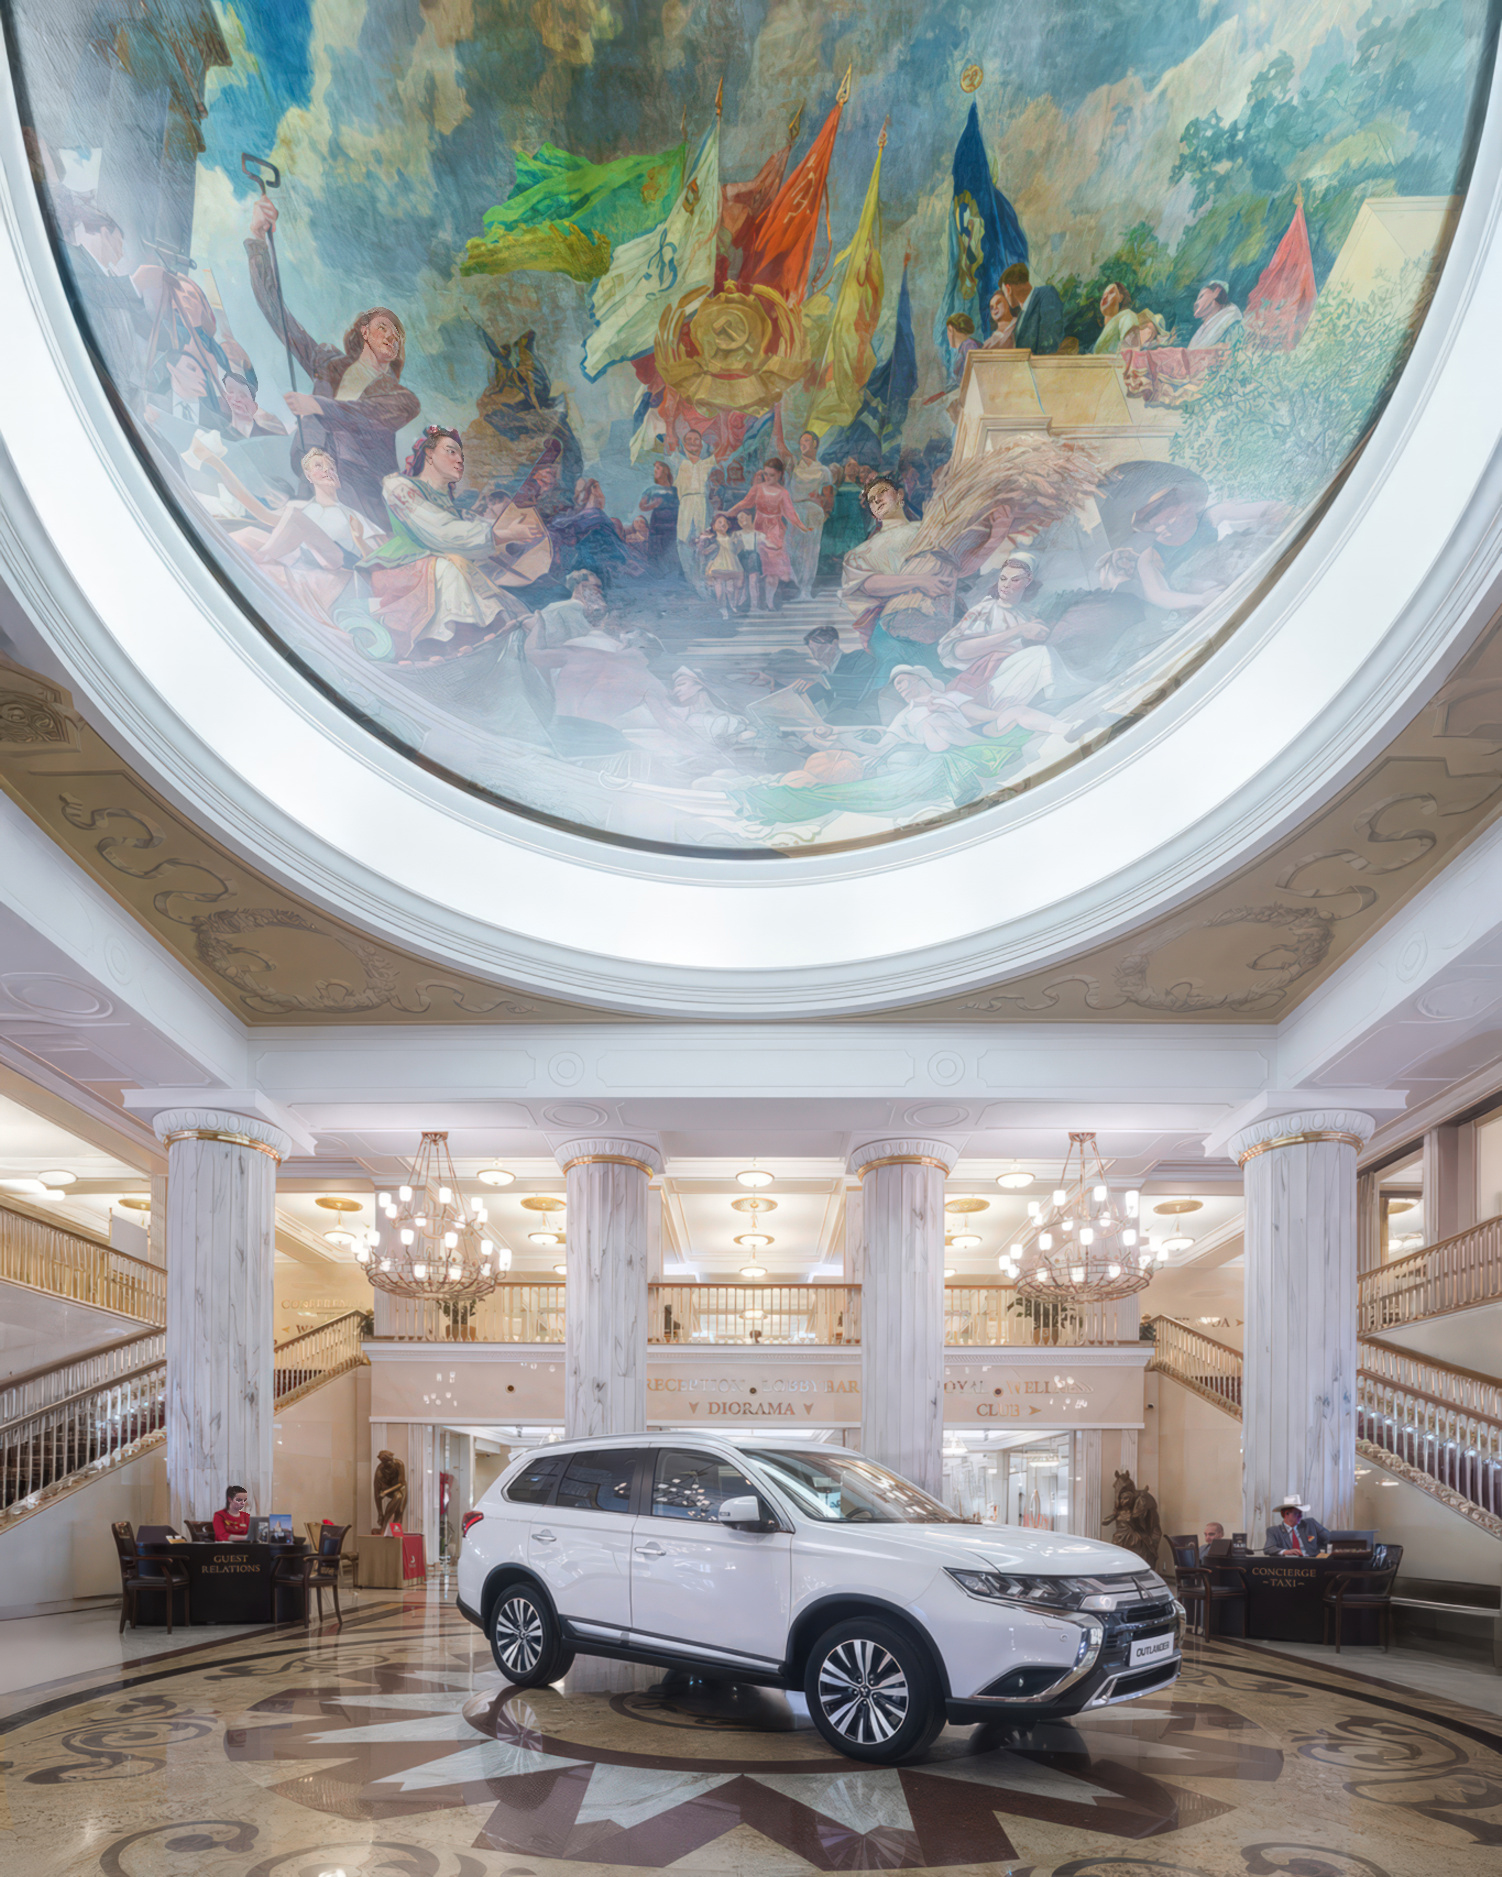
Rare «situational» solutions are also possible, like this Moscow City room, which I shot in times long gone, as can be seen from the landscape.

32. Can you photograph interiors handheld like on a phone or only with a tripod?
Shooting handheld is generally inconvenient. A frame is often formed by correcting items in the frame. So even a phone, ideally, is better placed on something stable. Although…
Sometimes, before a big shoot, I do a «sketch» visit. That’s when I photograph «handheld» (handheld). I do it with an OM System-1 camera with a set of fast primes: Laowa 7.5 mm, Panasonic 9 mm f/1.8, fisheye Samyang ( photo example ) and the old-timer Panasonic 20 mm f/1.7.
For such sketches, I sometimes raise ISO to 1600 and shoot in «high resolution» mode. There, I stretch shutter speeds up to two seconds — not without effort, of course, and holding my breath helps.
33. What cameras can you shoot like this «handheld» at all?
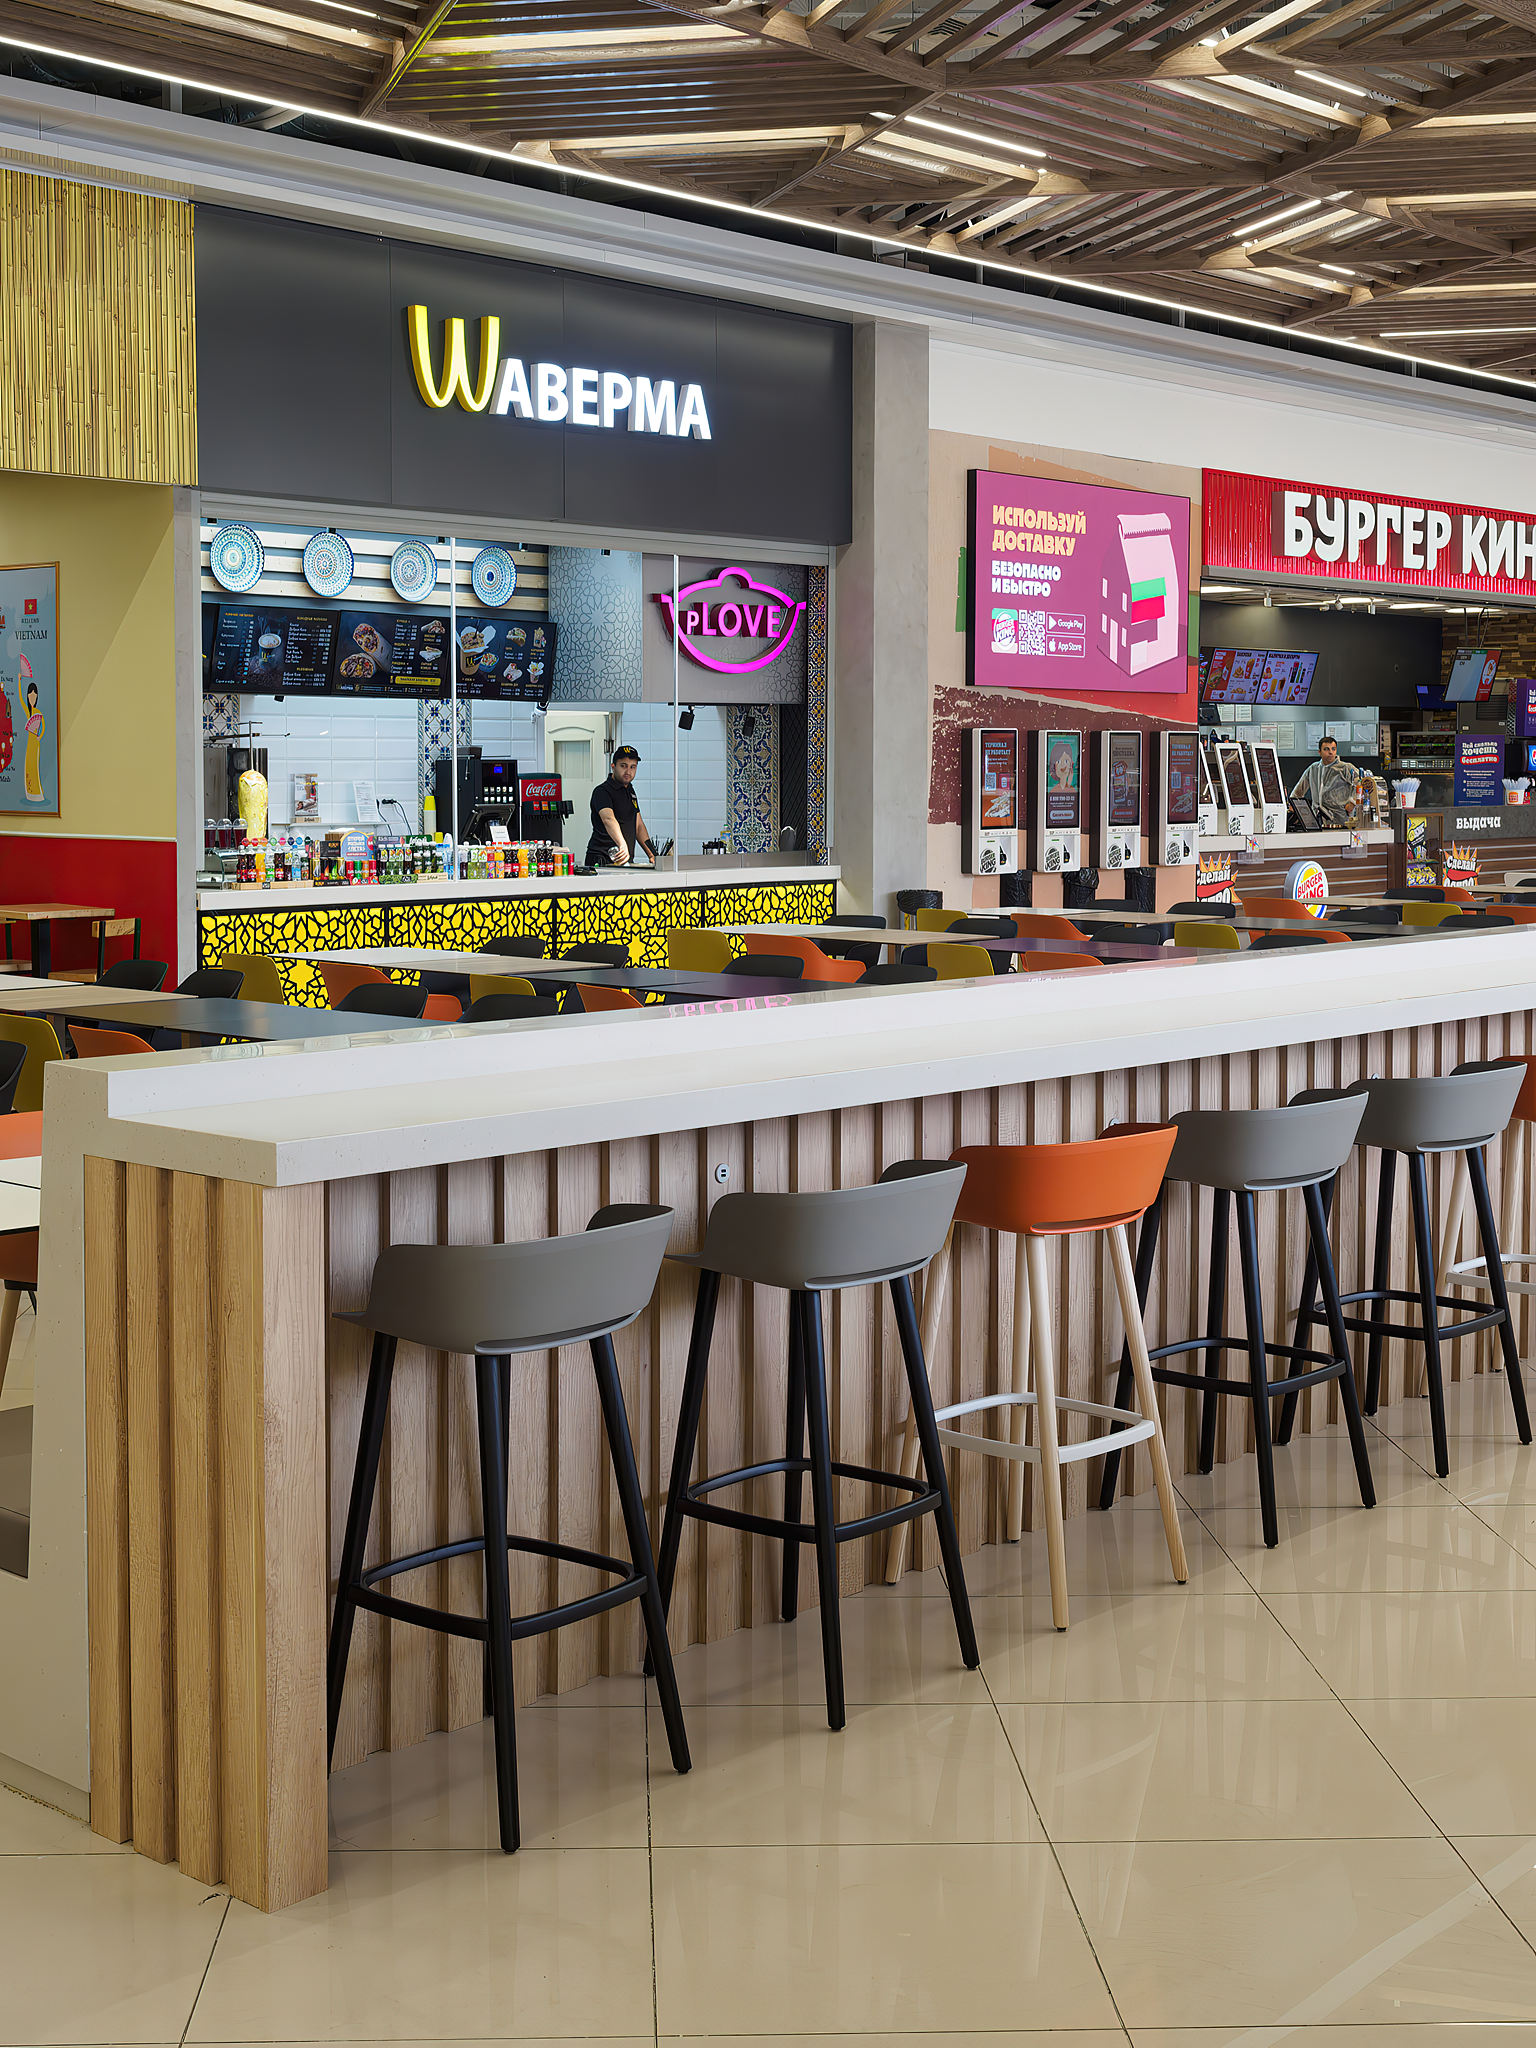 Image stabilization for photo works well in Nikon and Canon mirrorless cameras — but, of course, check by model, some simply don’t have it. OM System’s stabilization is excellent, they are masters at this. As for Sony, somehow we didn’t get along. I’ll keep silent about their achievements in stabilization — they were, like, among the first, but I never felt practical benefit from their stabilization. Maybe they improved something in the latest models? But their marketers are generous with promises — «Faith No More».
Note. At the same time, it is Sony that is practically the standard for large productions. If you want to work with them — work on Sony.
So, in short: you can shoot handheld, but it’s exactly for sketches, quick scouting, or when a tripod is completely out of the question. This is extreme.

34. What camera settings are basic for interior photography?
Three pillars of settings: tripod, low ISO, stopped-down aperture.
• ISO: Minimum, as far as the camera allows (50-400). Noise is the enemy of image cleanliness.
• Aperture: f/8 — f/16. The depth of field should cover the entire frame from foreground to background.
• Shutter speed: Any needed for correct exposure (from 1/10 to 25 sec). The main thing is absolute camera stillness.
35. How to work correctly with white balance?
Correctly, it would be to set white balance using a gray card or at least a white sheet. But at a practical level, it’s important to understand that you need to convey the atmosphere of the interior. i.e., besides numbers of color temperature and tint, you need to work with your memory. At a beginner level, I would recommend setting one white balance for the entire room and working from that.
Be prepared for the fact that you will have to apply masking and work with white balance, combining several files exported from raw with different white balance settings.
36. How to photograph an interior against a window?
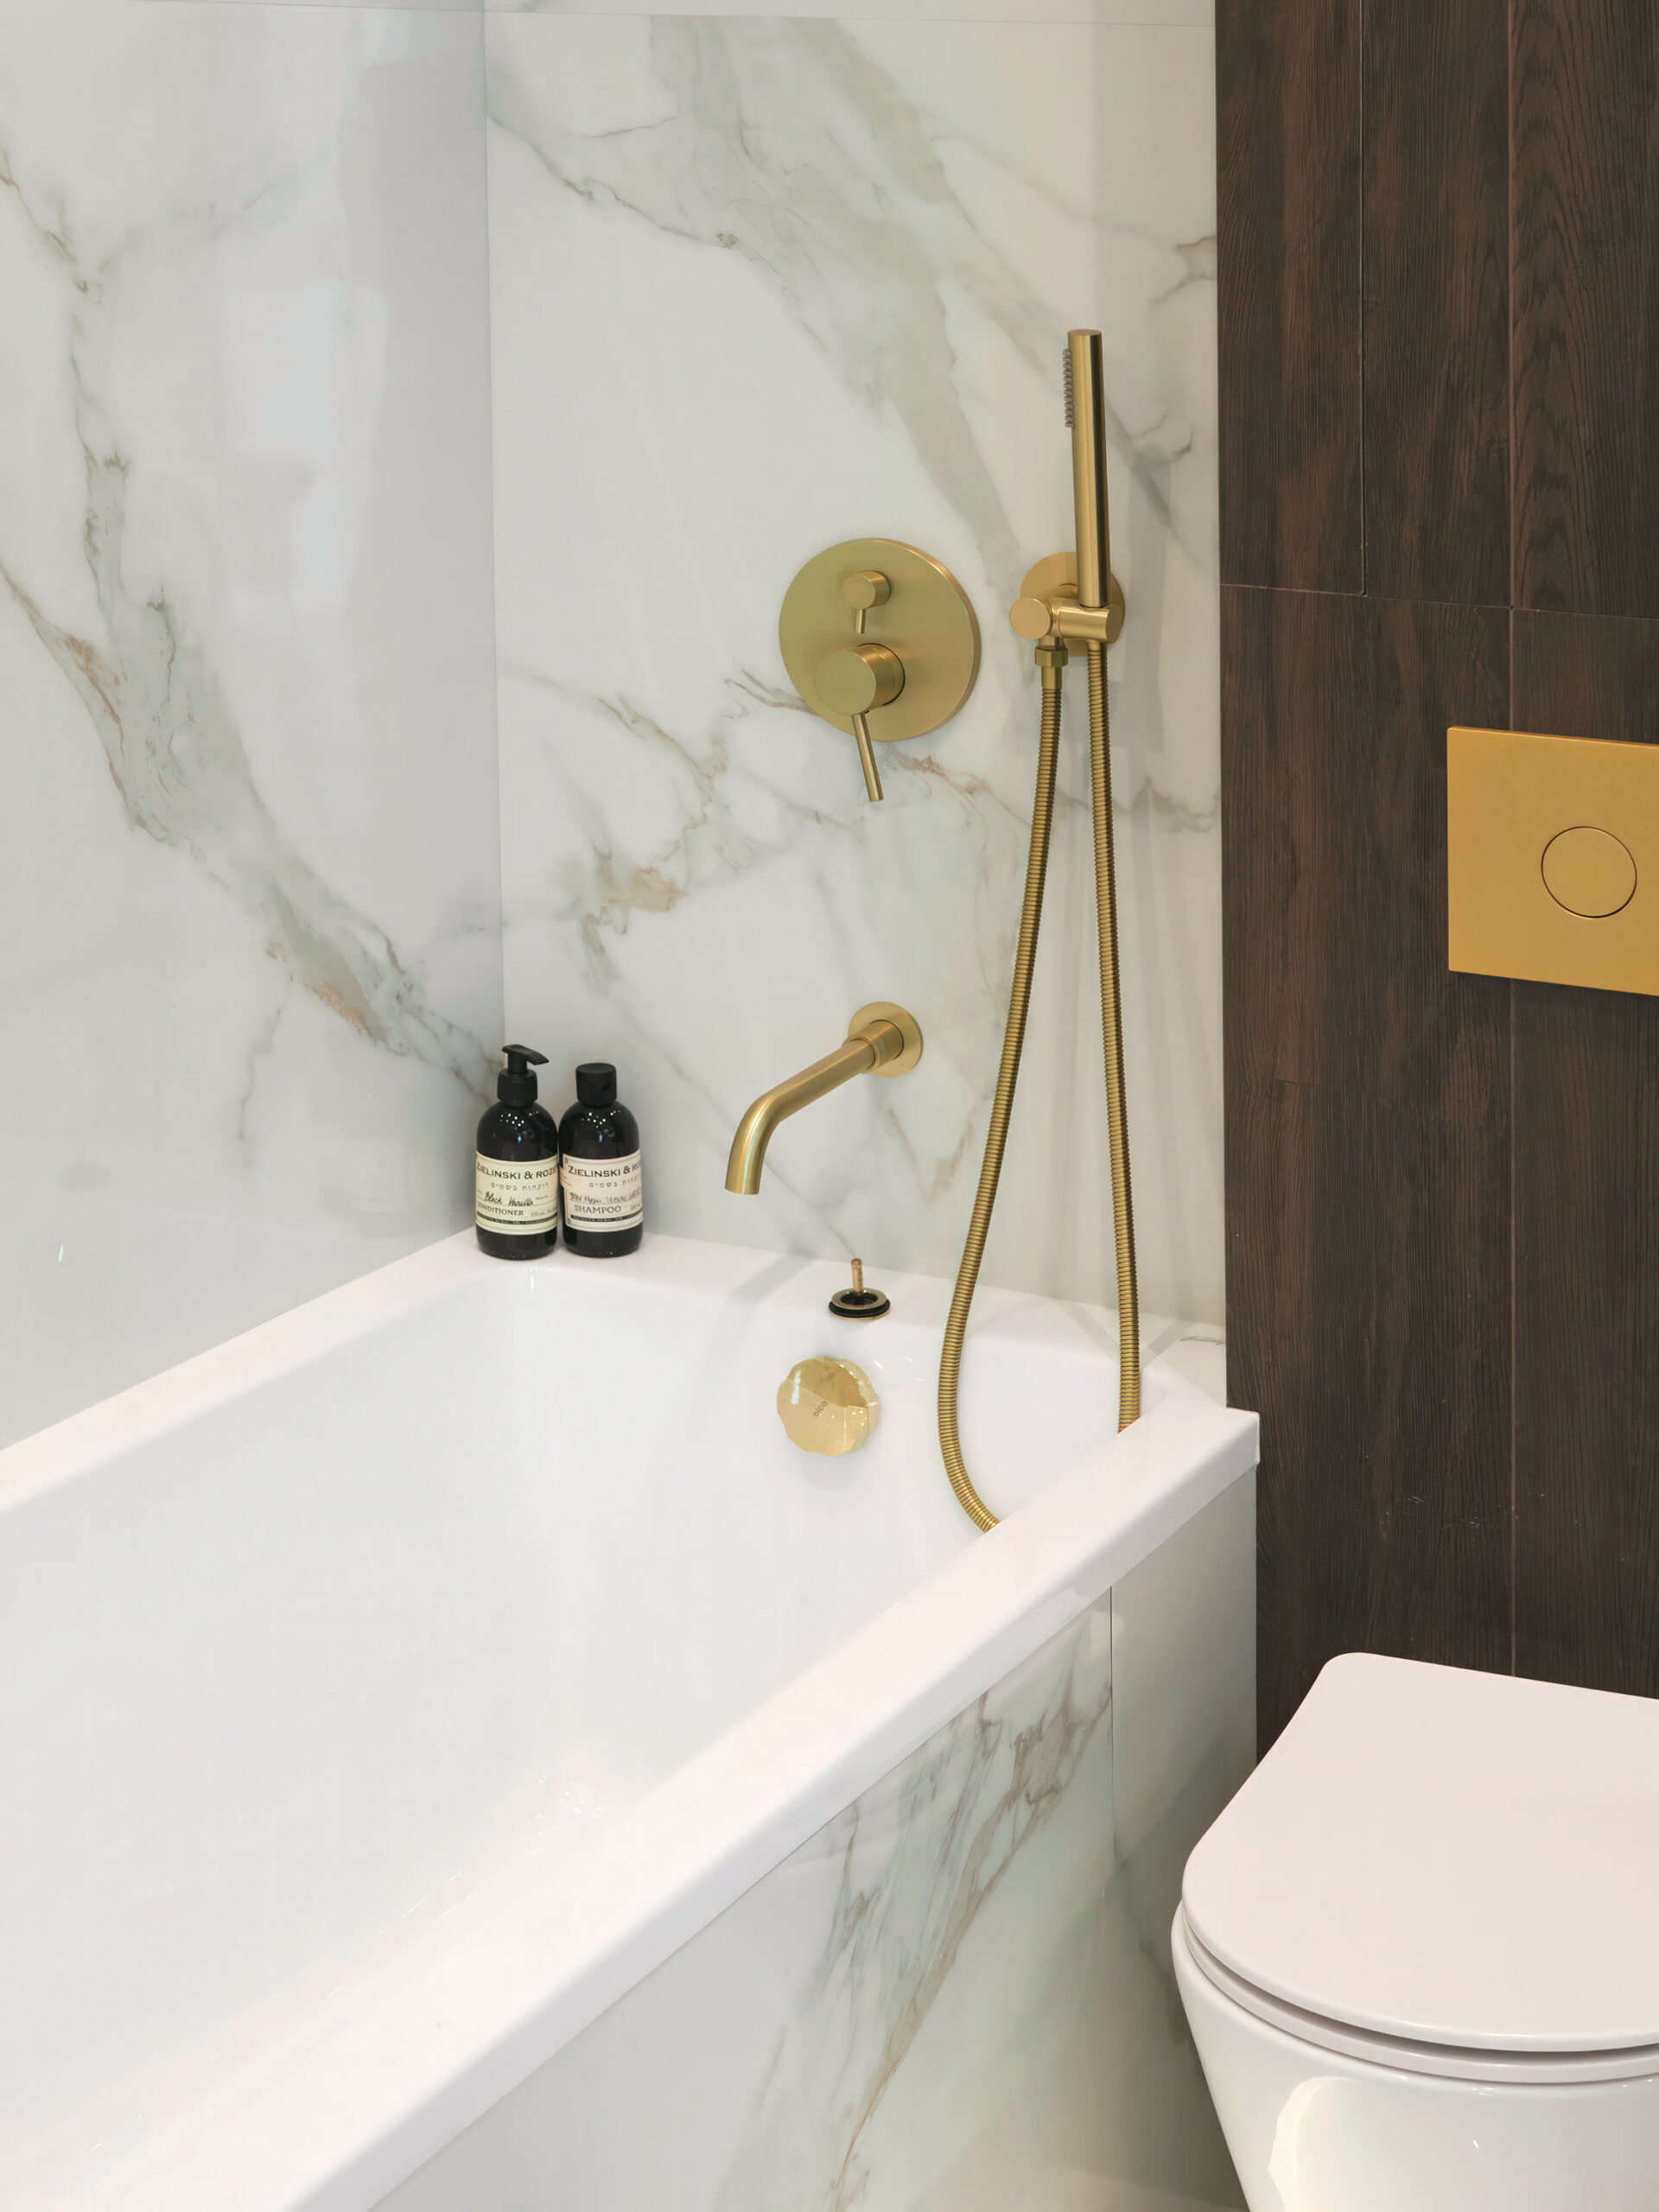
.jpg "Professional photography of a hotel room with natural and artificial light. Photographer Kirill Toll creates attractive images for hotels in Moscow, Moscow Region, and all of Russia. Photo services in Odintsovo, Krasnogorsk, Khimki, and other cities.")
It happens that shooting with exposure bracketing and manual blending in the editor doesn’t save you. For example, a dark velvet curtain at the boundary with a window loses its texture, turning into a flat dark spot with a bleached edge. This is not an exposure problem, but a lens flare problem leading to loss of local contrast.
The solution — make an additional shot with flash, directed exactly at the problem area. Your task is not just to illuminate it, but locally to «overpower» the flooding light from the window, returning the texture to the material. The flash power and position are adjusted so that this area fits naturally into the overall lighting.
Then in the editor, you combine everything into a harmonious and natural picture.
37. What tripod to choose and how to work with it for interior photography?
It all depends on your system. Some shots in recent years I do «handheld» because the stabilization system works excellently. But that’s an extreme case, when working with a tripod is too hampered by some circumstance of the room or a specific angle.
-1_01-%20-art-scale-1_50x.jpeg "Professional hotel room photography: cozy area with bed and light textiles. Photographer Kirill Toll conveys an atmosphere of calm and elegance, emphasizing interior details. Commercial photography services for the hotel business.") A tripod must stand firmly. This is important because sometimes a whole set of shots is made with different exposures or even with changing lighting. While the photographer changes something in the frame, the tripod must stand firmly. Of course, it’s better not to take many video heads for photography. Quick camera correction on them is often not as convenient because other tasks are pursued.
A tripod must stand firmly. This is important because sometimes a whole set of shots is made with different exposures or even with changing lighting. While the photographer changes something in the frame, the tripod must stand firmly. Of course, it’s better not to take many video heads for photography. Quick camera correction on them is often not as convenient because other tasks are pursued.
? From experience. Low angles (from the floor) I’ve used only three times ever. But high ones — much more often. Especially when I started working with shift movement, it happened sort of by itself.
38. How long does shooting one property take?
For an architect: 4-8 hours, depending on complexity and detailing. For a realtor: 1-3 hours. The time includes not only shooting but also preparing each shot, setting up equipment, moving between points.
39. How to photograph in tight spaces?
Sometimes you have to shoot through a doorway or from an adjacent room. Or from a high point. The important thing is simply not to try to fit everything into one shot, but to break the space into logical zones.
But the extreme point is always in some top corner. Here, it’s still desirable to have a camera that can shoot «handheld». After all, you can’t attach a suction cup tripod everywhere.
40. Do you need to shoot RAW or is JPEG enough?
Only RAW. This format gives maximum flexibility in processing, especially when working with complex light.
JPEG theoretically could be convenient if you need to immediately send a «sketch» of the material to the client. But that never happened to me. And I always insist on a simple position: raw files poorly correlate with the commercial result. It’s unlikely the client possesses my level of expertise and will understand WHAT will come out of this raw material.
? From experience. Once I shot all the material in JPEG. Why? On the 4th hour of shooting, the camera glitched, and I reset all settings to factory defaults. I forgot to check the usual RAW shooting settings.  I had to sweat in processing, but I managed without problems for the client. Anything can happen.
41. How to photograph interiors with high ceilings?
If you need the ceilings, if the emphasis is on them, then it’s better to use a Tilt-Shift lens or shoot from a low point to include the ceiling in the frame. It’s important to keep verticals parallel. Sometimes you have to make several shots with different camera tilt and stitch them in the editor.
42. How to work with reflective surfaces and glare?
Shoot in a way that requires less retouching later. On set, act in sequence: 1) Try changing the angle of the CPL filter, 2) Block the reflection source (flag), 3) Set up your own light. Leave complex, irremovable-on-site glare for the final stage — careful digital retouching, considering it as a backup tool, not plan «A».

43. What to do if there is mixed lighting in the room?
Shoot in RAW and correct white balance in post-processing ?. You can make several shots with different white balances and combine them using masks (what masks are there ?). The main thing is to preserve the natural look of the lighting, not bringing it to absurdity.
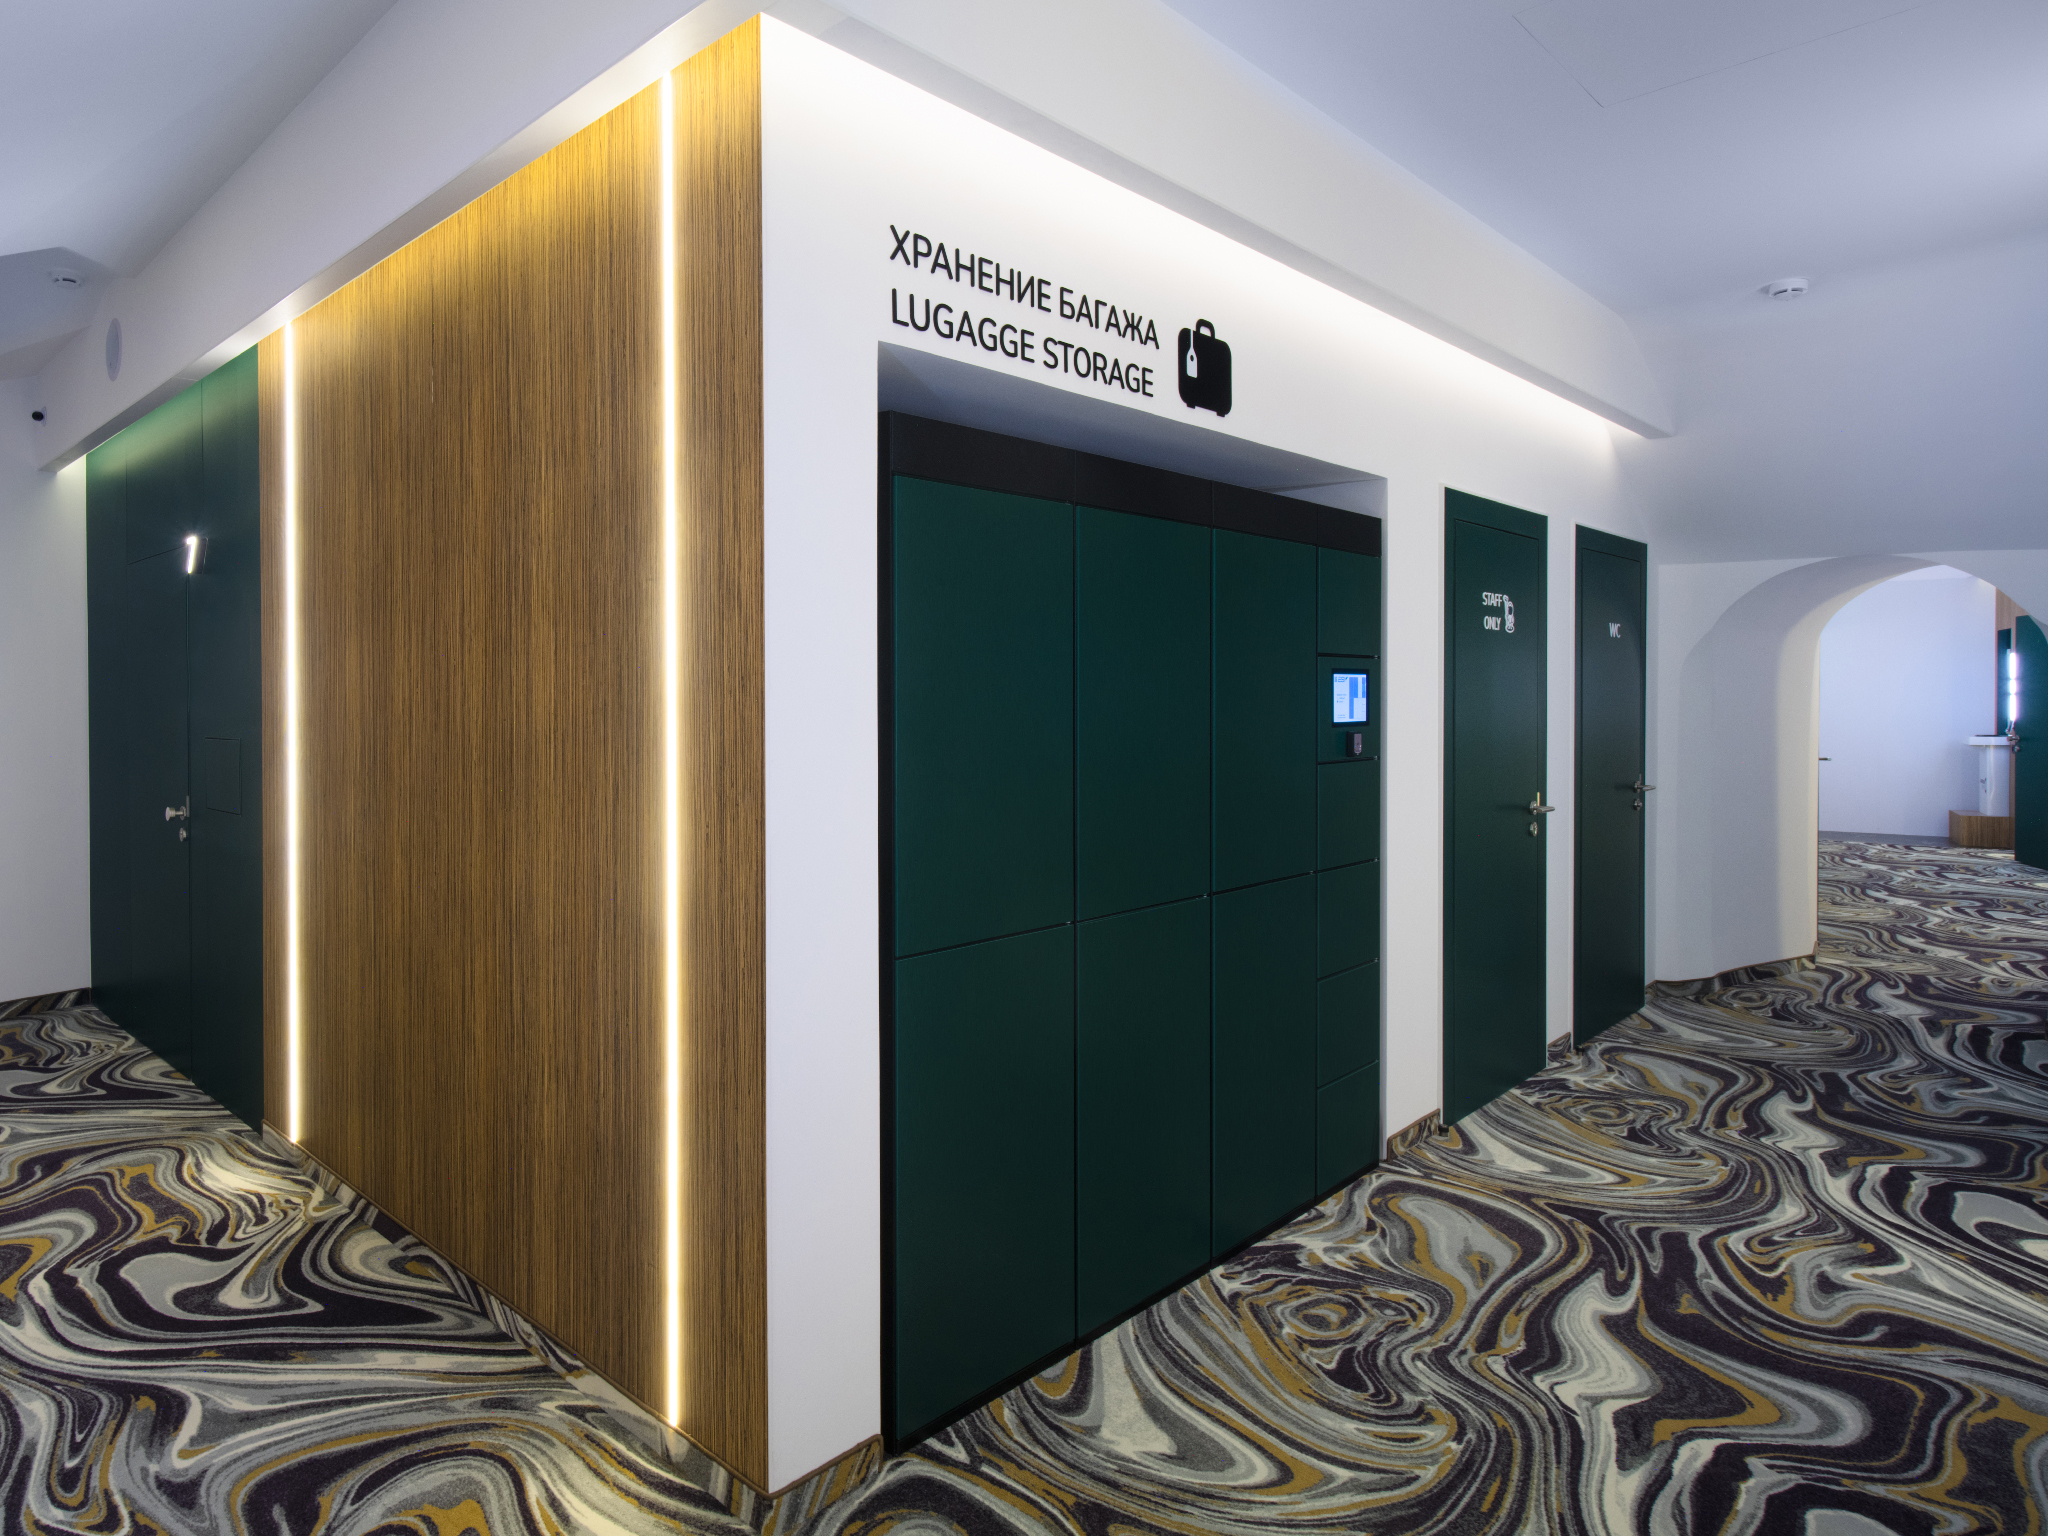
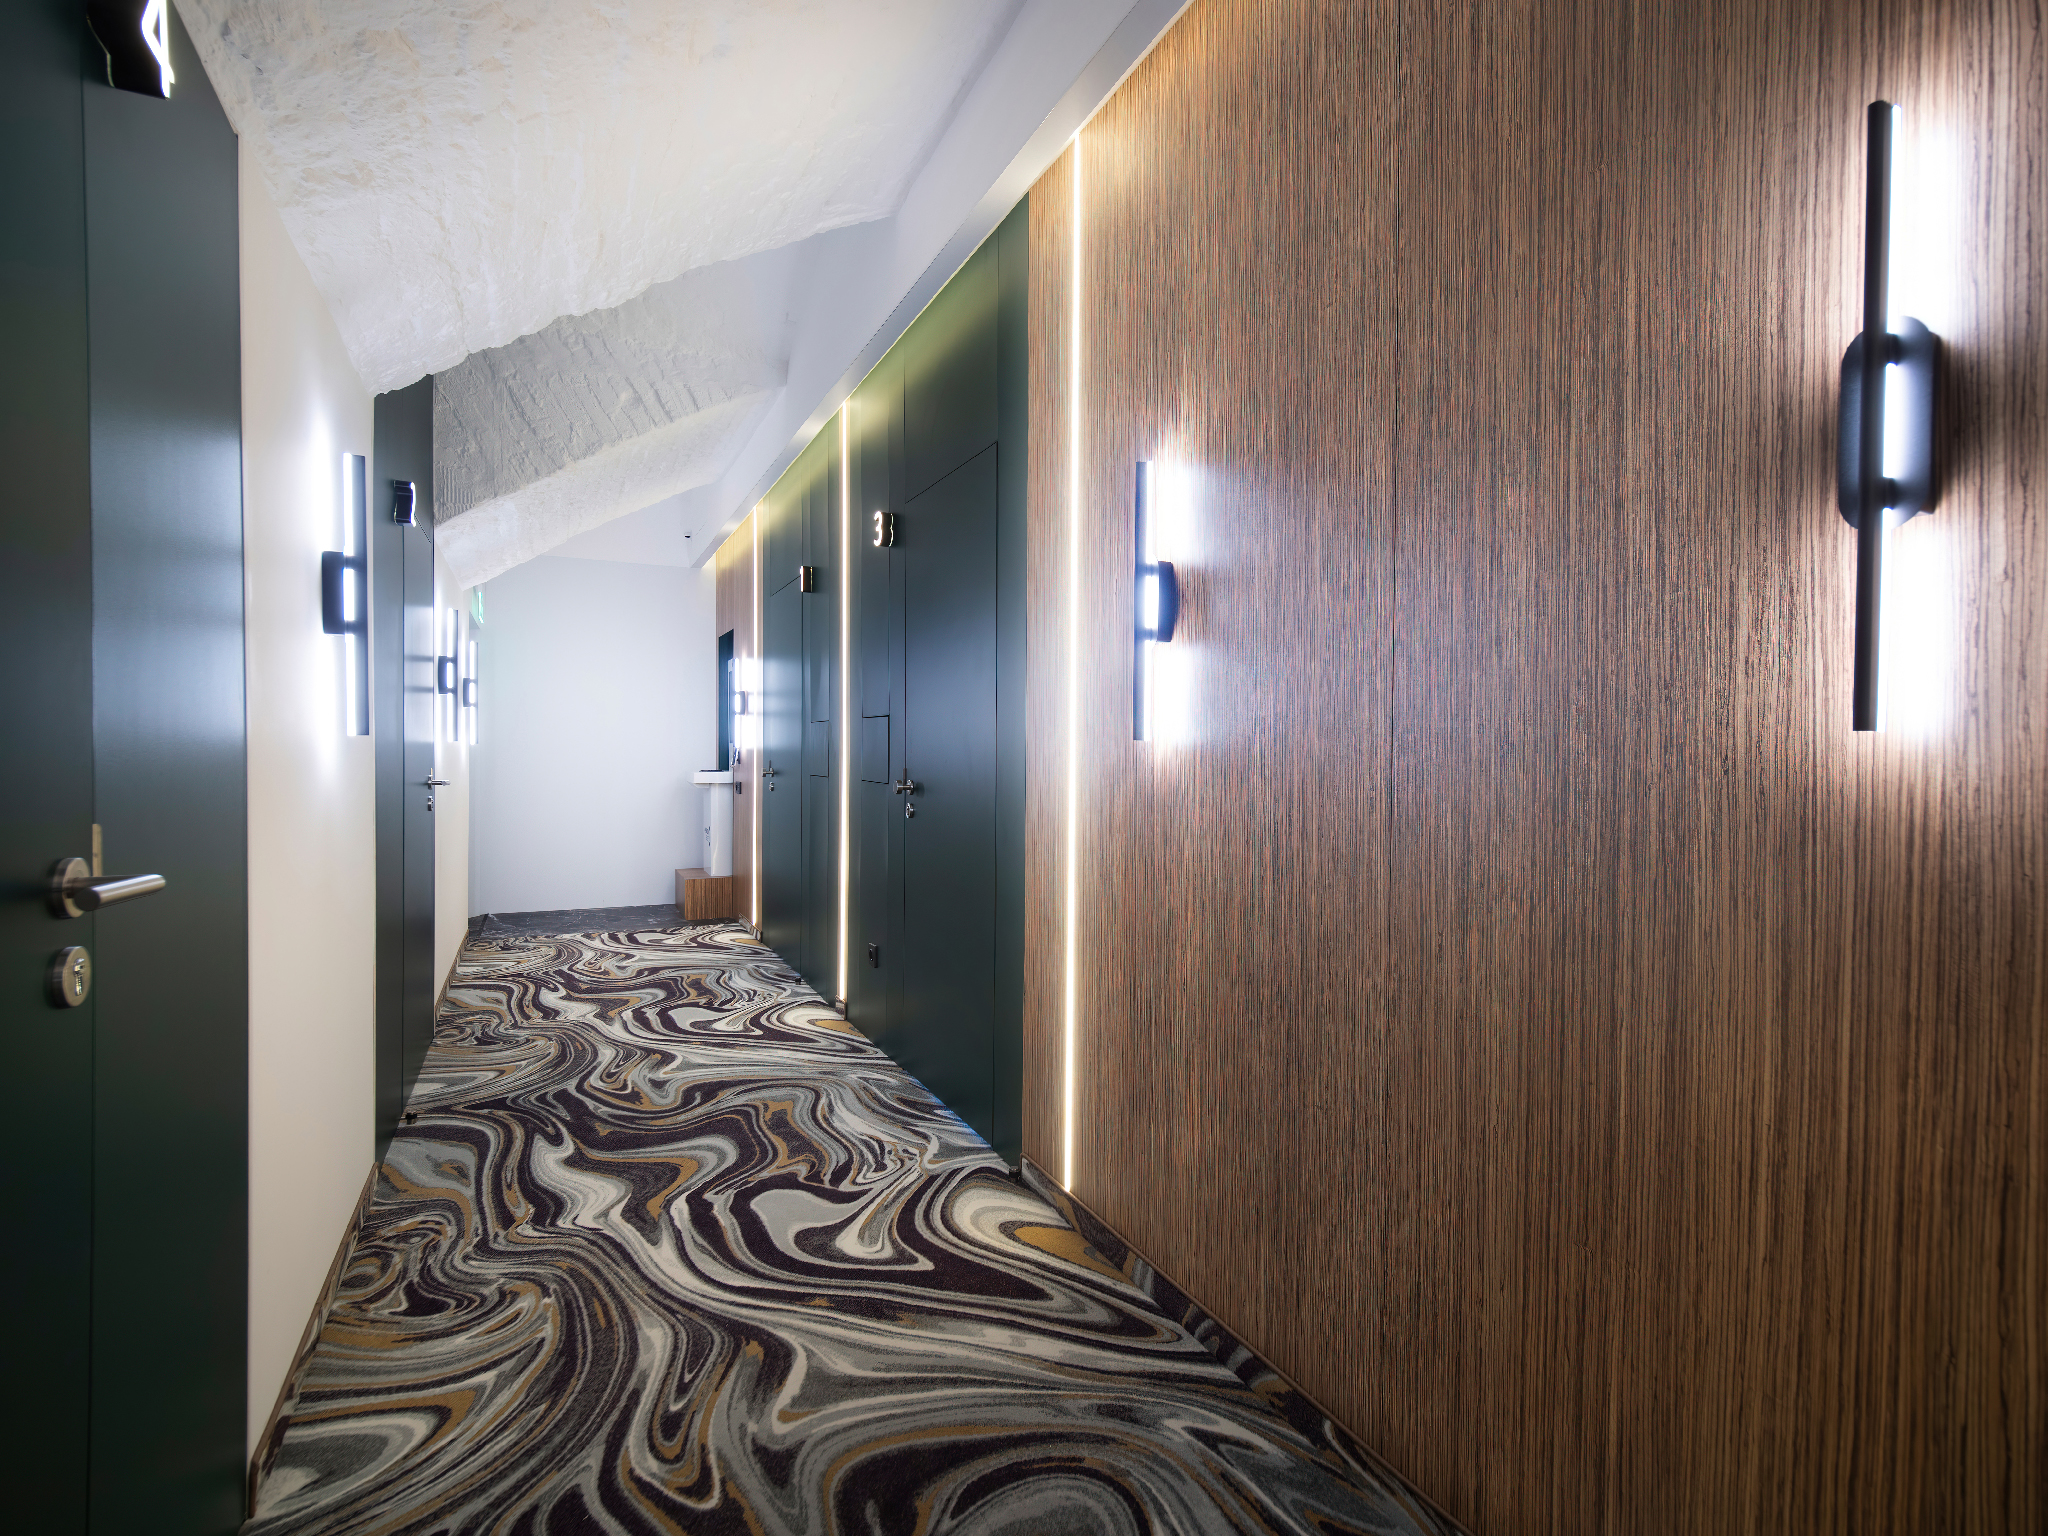
44. How to shoot long corridors and narrow spaces?
First, you need to realize what to show here. Maybe the length of the corridor or emphasize the rhythm of doors or something else. Sometimes it’s «just need to show» for the set. This happens in realtor shoots, and a super-wide works simply here. But for an architectural bureau, you need to think more subtly. I’ll add that in some tight spaces (1↴ ) for the desired effect, it’s possible to draw edges through AI generation. This will give the possibility of shots that are difficult or impossible to take by conventional methods.

45. How to work with natural light at different times of day?
 Knowing the location, you can take into account the natural movement of the sun and weather. The direction of light from windows changes throughout the day. The color cast changes too, which is important. If light comes through tree foliage, then, you understand, it gets a corresponding color.
There are many opinions on when it’s best to photograph the exterior of buildings. But it should be noted that imagining evening lighting, you must keep in mind a simple fact — far from all windows in a large building will be turned on. And on weekends, it will be a «dead house» if it’s an office building.
If evening view is still needed, then you should estimate the cost of «painting in» windows, etc.
46. How to shoot rooms with dark walls and furniture?
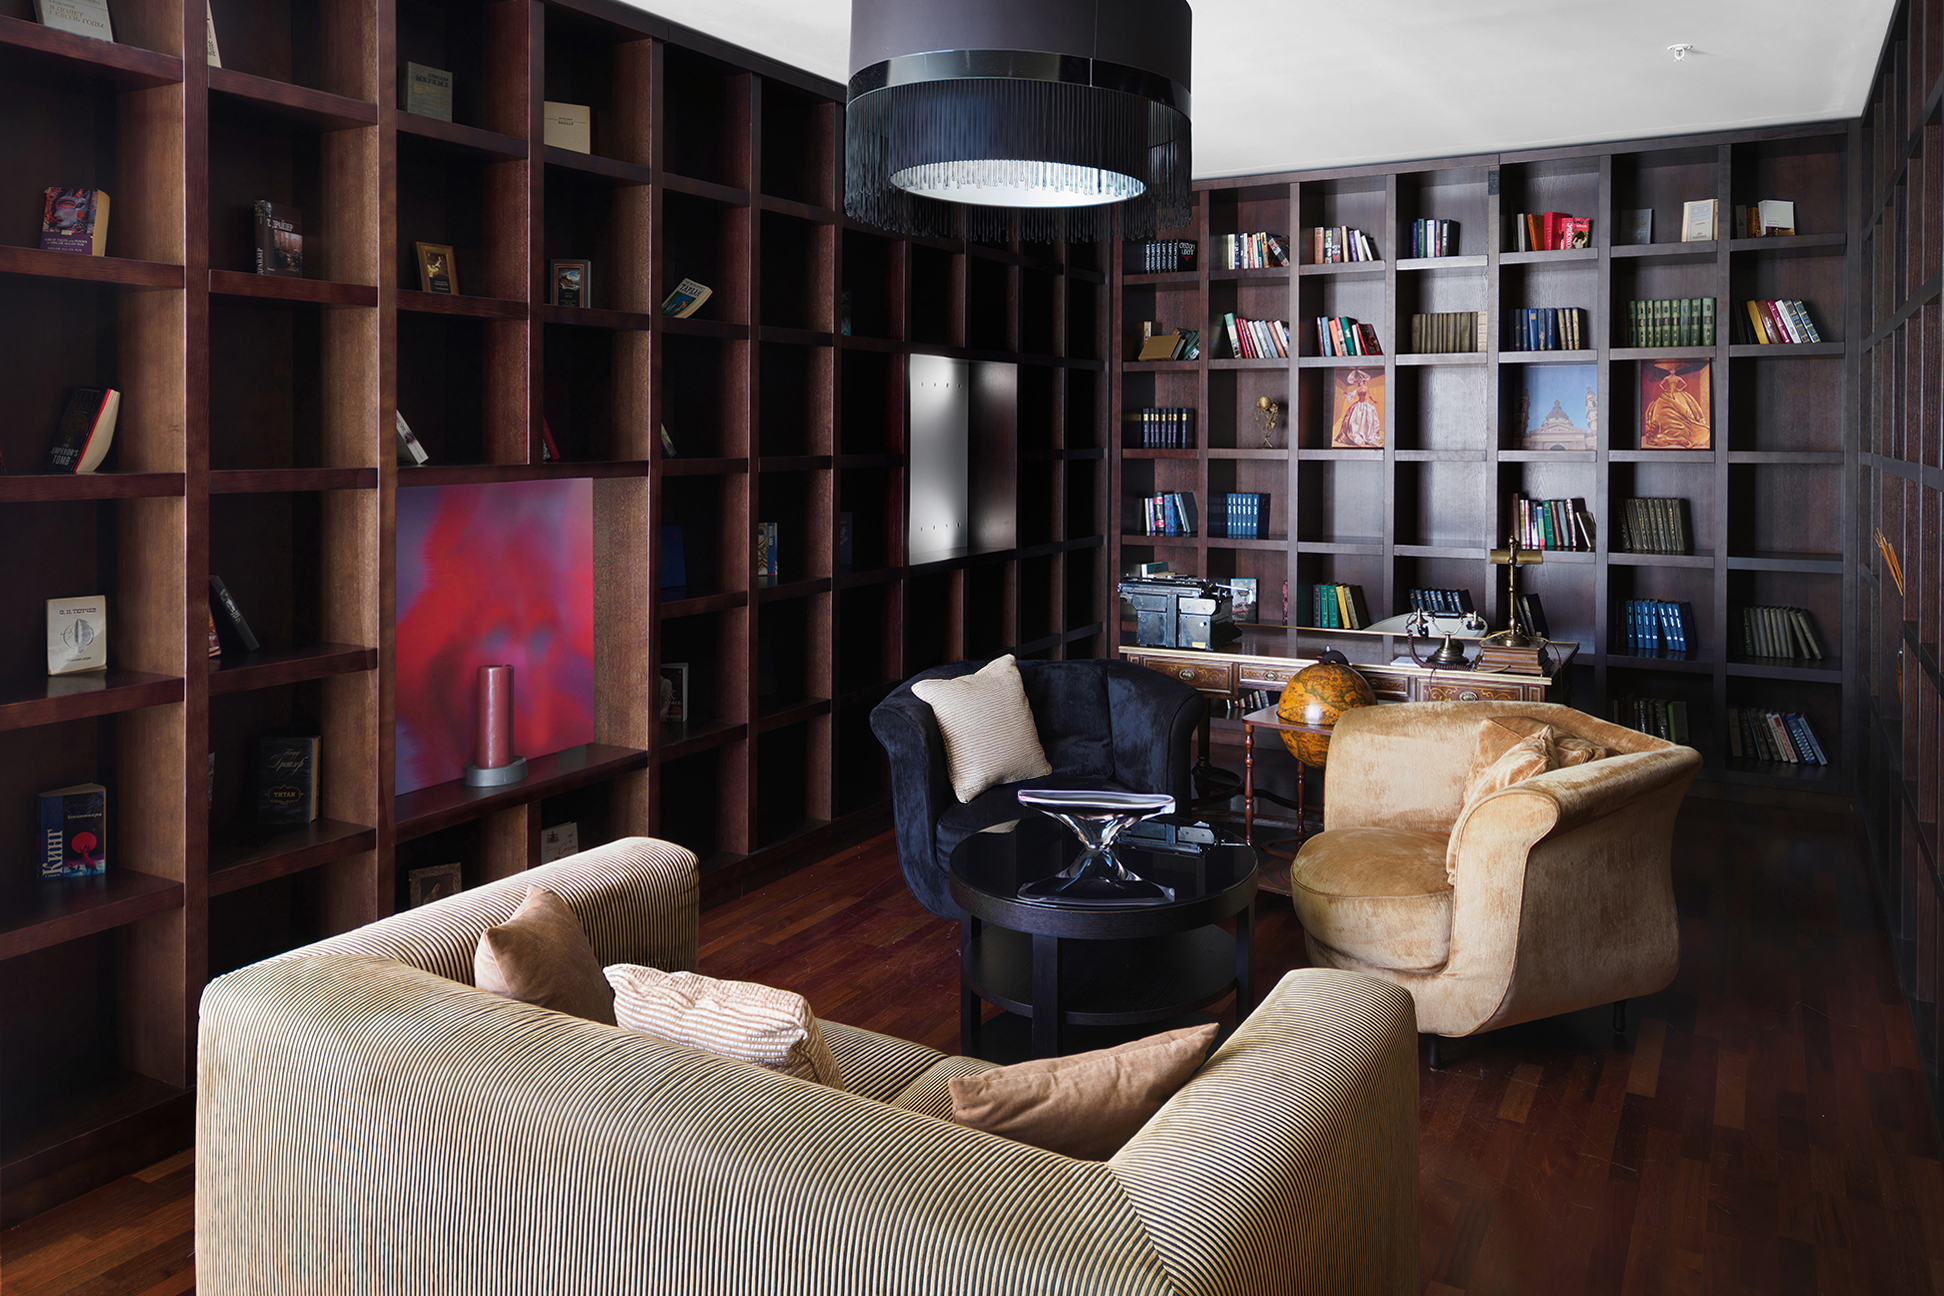 This is difficult. I’m afraid my advice here is meaningless because any real location will be solved in its own way. Of course, we’ll shoot with exposure bracketing, carefully work with highlights and shadows in production. At the same time, dark lacquered furniture reflects everything like a mirror. And the light reflected from it greatly changes the color of the room. You can either fight this or try to convey the impression.
Nevertheless, be prepared to work with a polarizing filter, making several images in different positions, use something that will help either not reflect in the «black mirror» of lacquered surfaces, or block the reflection with black flags or a situational solution with your own lighting so the reflection «goes into darkness».
47. What lens is really needed for an interior photographer?
.jpg)
It all depends on the goal. If you are a beginner photographer, and despite everything want to work for a real estate agency, the answer is simple: you need a zoom like 16-35mm. What’s good about it? No matter who clicks the shutter button, a lot will fit into the frame. Well or badly, but the room will be visible. But for serious clients, more restrained focal lengths are desirable.
Note. Later I’ll talk about the acute necessity of using a polarizing filter (?).
48. About wide-angle lenses for interior photography. What are the main working parameters?
A lens for interior photography should have three main working parameters:
a) resistance to backlight (?) and glare because you have to deal with windows, chandeliers, street lights, and the sun.
b) absence of complex distortion (?) because the geometry of most objects will tend to show this very «wave». Especially in frontal shots.
c) commercial sharpness at apertures 5.6-12 is critically important, as is the absence of noticeable vignetting.
Note. A lens that has been dropped, as seen by the body condition, is not worth buying for a beginner. A lens that has been repaired, as seen by the condition of screws — also not worth taking.
49. How critical is resistance to backlight and glare?
 Not all ultra-wide-angle lenses (range 95°-150°) handle backlight and flare well, and this is important for every interior photographer. In «creative shoots», flares can please with tube-like warmth. Here it’s different. The occurrence of flare is associated with 3 factors: the quality of lens coating (anti-reflection), the quality of lens element cementing, the quality of internal barrel coating. All these properties can be damaged by dropping, flooding, and handyman-repairer’s clumsiness.
Example. An interior photographer regularly has to shoot against a window.
In such situations, the photographer uses exposure bracketing up to 10 stops. The obtained files are compiled in a photo editor to get a natural picture. Processing methods ? may be different, but obtaining a quality result is possible if there are quality source files. And the worse the lens delivers contrast, color, flare, the more time we spend on what shouldn’t be a problem at all. We lose profitability.
Problems arise where there is sharp contrast between a bright and a dark zone — for example, at the boundary of a window opening and a dark frame or curtain. Of course, a professional photographer must be able to solve such problems not only through lens selection, but also through additional lighting ?, and the finger method (see guide ?).
50: Is there something common to all lenses with poor flare resistance?
Poor resistance to backlight is characteristic of old Sigmas, Quantarays, Tamrons, Tokinas. For some situations, these lenses with peculiar color rendition create desired retro colors, but for an interior photographer they are dangerous. Modern lenses are also not all flare-resistant. Often, for the sake of compactness, the manufacturer sacrifices complexity of the optical design or may decide that internal blackening is too expensive for the production process.
Certainly, having decided to «re-light» the interior with your mobile light, as Cool Nathan does (#books ?), you can work even on weak lenses. Because with such a maneuver, there will be no flare. But that’s in the States. And those are realtor shoots. And even in the States, not everyone does that. And many Japanese would have a stroke from such an approach.
Additional lighting should be used as a last resort. In any case, it’s better to have a good lens than to dance with an invalid on crutches.
51. What is «wave distortion» and why is it dangerous for interior photography?
Wave distortion is a dangerous thing. But I lived with it for years. Suffered, corrected by hand these wonderful bends in every photo where they stuck out. It’s laborious. The most common types of distortion («barrel» and «pincushion») are easily corrected in any editor. But «complex distortion» — that’s what to fear.
Wave distortion looks like this: at the corners the lens gives «pincushion» or barrel, but relative to the center of the image, another «hump» or «wave» arises. If you’re photographing a landscape, this might not be noticeable. But in interior photography, such distortion will bend straight lines. Especially lines in the foreground. Correcting such distortion in an editor via «lens profile» is sometimes impossible. Beware of lenses that show complex distortion in tests. Look for critical reviews, rent for testing.
52. How critical is lens sharpness and can you trust tests?
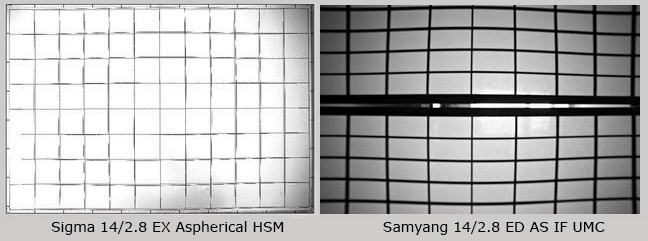
Sharpness — is that a very simple point? No. I’ll tell you honestly — every lens should be tested. For example, I tested 4 copies of Canon EF 14mm f2.8L II USM and refused to buy. The reason was precisely the sharpness of these copies. They handle backlight well, cope with glare, but sharpness on them was obviously worse than on Sigma 14mm f2.8, which has another weak point — peculiar distortion.
If a lens doesn’t give the needed sharpness, you can put a full stop on it.
53. Old lenses and modern sensors: what’s the catch?
Over 20 years, camera sensors have changed a lot. Some lenses at sensor resolutions of 8-12 MP in 2010 looked wonderful. But when sensor resolutions grew to 18-20-24-26-36-42-XXL MP, photographers were disappointed. As an example, I’ll give Tamron AF 11-18mm f/4.5-5.6, also known as Sony 11–18 mm F4.5–5.6. This lens for cameras with a crop factor of 1.5-1.6 gives excellent color, fights backlight and glare well (but not excellently). But all the copies that came into my hands didn’t give the desired detail on sensors of 15 or more megapixels. Similarly (except for color, which is worse) can be said about Sigma 10-20mm f/4-5.6 and its faster version.
54. Should you trust reviews and articles on the internet?
It’s no secret that all companies producing photo equipment have advertising budgets for bloggers, endorsers, and ambassadors. Thanks to these figures, the internet is packed with laudatory reviews of new optics, and every new lens becomes a «hero for half a year». Photography enthusiasts entering the industry don’t see these processes and trust reviews.
Finding a negative review from a competent photographer about a camera or lens is a rarity. As for negative reviews on YouTube, it’s even worse. Obviously, negative reviews are either downgraded in search results, or complaints are filed against them and they are deleted. «You can’t become famous by good deeds» (c).
55. What to look for when choosing prime lenses (20, 24, 28 mm)?
Besides an ultra-wide-angle, it’s also desirable to have lenses with focal lengths of 20, 24, 28 mm. I’d like to caution against buying several lenses. If speaking about a minimal kit for EF full-frame mount, I would take sigma 14mm 2.8, canon 20mm 2.8, canon 40mm 2.8. The weakest in this trio is the old 20mm. But it will find its work at stopped-down apertures. And for video it will come in handy later. The kit is not ideal, but penny-cheap and working. I can’t even think of anything cheaper.
56. Are there modern lenses unsuitable for work with architecture?
There is much new optics that seems attractive for interior photography but isn’t suitable. As an example, Viltrox AF 20mm 2.8 STM (AIR), which is quite attractive in focal length, compactness, important for working with video on a gimbal, has barrel distortion, which is easily corrected in an editor, and significant vignetting, which is also «easily corrected». Sounds not bad. But on correcting distortion, we lose practically 1mm of focal length, and on correcting vignetting, we lose about 2 stops of exposure at the periphery of the frame. And that’s already a so-so tool.
57. What conclusions follow from this for lens selection?
If you plan to photograph for realtors posting photos online, then take cheap lenses without fear and learn to build a frame, work with the object’s light, intervening with your fill light minimally. If your ambitions already extend to shooting for magazines or designers, then start understanding modern expensive optics and nuances of composition ?. Possibly, on this path, you’ll manage to find something old and suitable.
58. What does a Tilt-Shift lens do? What’s its point?

Tilt movement controls changing the plane of focus. In my opinion, in interior and architectural photography it’s not needed, except for creative joys. Its essence is that it changes the plane of focus. Usually, this plane is parallel to the camera sensor, but here, by tilting/raising — in a word, rotating — the lens on a fixed camera, we change this plane. If we talk about wide-angle lenses, the resulting blur looks somewhat inelegant, soapy.
Shift movement — another matter. It’s quite suitable in work.
Example. I think for an unprepared person, it’s easiest to demonstrate visually.
Here’s a house in the frame. The camera stands «level» i.e., all verticals are vertical, and horizontals are horizontal). That is, we were looking for exactly such a representation of the object. And now, mentally imagine that we have a frame of smaller size that we can move across the field of the frame up-down, left-right. That’s all, actually.

PC-Nikkor 3,5/35 — the world’s first lens with shift movement for 35mm film. 1959. Nikon F
It’s often said that Shift movement corrects perspective ?. This sounds crooked. Shift movement gives the ability to display perspective in the desired way. And Tilt (Tilt) — controls the zone of focus (plane of focus), but for shooting interiors and architecture, this is done so rarely, and so easily done in an editor, that let’s skip it.
But for a beginner photographer, I would suggest mastering the digital replacement of shift movement, mastering the skills of a cleaner, and then deciding whether to invest in expensive and strange gear. Especially, you shouldn’t take old Canons and various Samyangs. Their train has left. There are interesting options Laowa 20mm f/4 Zero-D Shift and Laowa shift 12-24 f/5.6. But remember, these are niche things. Selling them is hard. Owning them won’t instantly increase your shooting fee. If shooting for a realtor, it’s an empty gesture. In other words, these things are more for personal growth and pleasure. Even quite professional photographers don’t often own these items. Apparently, there are reasons?)

Let me explain from another angle. You bought a 20 mm Tilt-Shift, but its optics give an image like a 15 mm (120°). Your sensor crops the central 84° from it. The shift allows moving this «frame»-sensor across the entire wide-angle field, changing composition without moving the camera.
59. How to replace expensive Tilt-Shift lenses?
A. Digital correction in an editor. I suggest looking at a photograph by Mark Teskey. He believes he got a photo that is a clear argument for buying a shift lens. Is that so?
Step 0. Original photo. (c) M.Teskey.

1. First, I’ll say my «valuable». Mark didn’t work hard on the photo. This is obviously shooting not for an architectural portfolio, but for some kind of sales. That is, you could have lit the window frames, could have made two sets of photos with exposure bracketing with electric light on and off, but it is what it is. OK. We work.
2. First, correct the vertical axes. Note how much space we cut off in the editor immediately.

Here’s what we get. The meaning in the frame hasn’t increased, but it’s a bit better.
3. Next, correct the lines that were «arcs». Clean the frame: wash frames, chairs, locally correct color using masks. If the author had used a polarizer, we would have minimized glare on the table and floor. And finally, crop, improving the story.
What do we have as a result? Lost a lot of trimmings. Lost the story about the «awesome rug» and the grill. Got a story about comfort in this zone and its specifics.
Question. Does Mark Teskey really need a tilt-shift lens so much? It’s his business, after all, supporting lens manufacturers is an important aspect of the common good.
? The cheapest Tilt‑Shift — can be bought for APS-C cameras and that’s AstrHori 18 mm F8 shift (avito used ≈₽40). It’s not too good in backlight ?, it has only one aperture, which is not a problem, you can screw a polarizer onto it, which is cool. Its distortion seems corrected, but not perfectly. However, paired with a Sony A3500 (avito used ≈₽40), so beloved by A.Schapoval, it’s a bombastic kit, to which you can add something inexpensive but decent for portraits in normal lighting, and there are plenty of wide-angles for beginners in the system. They will give you a chance to learn, and either leave the niche, or keep it «for yourself», or buy expensive optics consciously, selling the old one. And for portraits, the Sony A3500 is quite suitable.
B. There are adapters with Tilt‑Shift option. What’s important to understand: any such adapter assumes that the lens you put on it must «see» more than the area of your camera’s sensor. Because we will move this lens up‑down and left‑right relative to the sensor. That is, the lens must have a good «margin» at the edges.
Therefore, for Micro 4/3 cameras or cropped cameras (with factor 1.5–1.6) with their smaller sensor, practically any full-frame (FF) lens from DSLRs will fit — it has this margin.
But with full-frame mirrorless cameras it’s already harder. Some lenses, however, were made «with margin», but in any case, vignetting and drop in sharpness towards the edges will be a constant headache when using old DSLR FF lenses via a tilt‑shift adapter on a full frame.
60. What kinds of Tilt-Shift adapters are there?
Any adapter with Tilt-Shift deprives you of autofocus and aperture control directly from the camera. Therefore, aperture needs to be set in advance. It’s done like this: mount the lens on its «native» camera, press the depth-of-field preview button and, without releasing it, disconnect and remove the lens. The aperture will remain in the clamped position — that’s how it will work through the adapter.
Is it worth the candle? Buying such an adapter is an investment in pure pleasure and experiment. If this sum is significant for you, keep in mind: selling this toy later will be difficult. There aren’t that many narrow fans of such adapter tilt-shift.
61. How to get acquainted with the best optics with minimum loss?
In any large city, there is photo equipment rental. In Moscow, these are zoom-prokat.ru, kino.rent, pixel24.ru, rentaphoto.com, arenter.ru.
On average, renting a modern excellent lens will cost you $15-$20 per day without various promotions. If you don’t have a camera, add about the same for renting a camera. Renting is a good temporary step because the money loss on reselling new optics will amount to approximately the cost of 15-30 days of rental. The deposit amount is often reduced if you provide the store with your full details.
62. How to choose a camera for interior photography?
First, ask yourself: will I shoot video or only photo? If video — then a lot of old cameras immediately drop out. That’s a separate big topic — hybrid cameras for interior videography (maybe I’ll give a link later).
If choosing a camera only for photo, you need to first understand what problems you’ll have to work with.
You can learn to shoot on absolutely any camera. But there’s a nuance.
Moiré. Overall view and detail close-up. Camera Panasonic DC-G9.
Sharpness and moiré. Until recently (approximately until 2017), almost all cameras came with an anti-aliasing (low-pass) filter in front of the sensor. It made the image softer and slightly less detailed but saved from moiré. That suited everyone. Then (first in the expensive segment) they started abandoning it, and off we go.
A simple conclusion: old DSLRs are generally slightly less sharp, and this doesn’t depend on the lens. But you can live with it.
Example: if you take a cheap used crop camera Sony Alpha a3500 (2014, 20 MP), it has a smoothing filter. But the older NEX-7 — already doesn’t. This affects detail and even price on the secondary market. You can check yourself. However, on rare old cameras without an anti-aliasing filter, you can seriously run into moiré in the texture of wallpapers, fabrics, and such.
-
Convenience. Here, the rear screen is important — does it tilt and how? This imposes limitations on work. Ideally, complete freedom is required. Although, of course, we managed without it before.
An electronic viewfinder, level control (convenient), and flexible white balance settings are also important. Also, many find the ability to output the image to a tablet or monitor important. It didn’t catch on with me — it slows down the process too much, and in the viewfinder I see everything well anyway.
Regarding some colleagues’ love of showing the shot to the client right during shooting — it’s probably better to avoid that. Only adds fuss. Although I’ve worked that way a couple of times. However, if absolutely needed, you can show the shot right in the viewfinder.
63. FF or crop? What is relevant for interior photography now?
For interior photography, this question is leaving the field of relevance. The reason is that cameras have appeared that make high-resolution shots by shifting the sensor (High Resolution). For example, a budget camera like the Olympus M5 MII easily makes a 40 MP shot, which quite competes with FF sensors up to 24 MP with an anti-aliasing filter. Cameras like Olympus E-M1 MII, Olympus M5 MIII, Olympus E-M1 MII, Panasonic DC-G9, although they are significantly more expensive. Sony a7R III and Sony A7RM4 have a «pixel shift multi-shot mode». Possibly, other models with similar function have appeared.
Progress in this direction continues, and newer cameras make a sensor-shift shot even in «handheld» mode. But for maximum detail, working with a tripod is still required. Honestly, the «high resolution mode» has limitations: moving objects in the frame are undesirable. That is, this mode is suitable for product photography or work with interiors and architecture. But that’s not all.
64. Are filters needed? Which ones and why?
A polarizing filter (CPL) is mandatory in an interior photographer’s arsenal. It can, for example, remove window reflection from a parquet floor or minimize glare from light fixtures. Remove reflection in the protective glass of a painting, in a display cabinet, or even the reflection of the room itself in a window in the evening.
65. How does a polarizing filter work?
A polarizer works at an angle between the camera, the glare, and the source. Otherwise, the magic won’t work. I already wrote about this in the practical guide #ReflectiveSurfaces
There are also limitations. On metal, the filter is useless. On wide-angle optics, it gives an uneven picture at the corners. Bad polarizers create color distortion of the image or even slight «doubling». On a wide angle on a sunny day, you get a peculiar sky that will have to be redrawn or somehow corrected.
Frame with CPL before and after correction.

The polarizing filter will have maximum effect if the line of sight (marked red below) is perpendicular to the direction of the sun
Another example ?
66. Which filter brands should you keep in mind?
A good polarizer — is an expensive and new polarizer. If all your optics have the same front filter thread size, you’re lucky. But for reference, I’ll name 120 for a 77mm filter. And even in stores there can be counterfeits. However, there’s another topic.
67. Can you put a small polarizing filter between the camera and the lens? Behind the rear element?
No, you can’t. Although there are some lenses that have a thin slot behind the rear element for color gel filters. But. If you contrive and insert a small polarizer between the camera and the lens (right at the rear element), the flange focal distance changes. The optical scheme gets disrupted, and focusing properly becomes impossible. But there’s a nuance.
The company Meike releases special adapters — MK-EFTE-C and MK-EFTZ-C. They are designed for mounting old DSLR lenses (Canon EF and Nikon F) on modern mirrorless mounts. And right in these adapters, there’s a slot for a small polarizer and ND filter.
Such an adapter with built-in polarizer and ND filter will cost about $150 and will work with all old lenses. I work like this myself — it’s very cool.
Note: Tamron lenses with EF mount through this adapter on some Sony cameras may behave less than ideally. But the possibility of using the built-in polarizer personally won me over.
With CPL and without
68. Do you need to use additional light (your own equipment) in interiors?
In my opinion, your own light is the last option, when natural light is insufficient or you need to emphasize a detail.
?Some magazines consider shooting with additional lighting unacceptable and may «reject» worthy material.
Add honestly: magazines can reject any material if it’s not paid for, or any other reason. In one case they might say — HDR, in another «we see additional light here», but the essence may be simpler. All free spots are already planned. Speaking from experience working in magazines.
A separate issue is that there are fewer and fewer magazines in Russia, and who reads them — I already don’t know. More and more work is done for websites and catalogs, and the request there sounds: «Make it honest and beautiful», and how — the photographer decides.
Light from a window, correctly balanced with interior lighting, gives the most natural result. Additional light should be used very thoughtfully.
69. How can an additional light source help? What methods and techniques are there?
First of all, I’ll say directly that a beginner photographer is unlikely to be trusted to shoot an expensive designer project for reasonable reasons — much effort is invested in the project and it needs to be presented at a high level. A beginner photographer must become a professional, achieving the best quality on «simple» objects. I’ll show such ones.
 ? Lighting a budget apartment frame with flash.
If the shot was taken only with lighting from the window, note the change in lighting color with distance from the window. Similarly, if you light the frame with a flash from the camera, the flash light intensity will fall off as the square of the distance. That is, you need to account for this and maybe even make several flash shots with different intensities.


Note how much was removed in retouching, besides the direct work with light). Is this apartment worth such effort? The client has already sold more than one property with my photos. Apparently, the advantages really exist.
? Lighting a bar hall with video light can be seen a bit above ( ↴ ). Besides lighting the chairs, work was done to reveal the specific light of the bar counter, correction of trapezoidal distortion (shot from above), drawing edges.
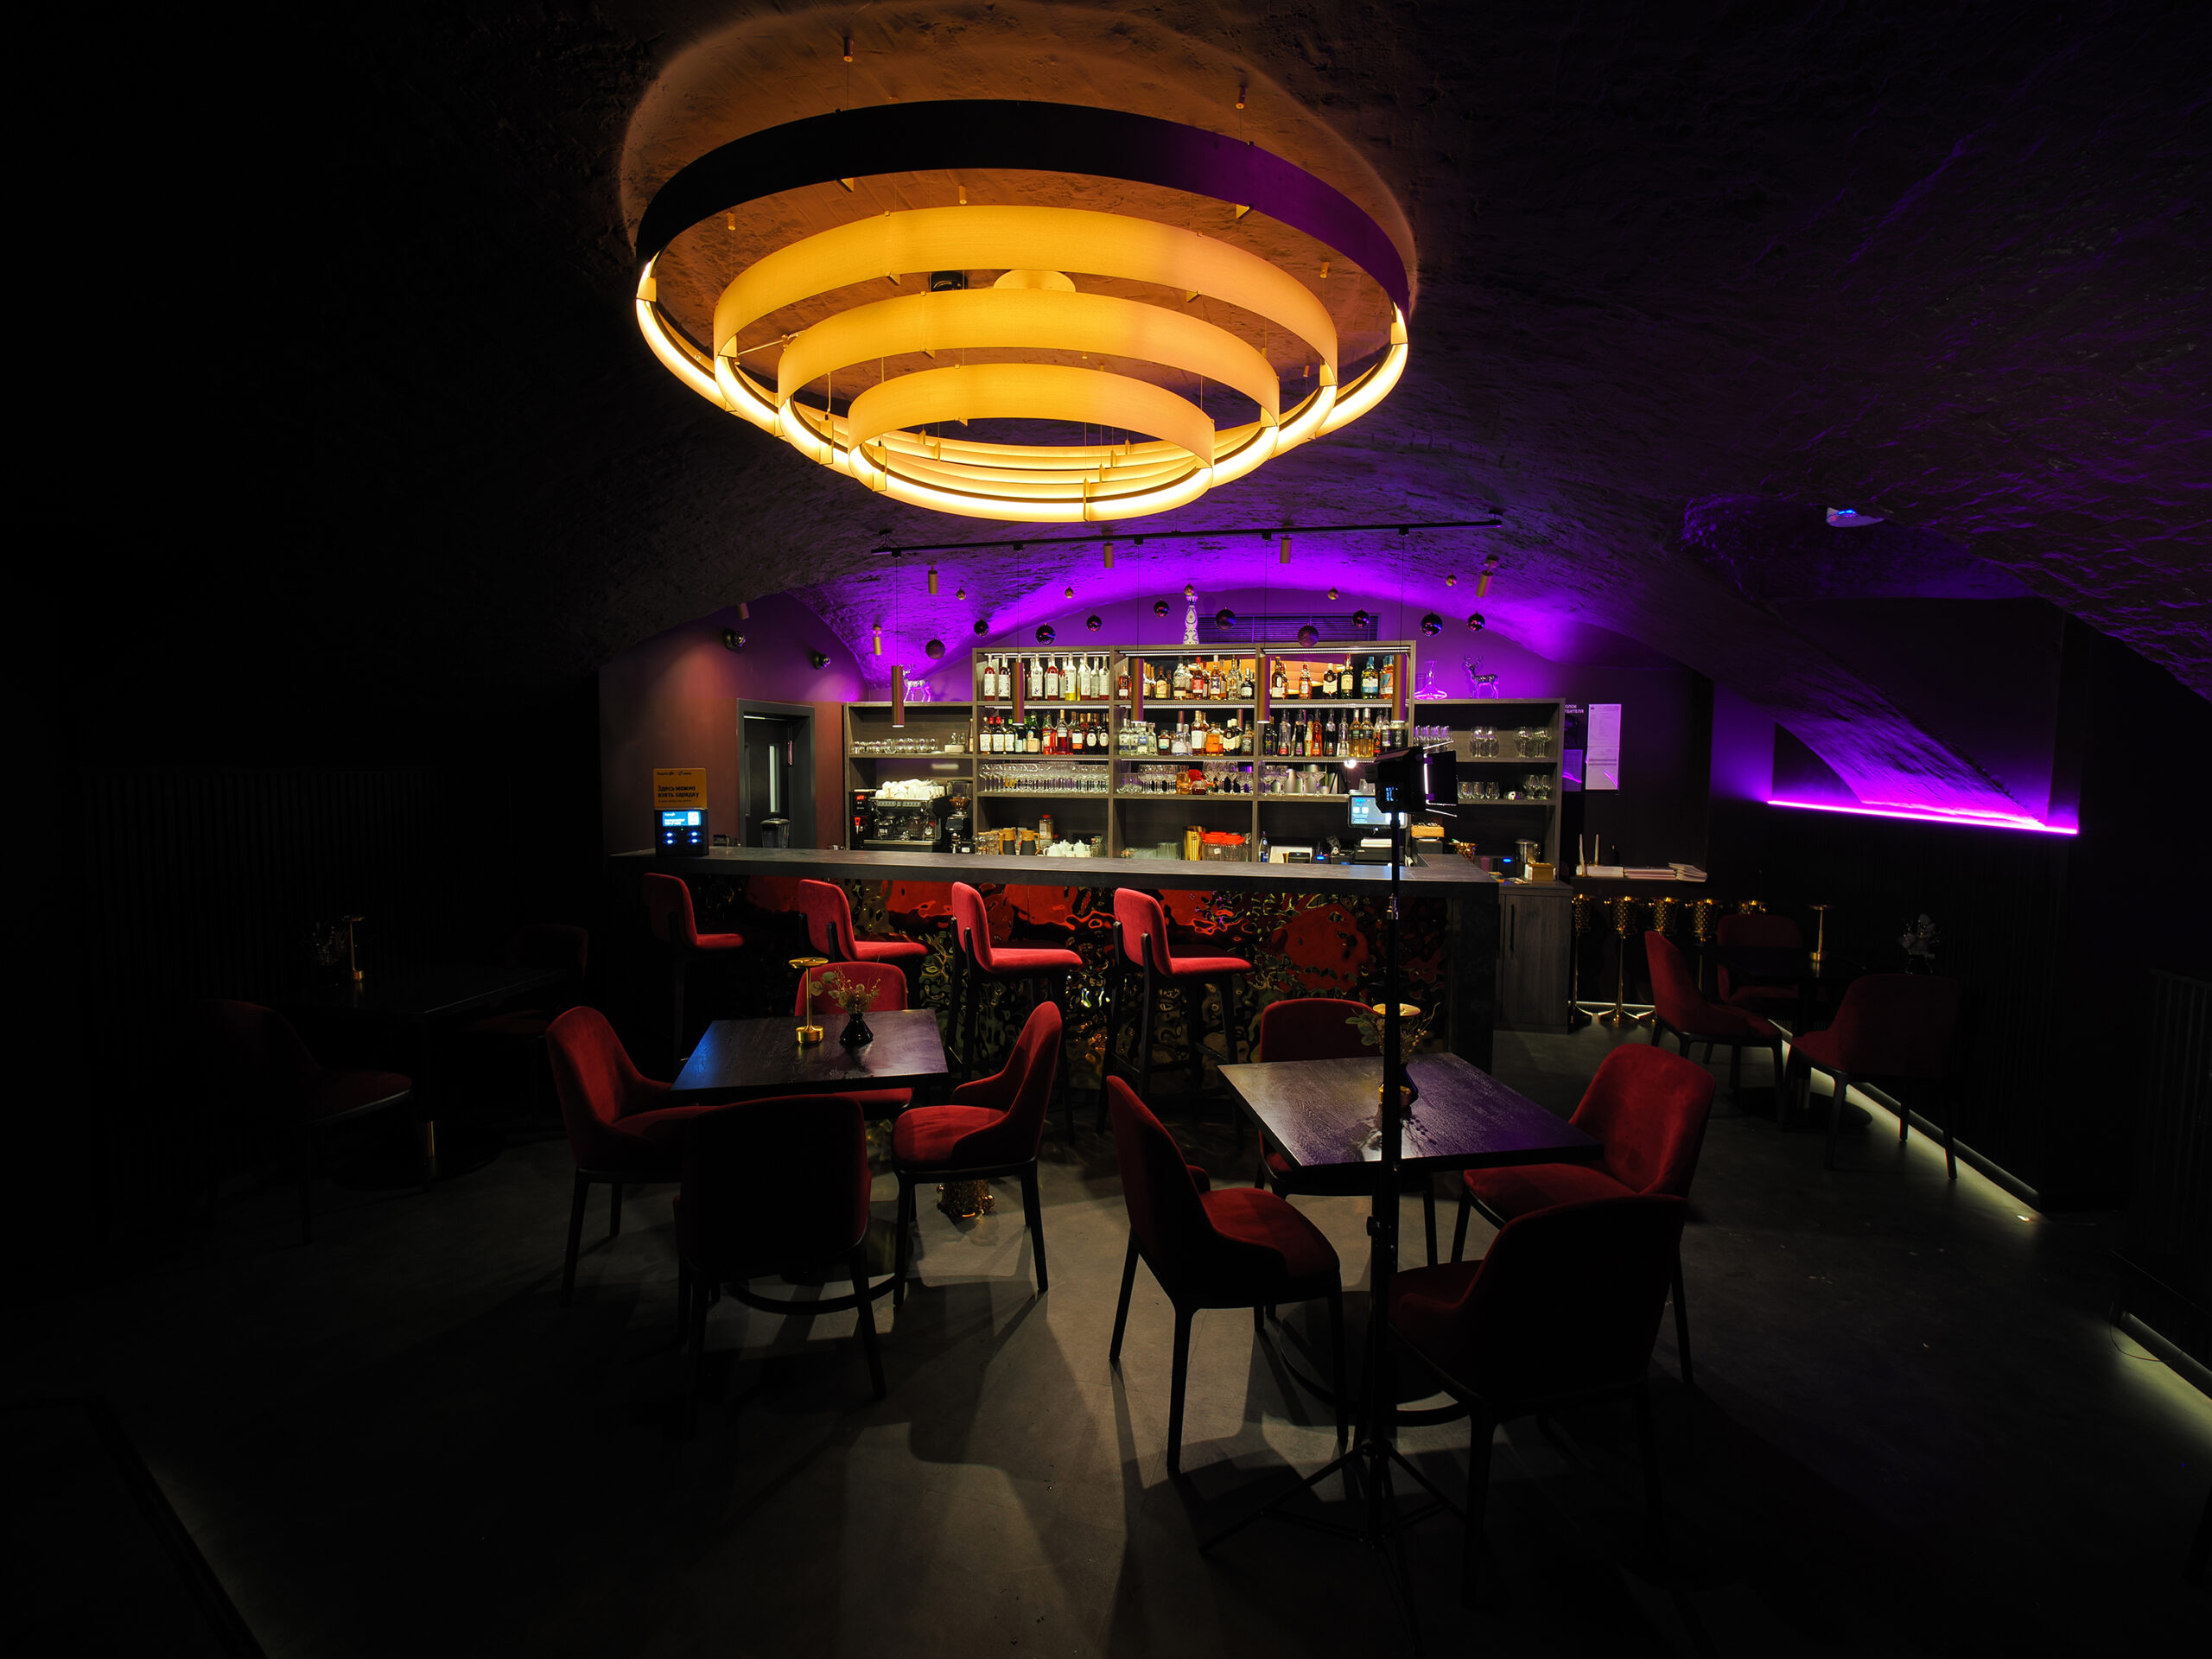
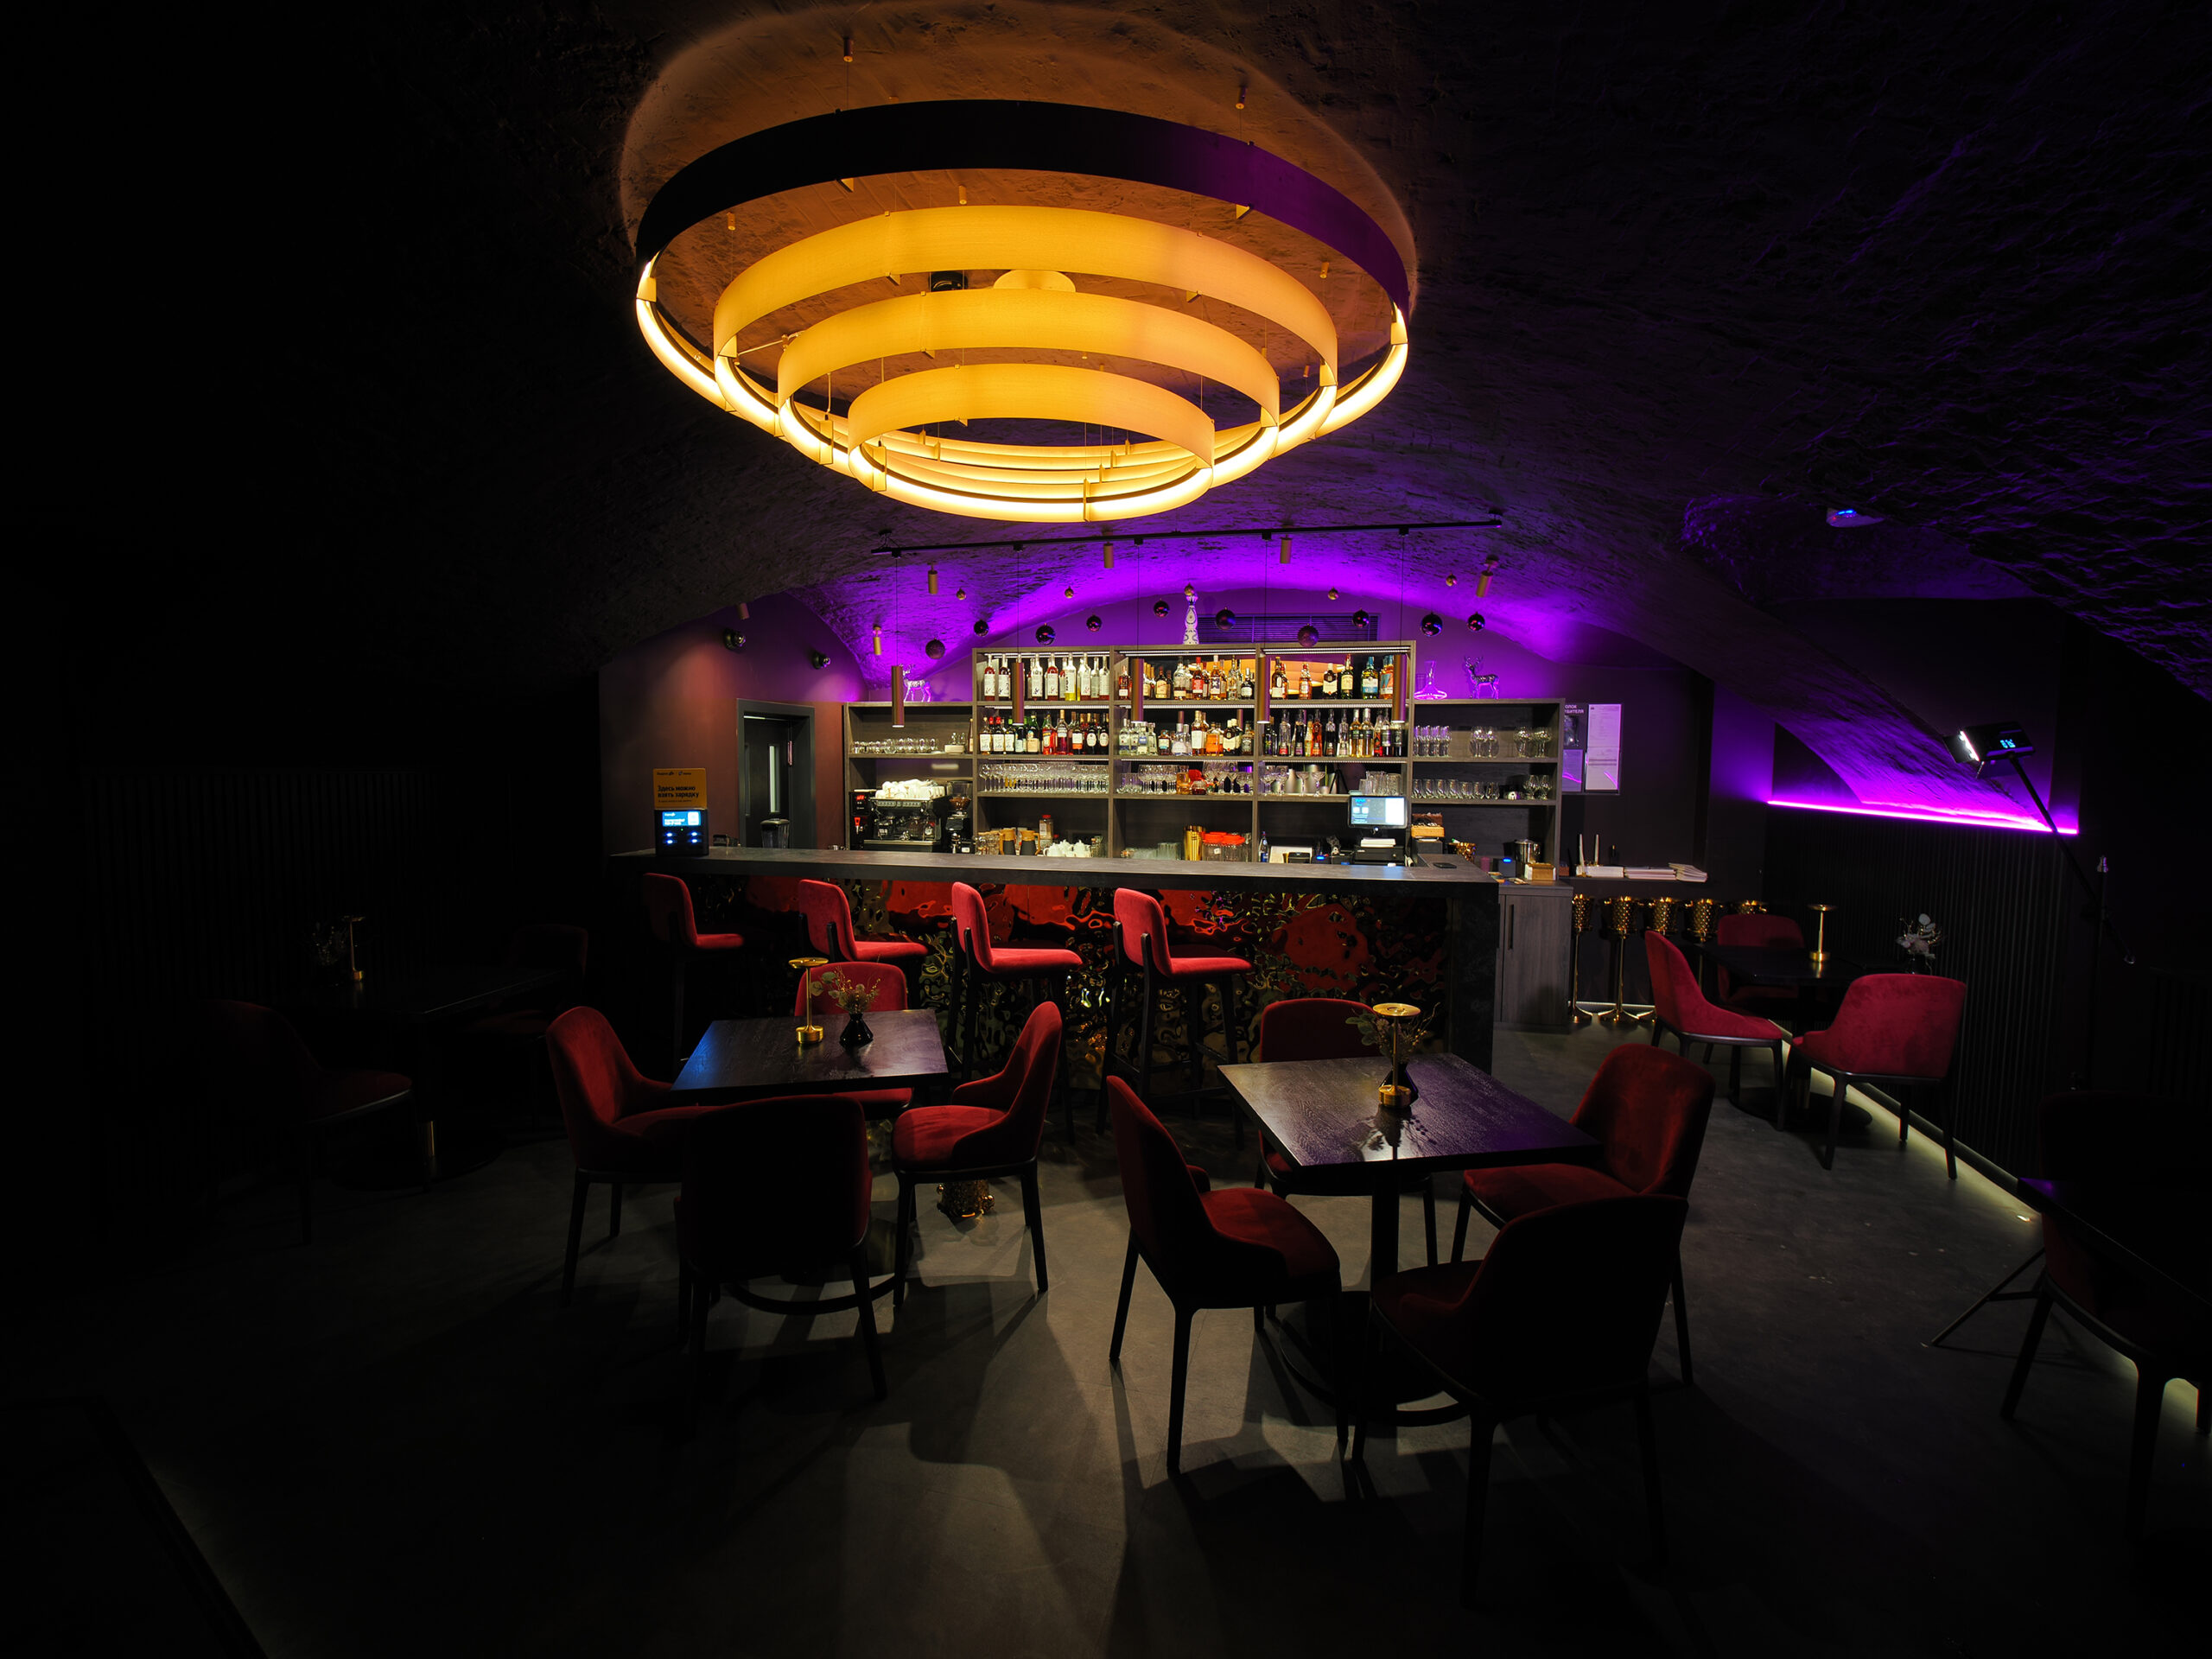
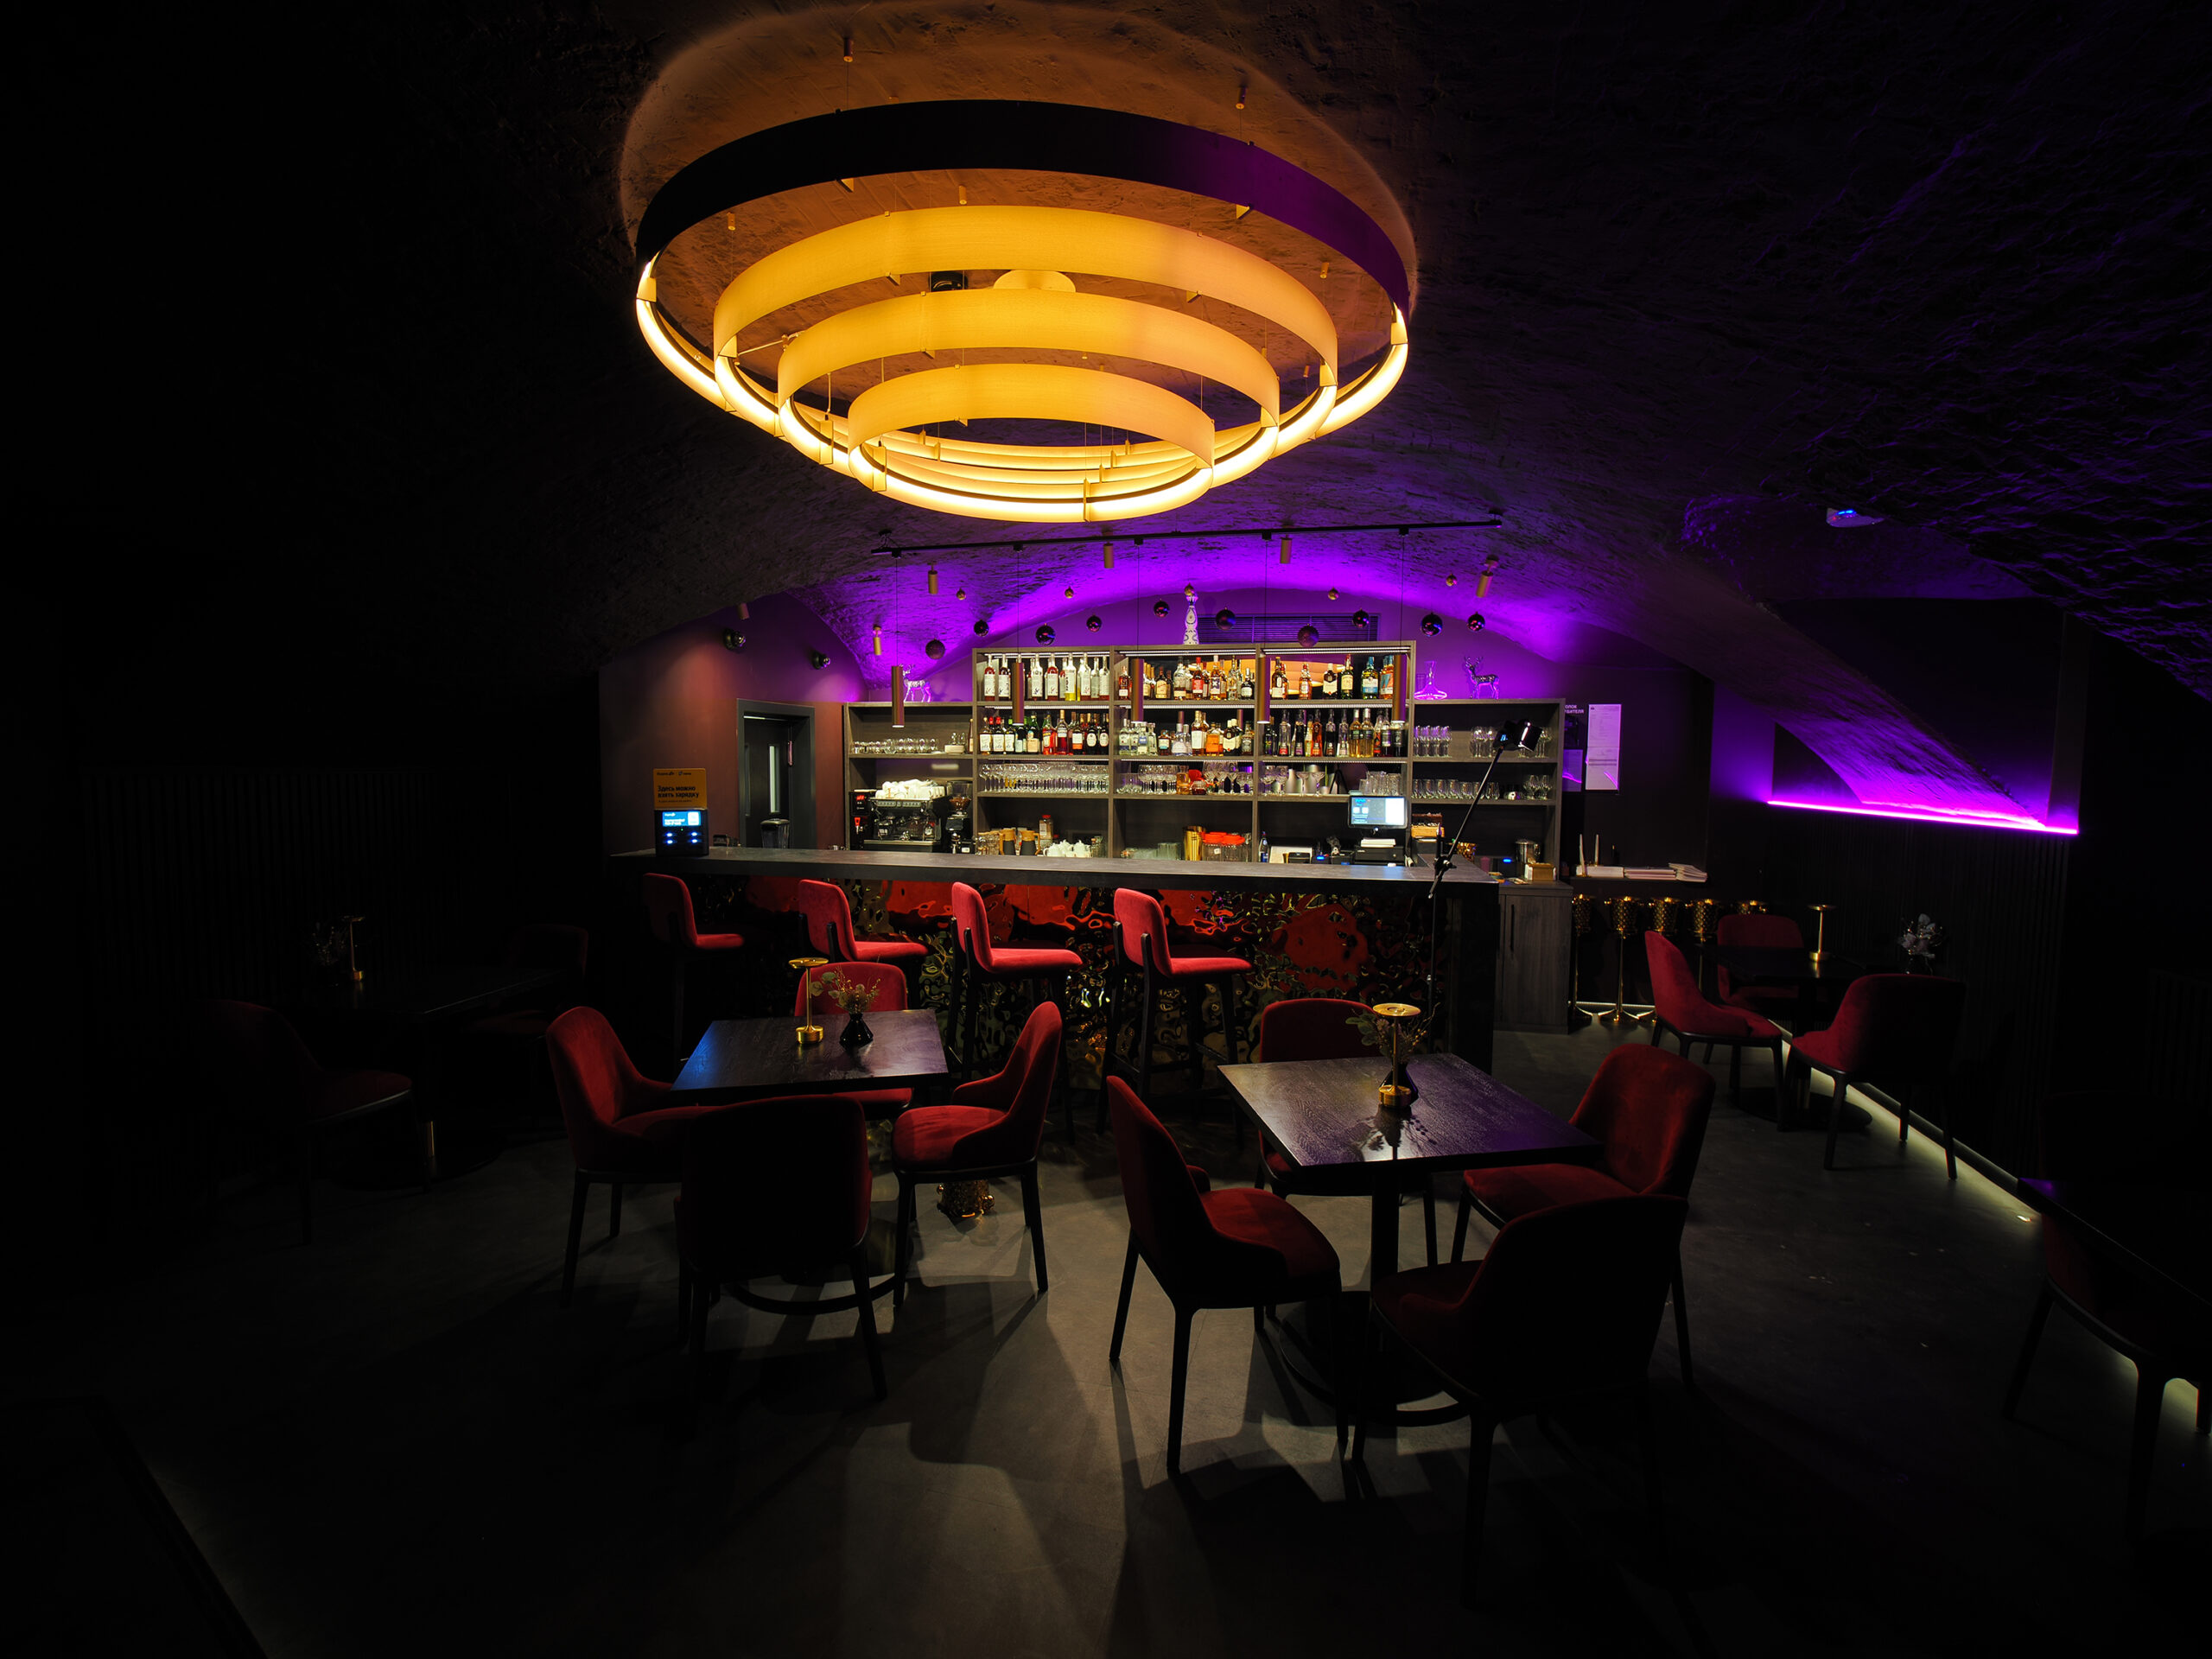

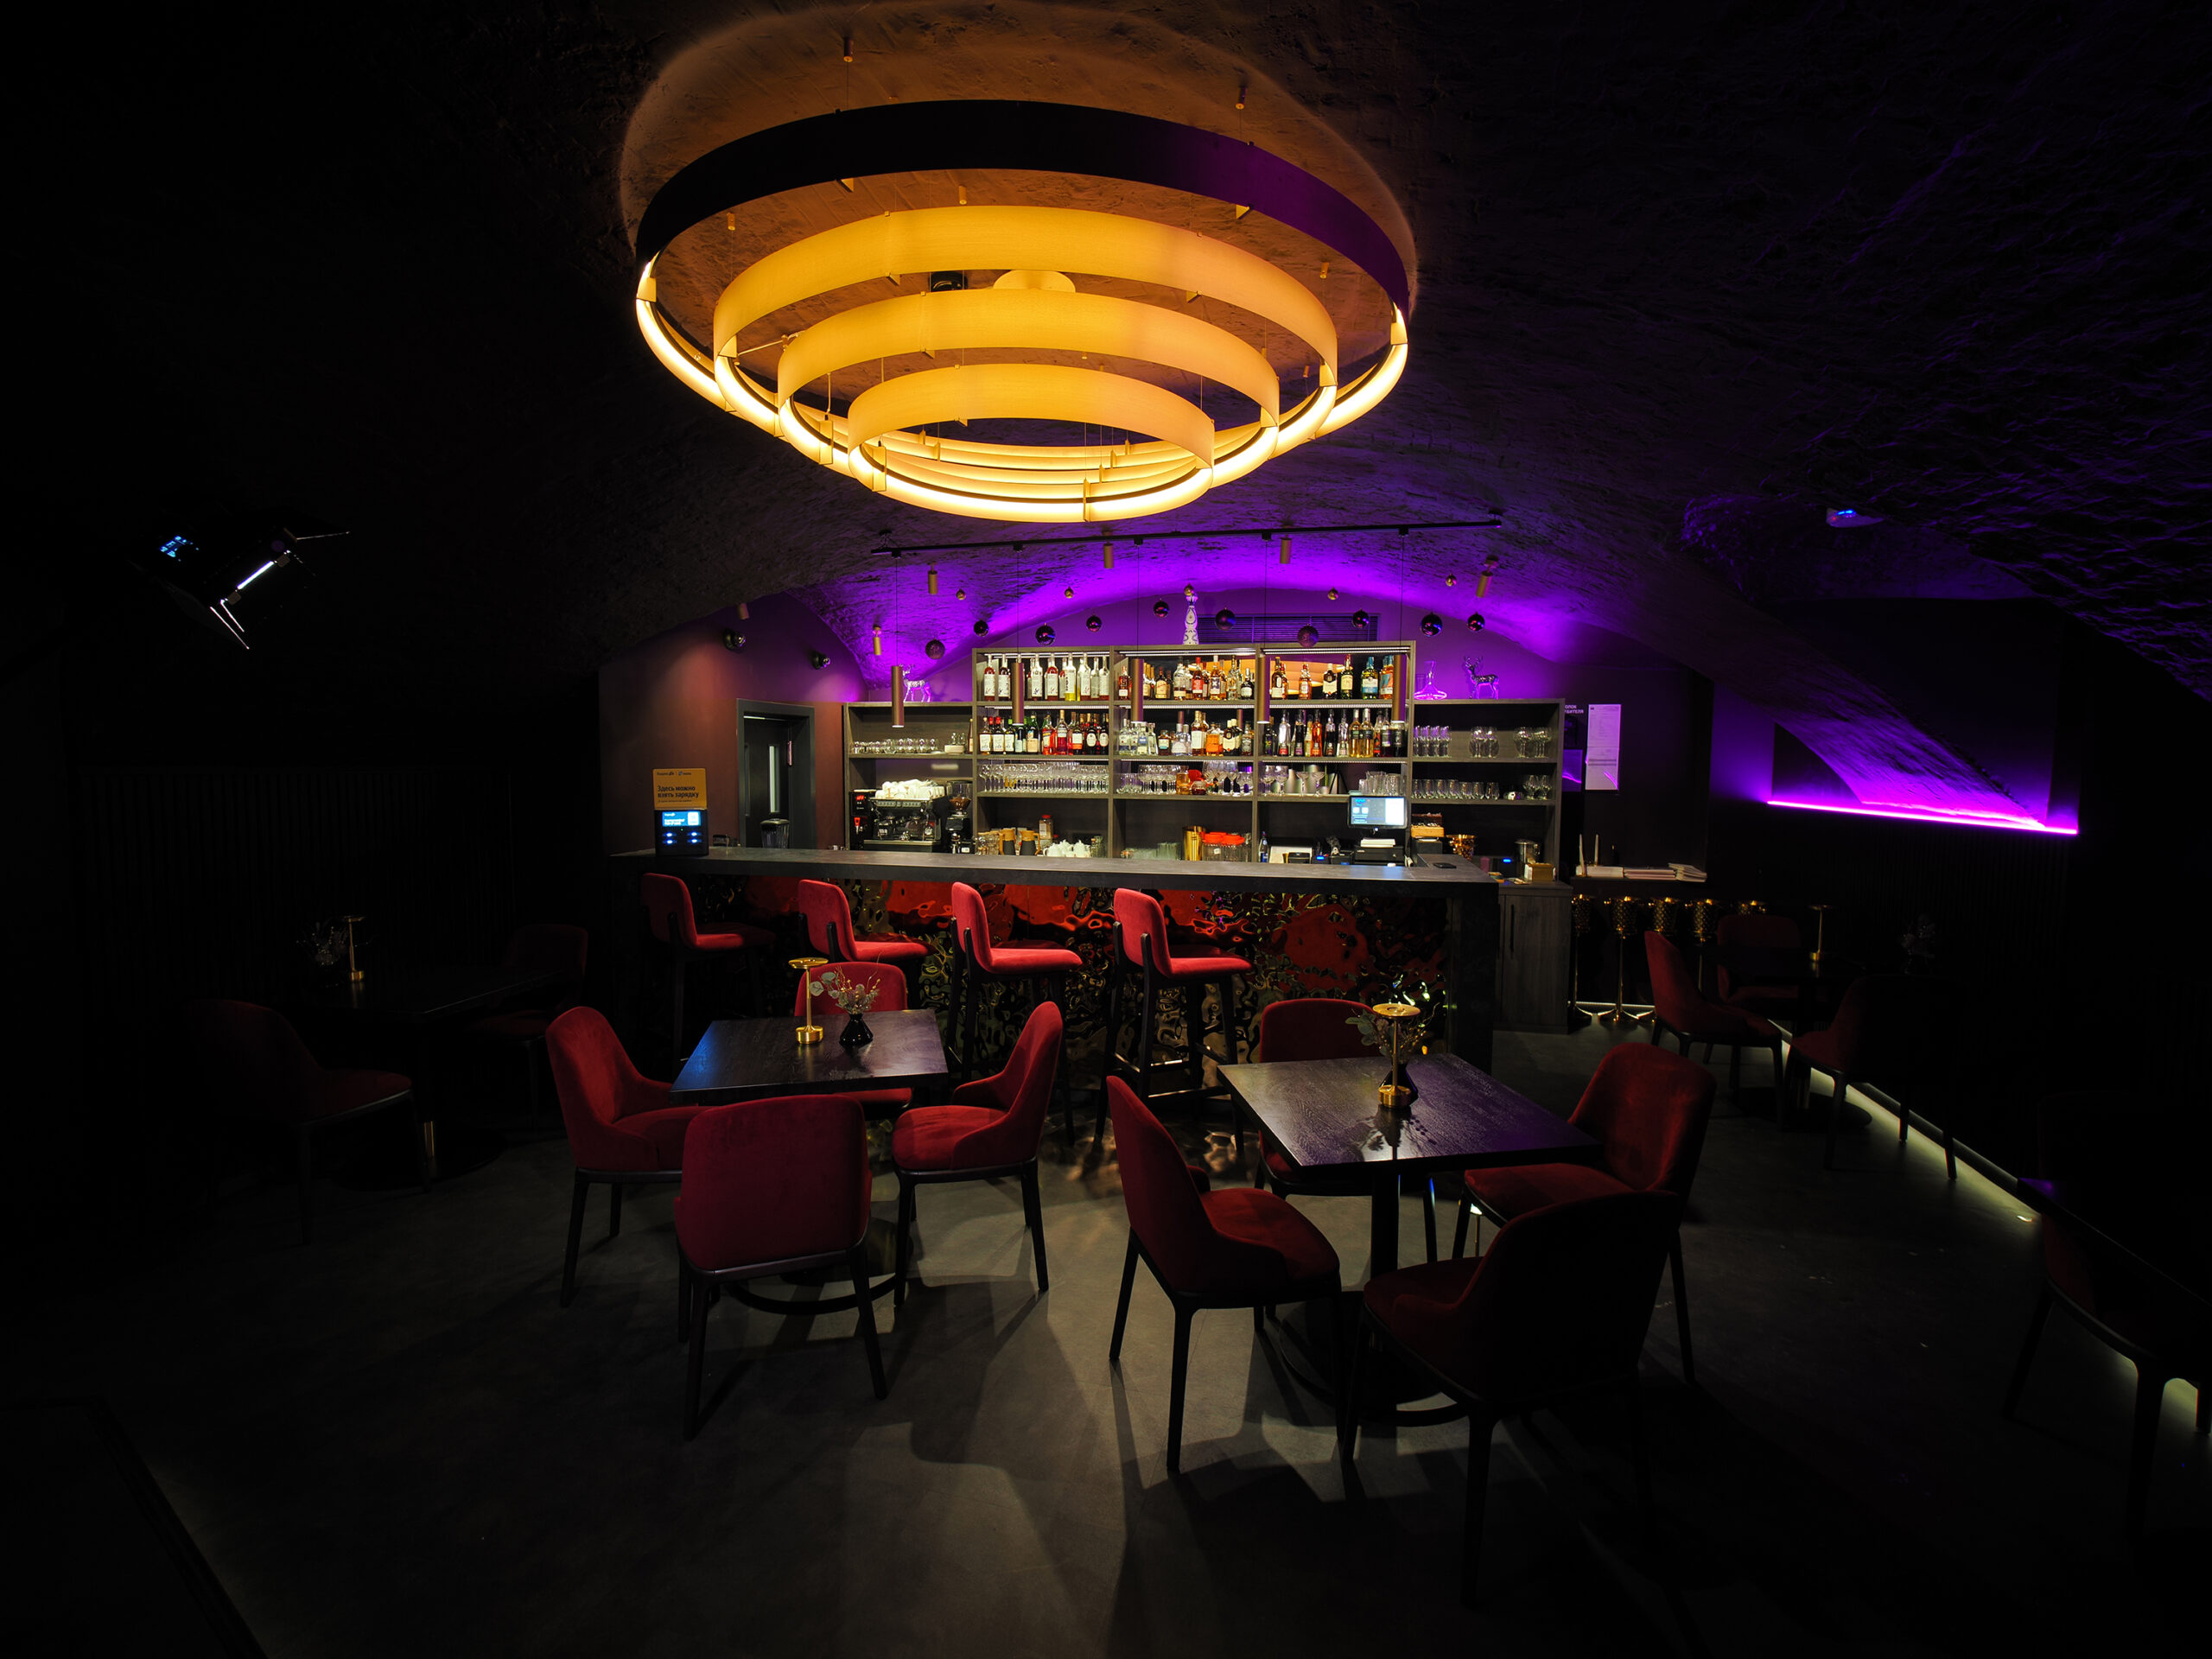

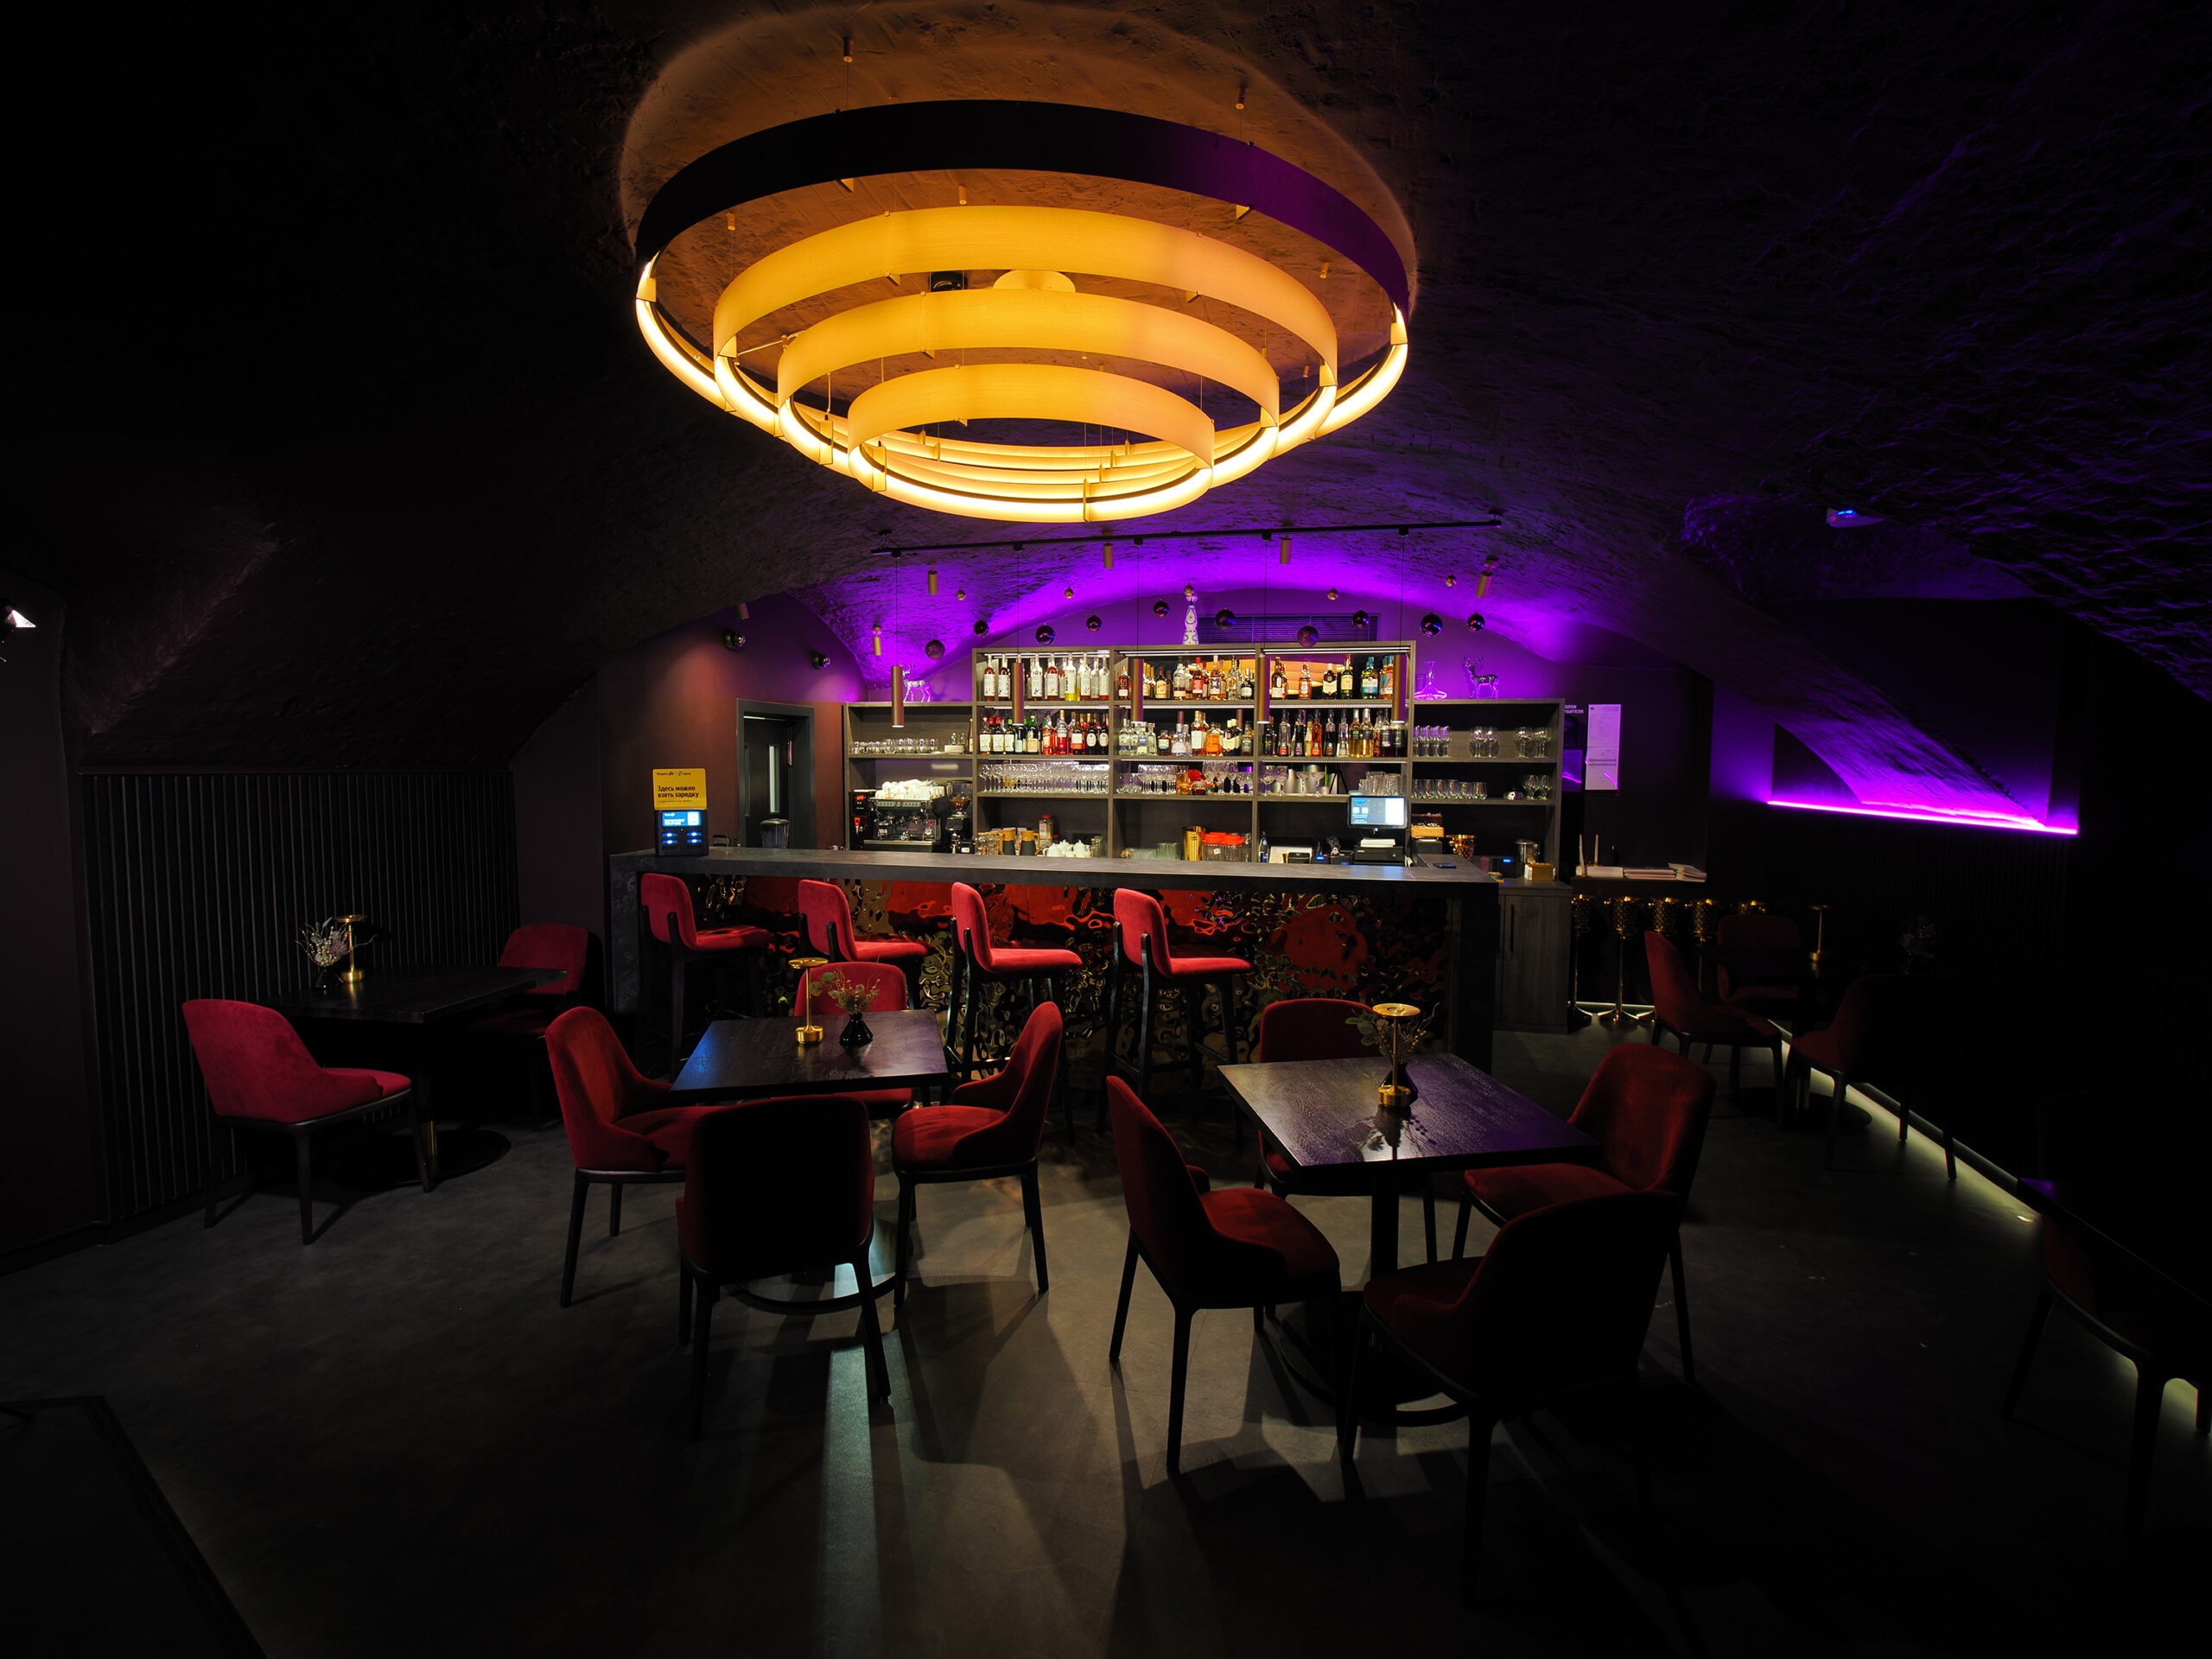
7 photographs taken with additional lighting for the result.
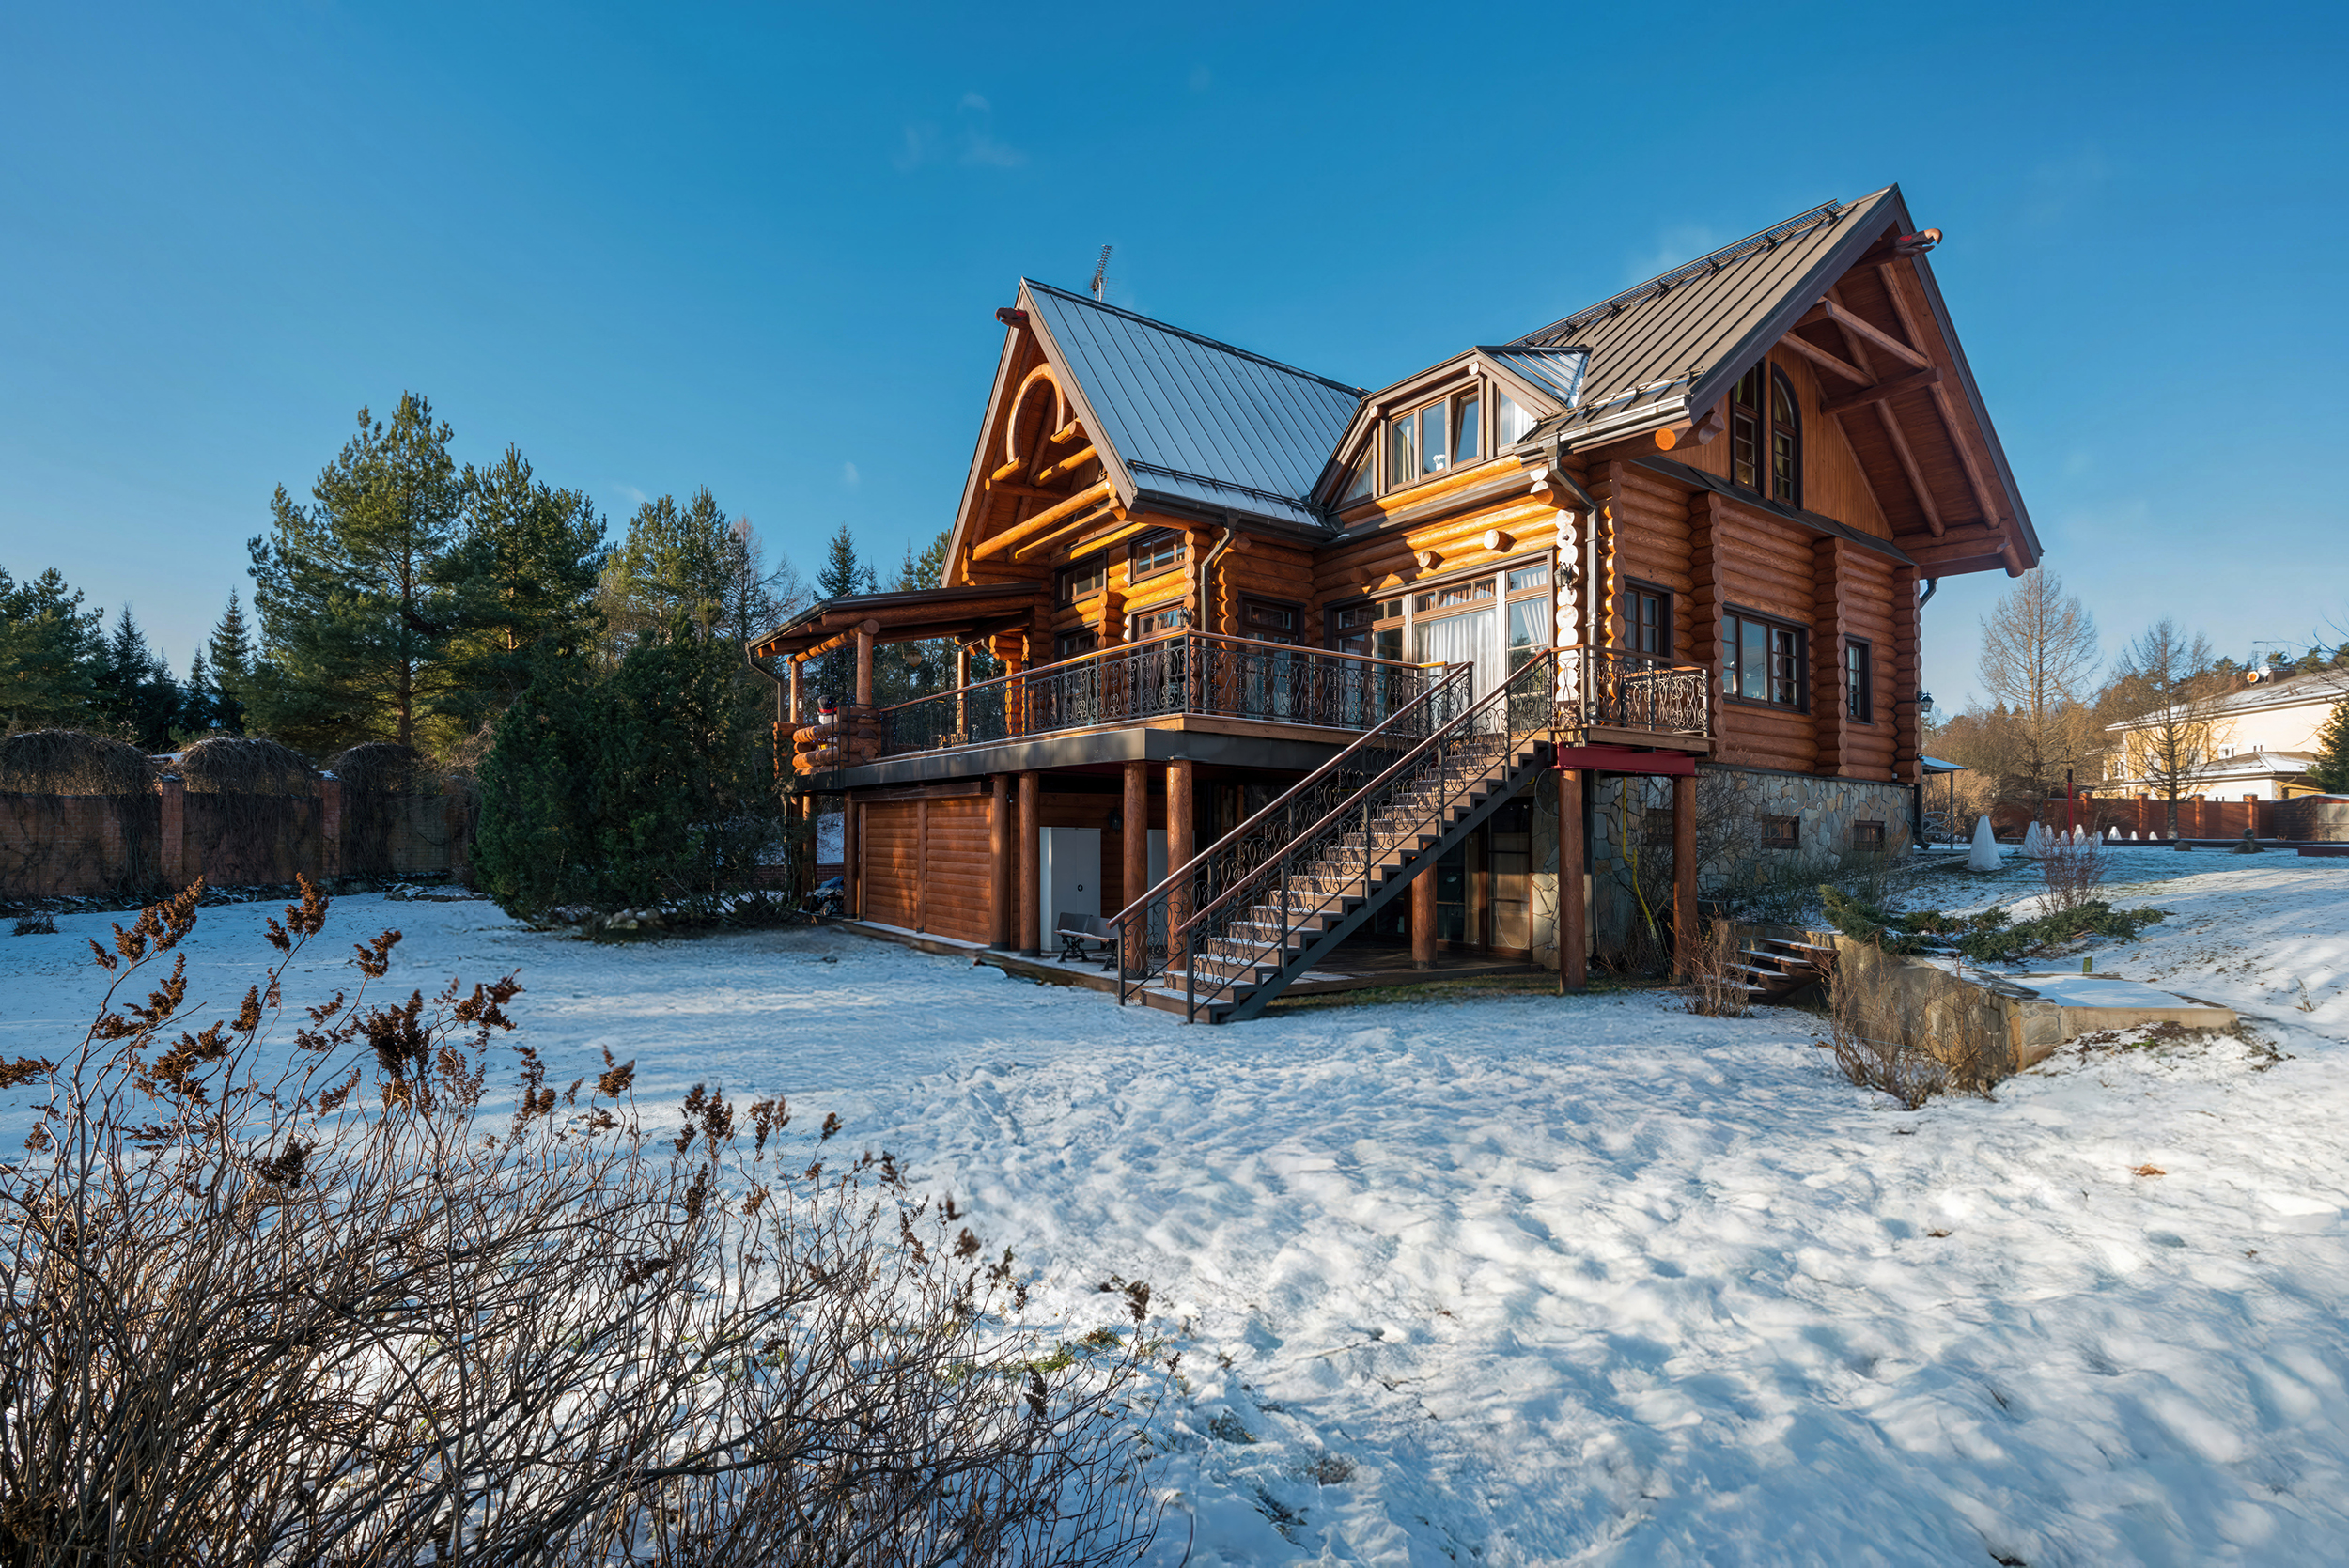
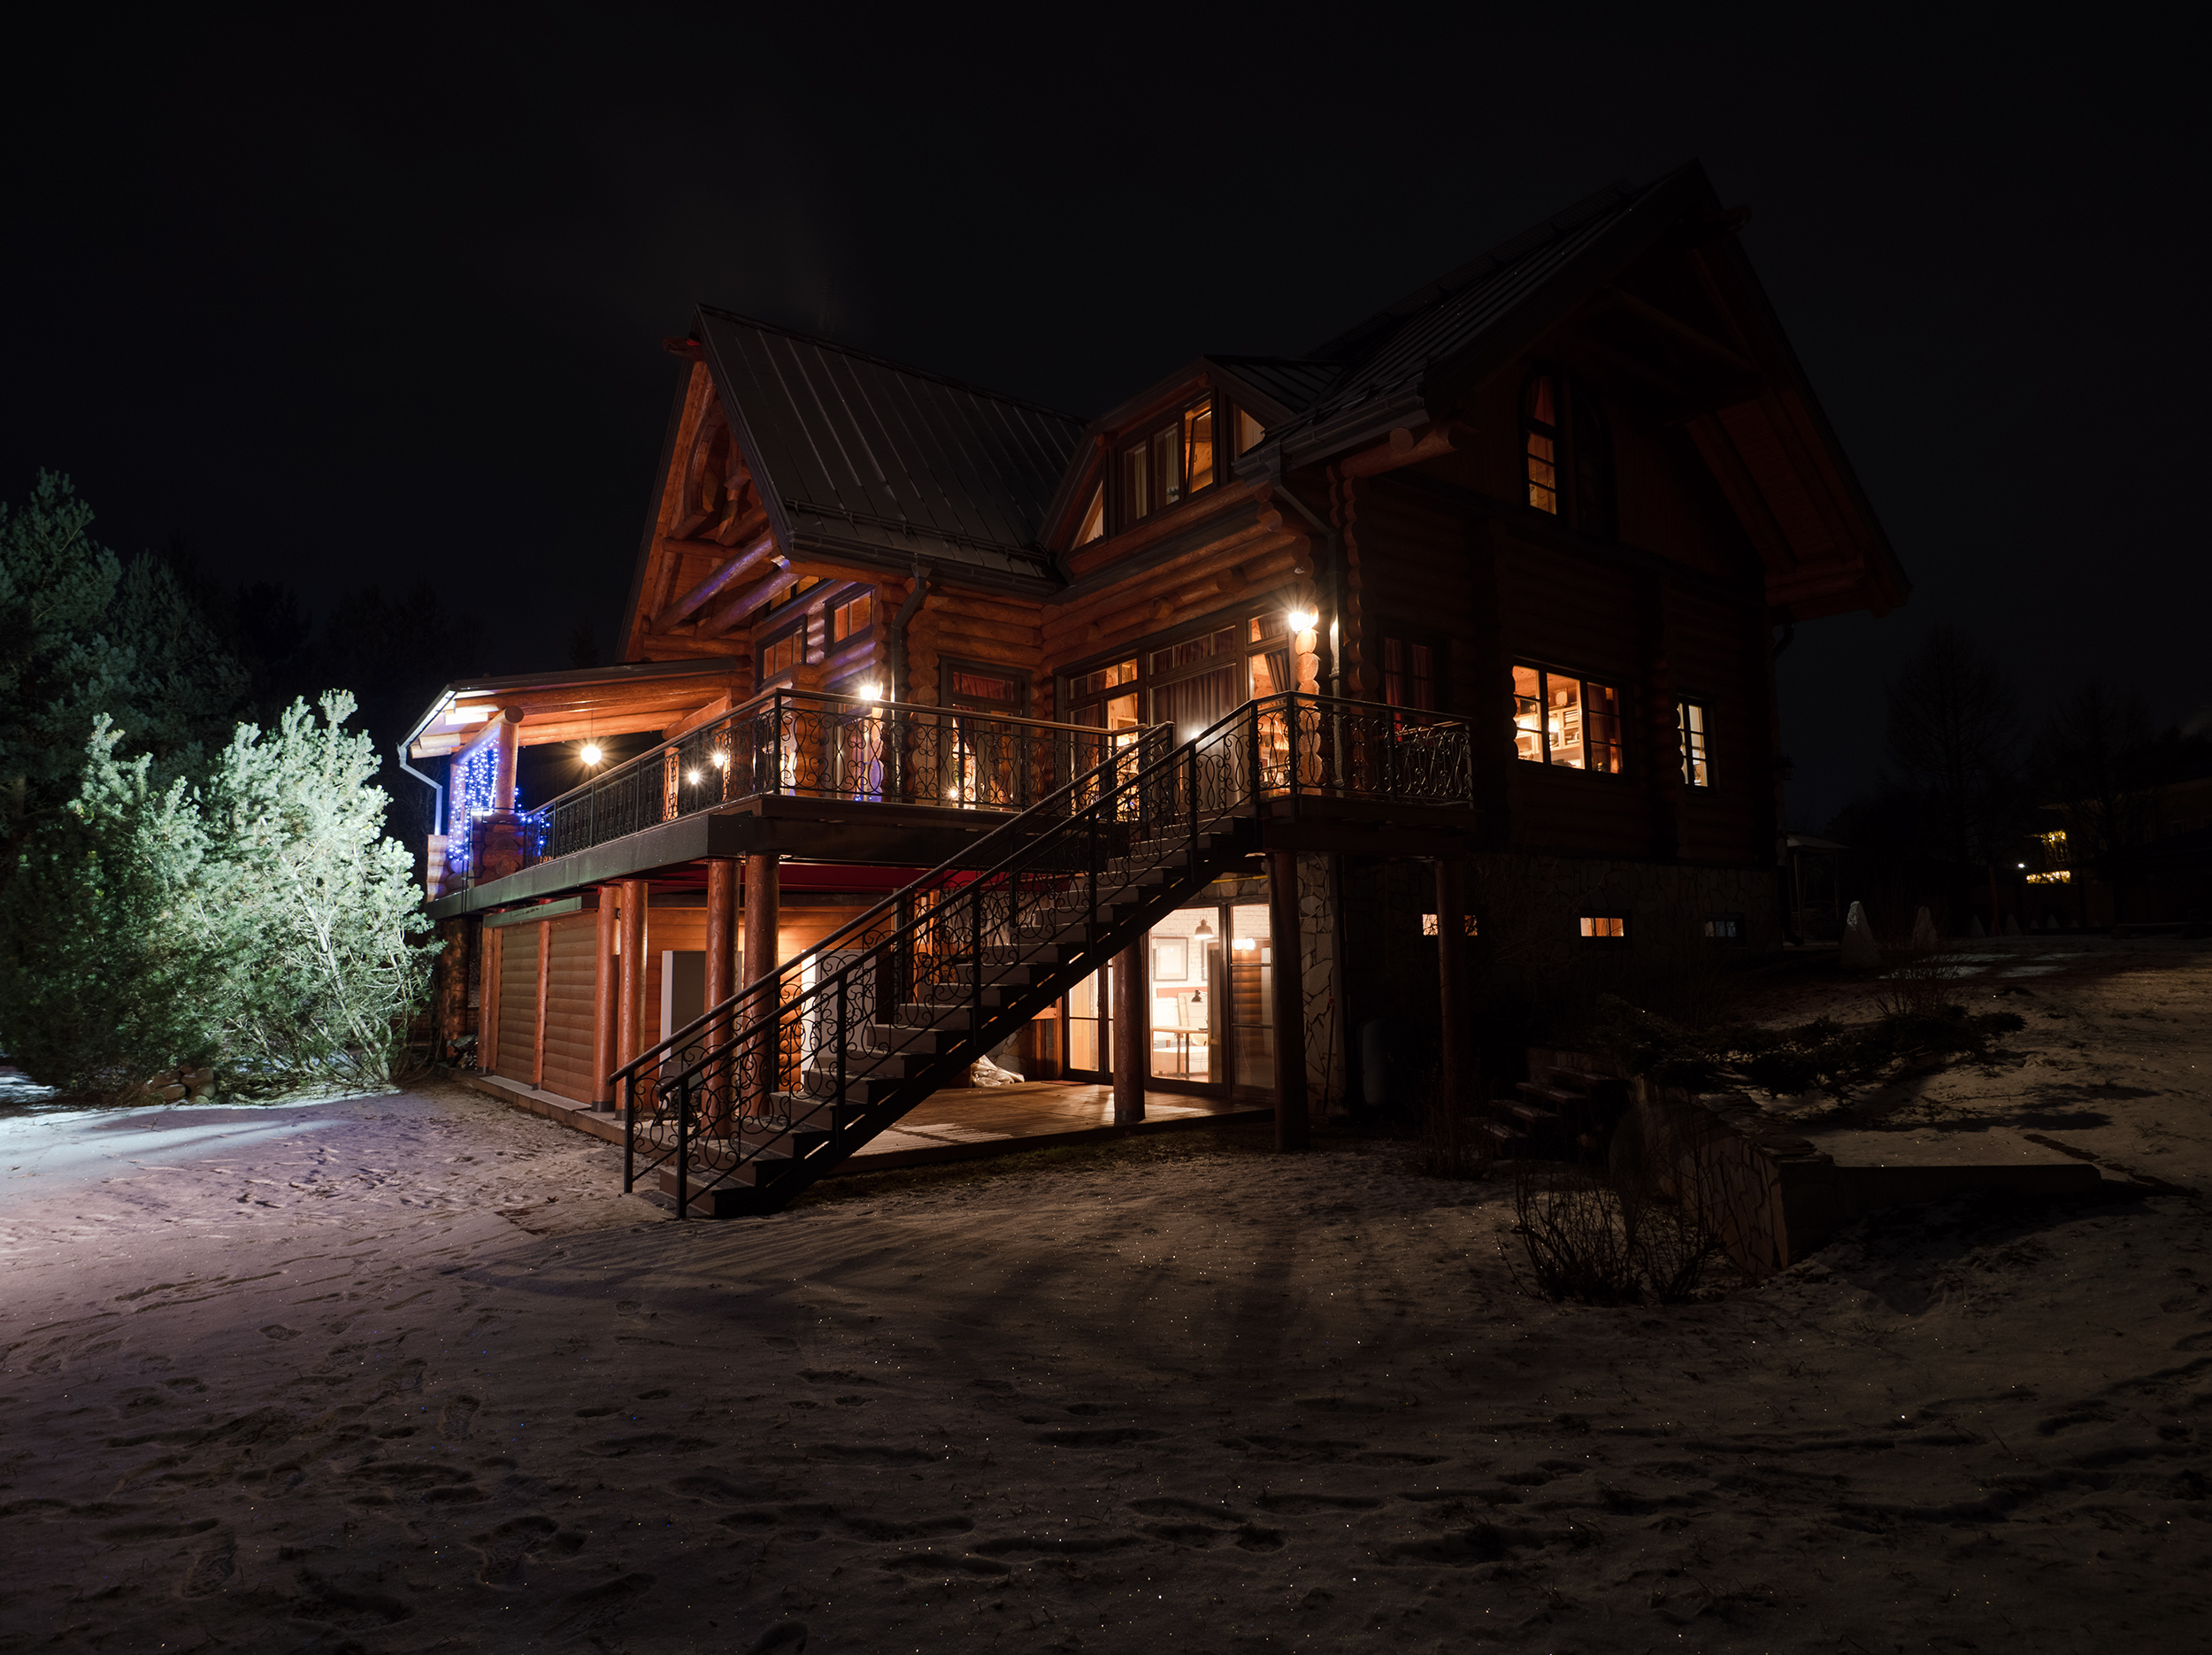
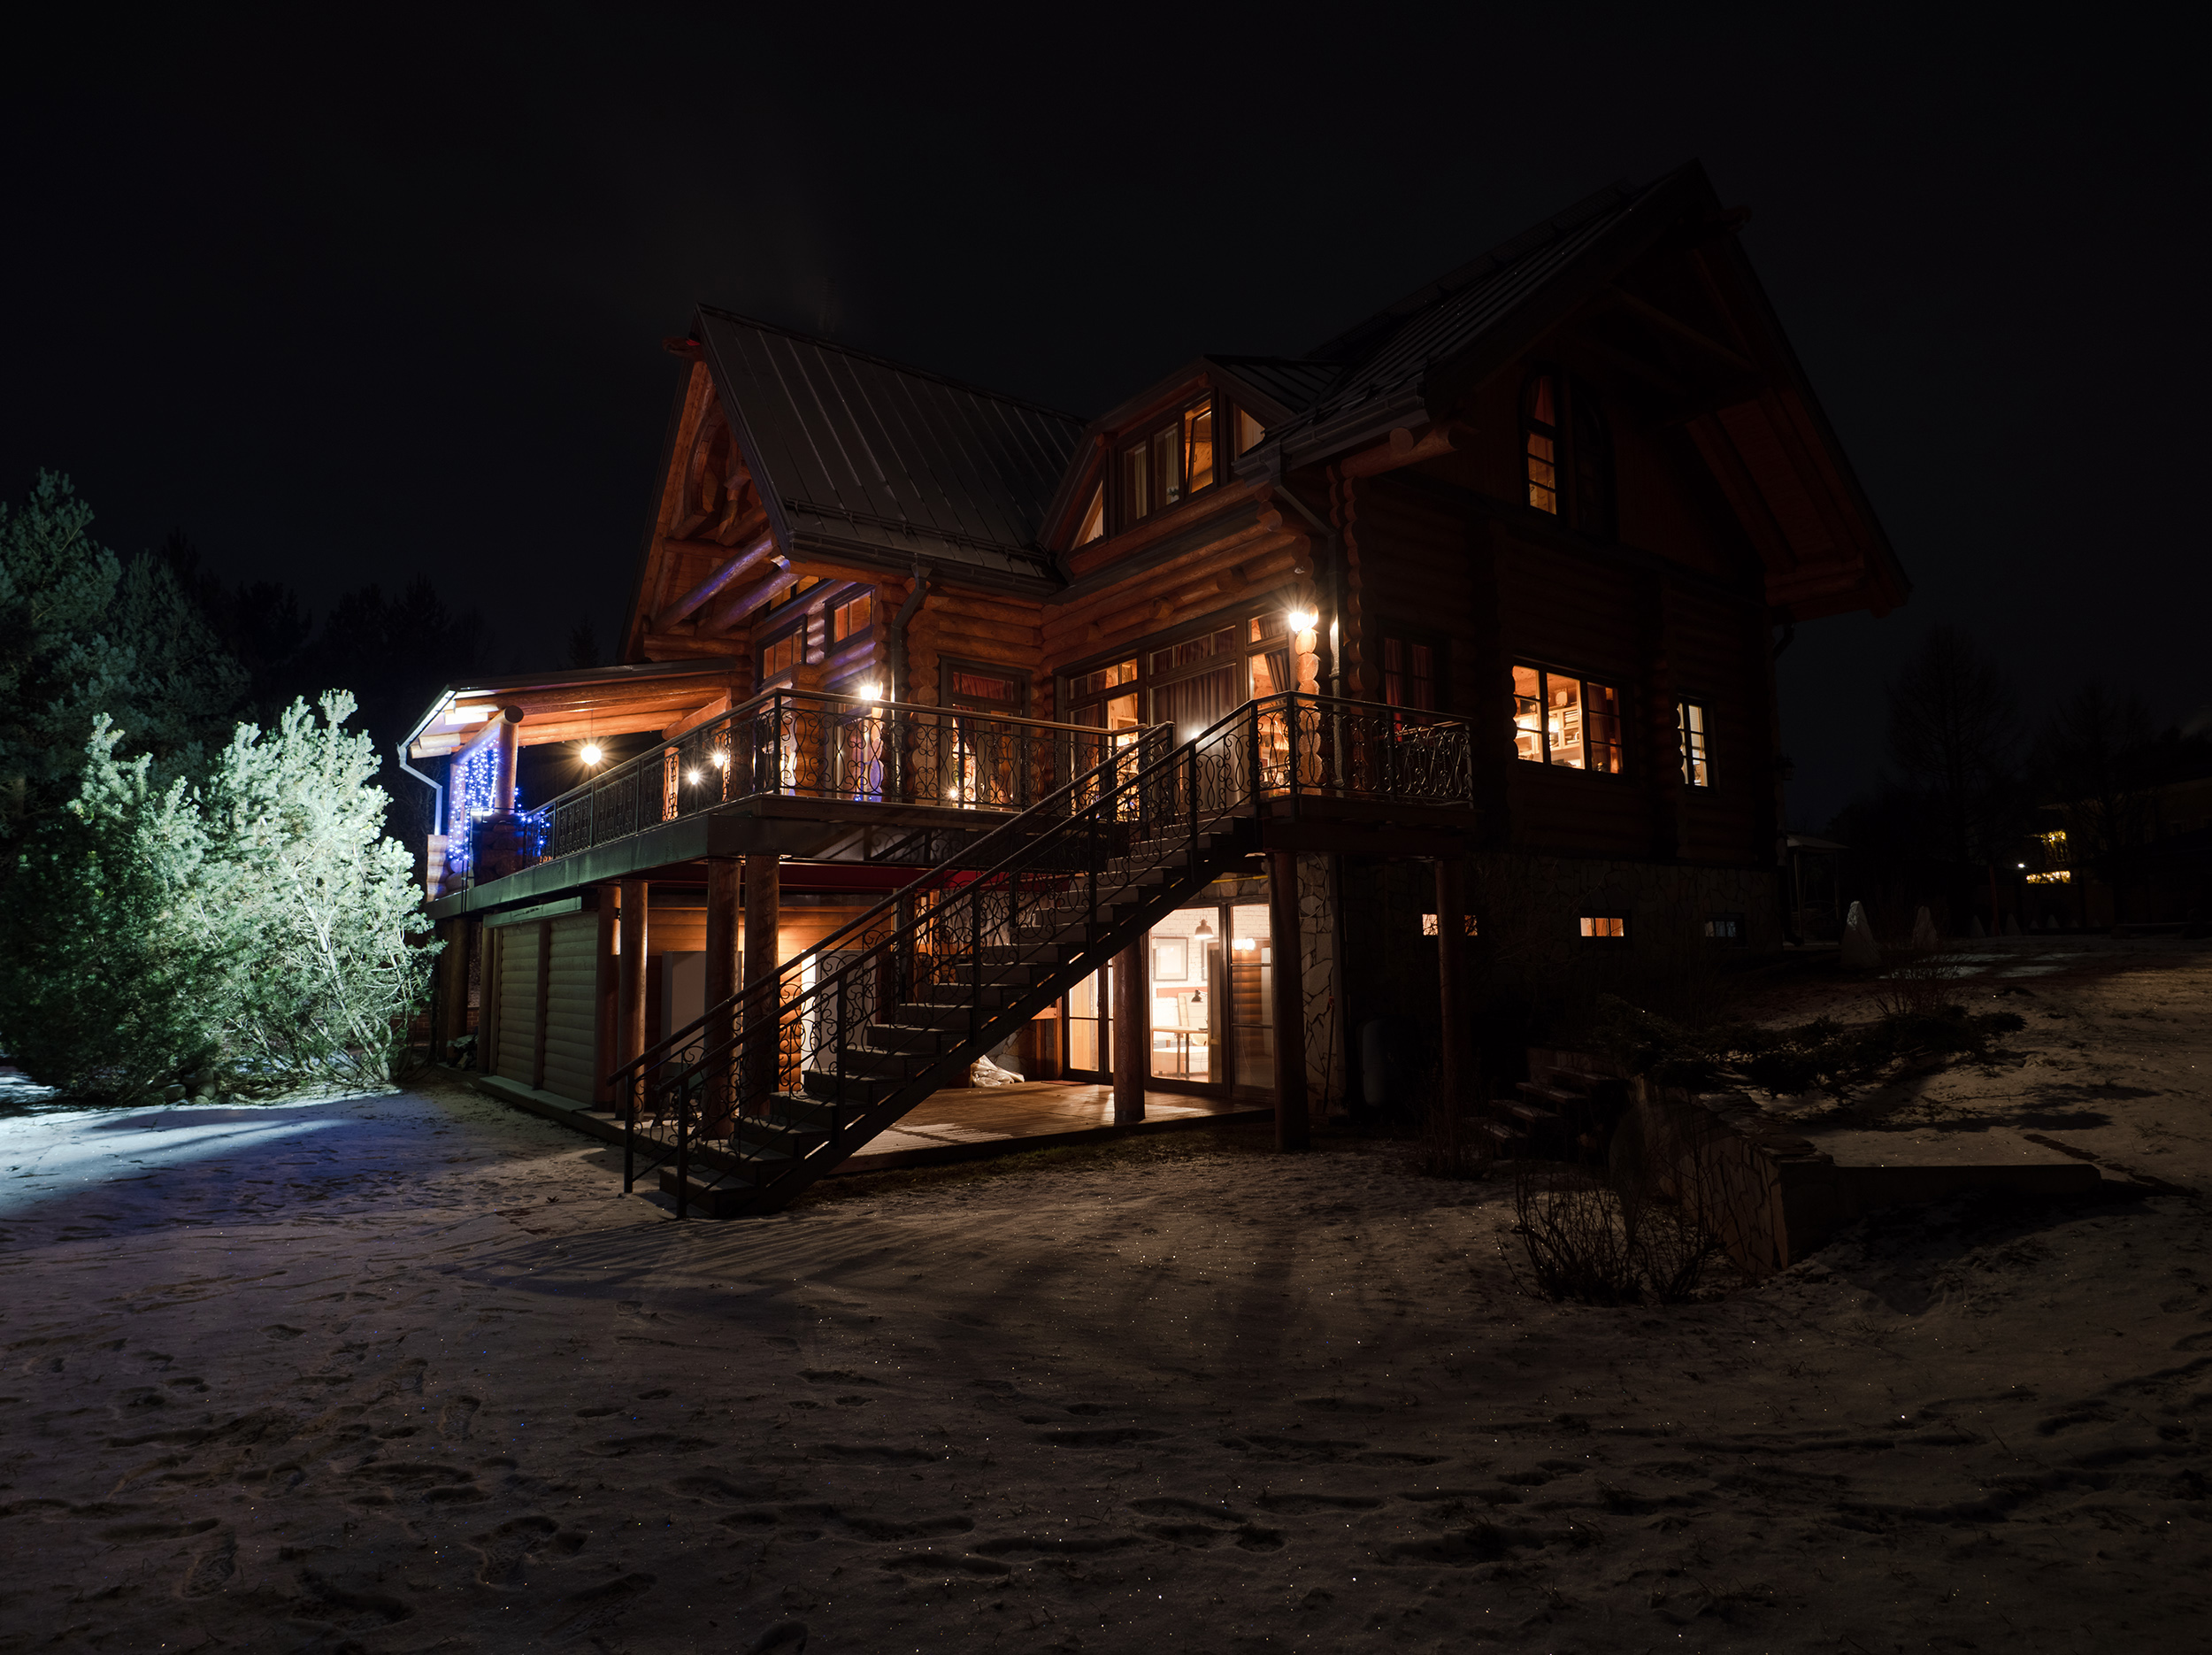
And that’s not all. Below there’s an example of a lit country house (?).
70. What equipment is convenient to use for lighting interiors?
First of all, there are flashes, which come in the form of a monolight or an on-camera flash. There are also continuous light sources, which will be in the video section.
Flashes are convenient because their tubes give clean color. There are studio monolights powered from the mains, and there are battery systems. Studio monolights are common among photographers who get to the location by personal transport, as almost everyone in the USA. In Russia, the situation is different, and compact devices are more widespread, although among studio options there are more powerful models. They might be needed to «overpower» strong natural light on a sunny day. However, we don’t have as many sunny days as in Texas.
? Hint. Among flashes, there are models with adjustable color temperature. For example, Godox Witstro AD200ProII or Profoto B10. For a photographer, this is simply wonderful. But there aren’t many such models, and they belong to the upper price range. But if you are a completely poor and beginning genius photographer, then buy for a couple of handfuls of coins a flash for an E27 socket at 45J. Some can be adjusted. Or you can simply limit the flash power with black electrical tape. Minus — mains powered.
So, pros of flashes: precise color, possibility of batteries and color temperature adjustment on some models.
? From experience. I always take one on-camera flash Godox Ving V860IIO TTL with a remote sync trigger. Although it’s for Olympus/Panasonic in «M» mode, it’s suitable for other systems. I use it very rarely. Color temperature is not adjustable. By the way, I’ve never even felt I needed it (thought while writing the text). For on-camera flashes, there are filter attachments for color and color temperature correction. Didn’t «click» for me.
71. What parameters to look at when choosing flashes? Which features are critical?
For many genres, recycle speed is quite important — for burst shooting, minimum flash duration — for the ability to freeze motion without blur, and, of course, the power (energy) of the pulse. To all this, add what’s already said — battery power and color temperature adjustment. Of course, you can take any studio monolight and power it from a generator. Everything can be done. But what’s convenient — you decide.
72. What attachments help in an interior photo session? Which light modifiers are the most needed?

 As for me, I use: a sheet of white cardboard, a sheet of black cardboard rolled into a tube as a snoot (for directional ceiling bounce or other place) and a collapsible 85cm beauty dish with Bowens mount. I use the beauty dish to create a flat shot with correct colors of objects, which is then combined with exposure bracketed shots.
Many use a collapsible softbox in lantern style. Didn’t «click» for me. I understand a beauty dish better.
73. What’s the difference between flashes and video light for lighting interiors?
Power. Flashes give a powerful pulse, but if suddenly the desire to shoot video comes, they are unsuitable. At the same time, video light is much less powerful. To overpower sunny window light with it won’t be easy. Although, if you bring the light close and make several shots, lighting different areas, then «soldier’s ingenuity» will win. But that’s also not an instant move and requires «wit and resourcefulness».
Color. Flashes give clean color. But with video it’s different. Many lighting instruments for video in the budget segment don’t give «accurate color» because the LEDs are so-so.
This is expressed in a dip in the red range.
? From experience. Lighting an interior with your own LED device is convenient. Power and color temperature adjustment is on almost every device. But working with daylight may show that the source goes into green, or shifts into magenta, no matter how you adjust it. And this could well be a «known brand». For some devices, the manufacturer supplied a pinkish filter in the kit.
But for shooting evening interiors or the exterior of a country private house, this point is almost unimportant.
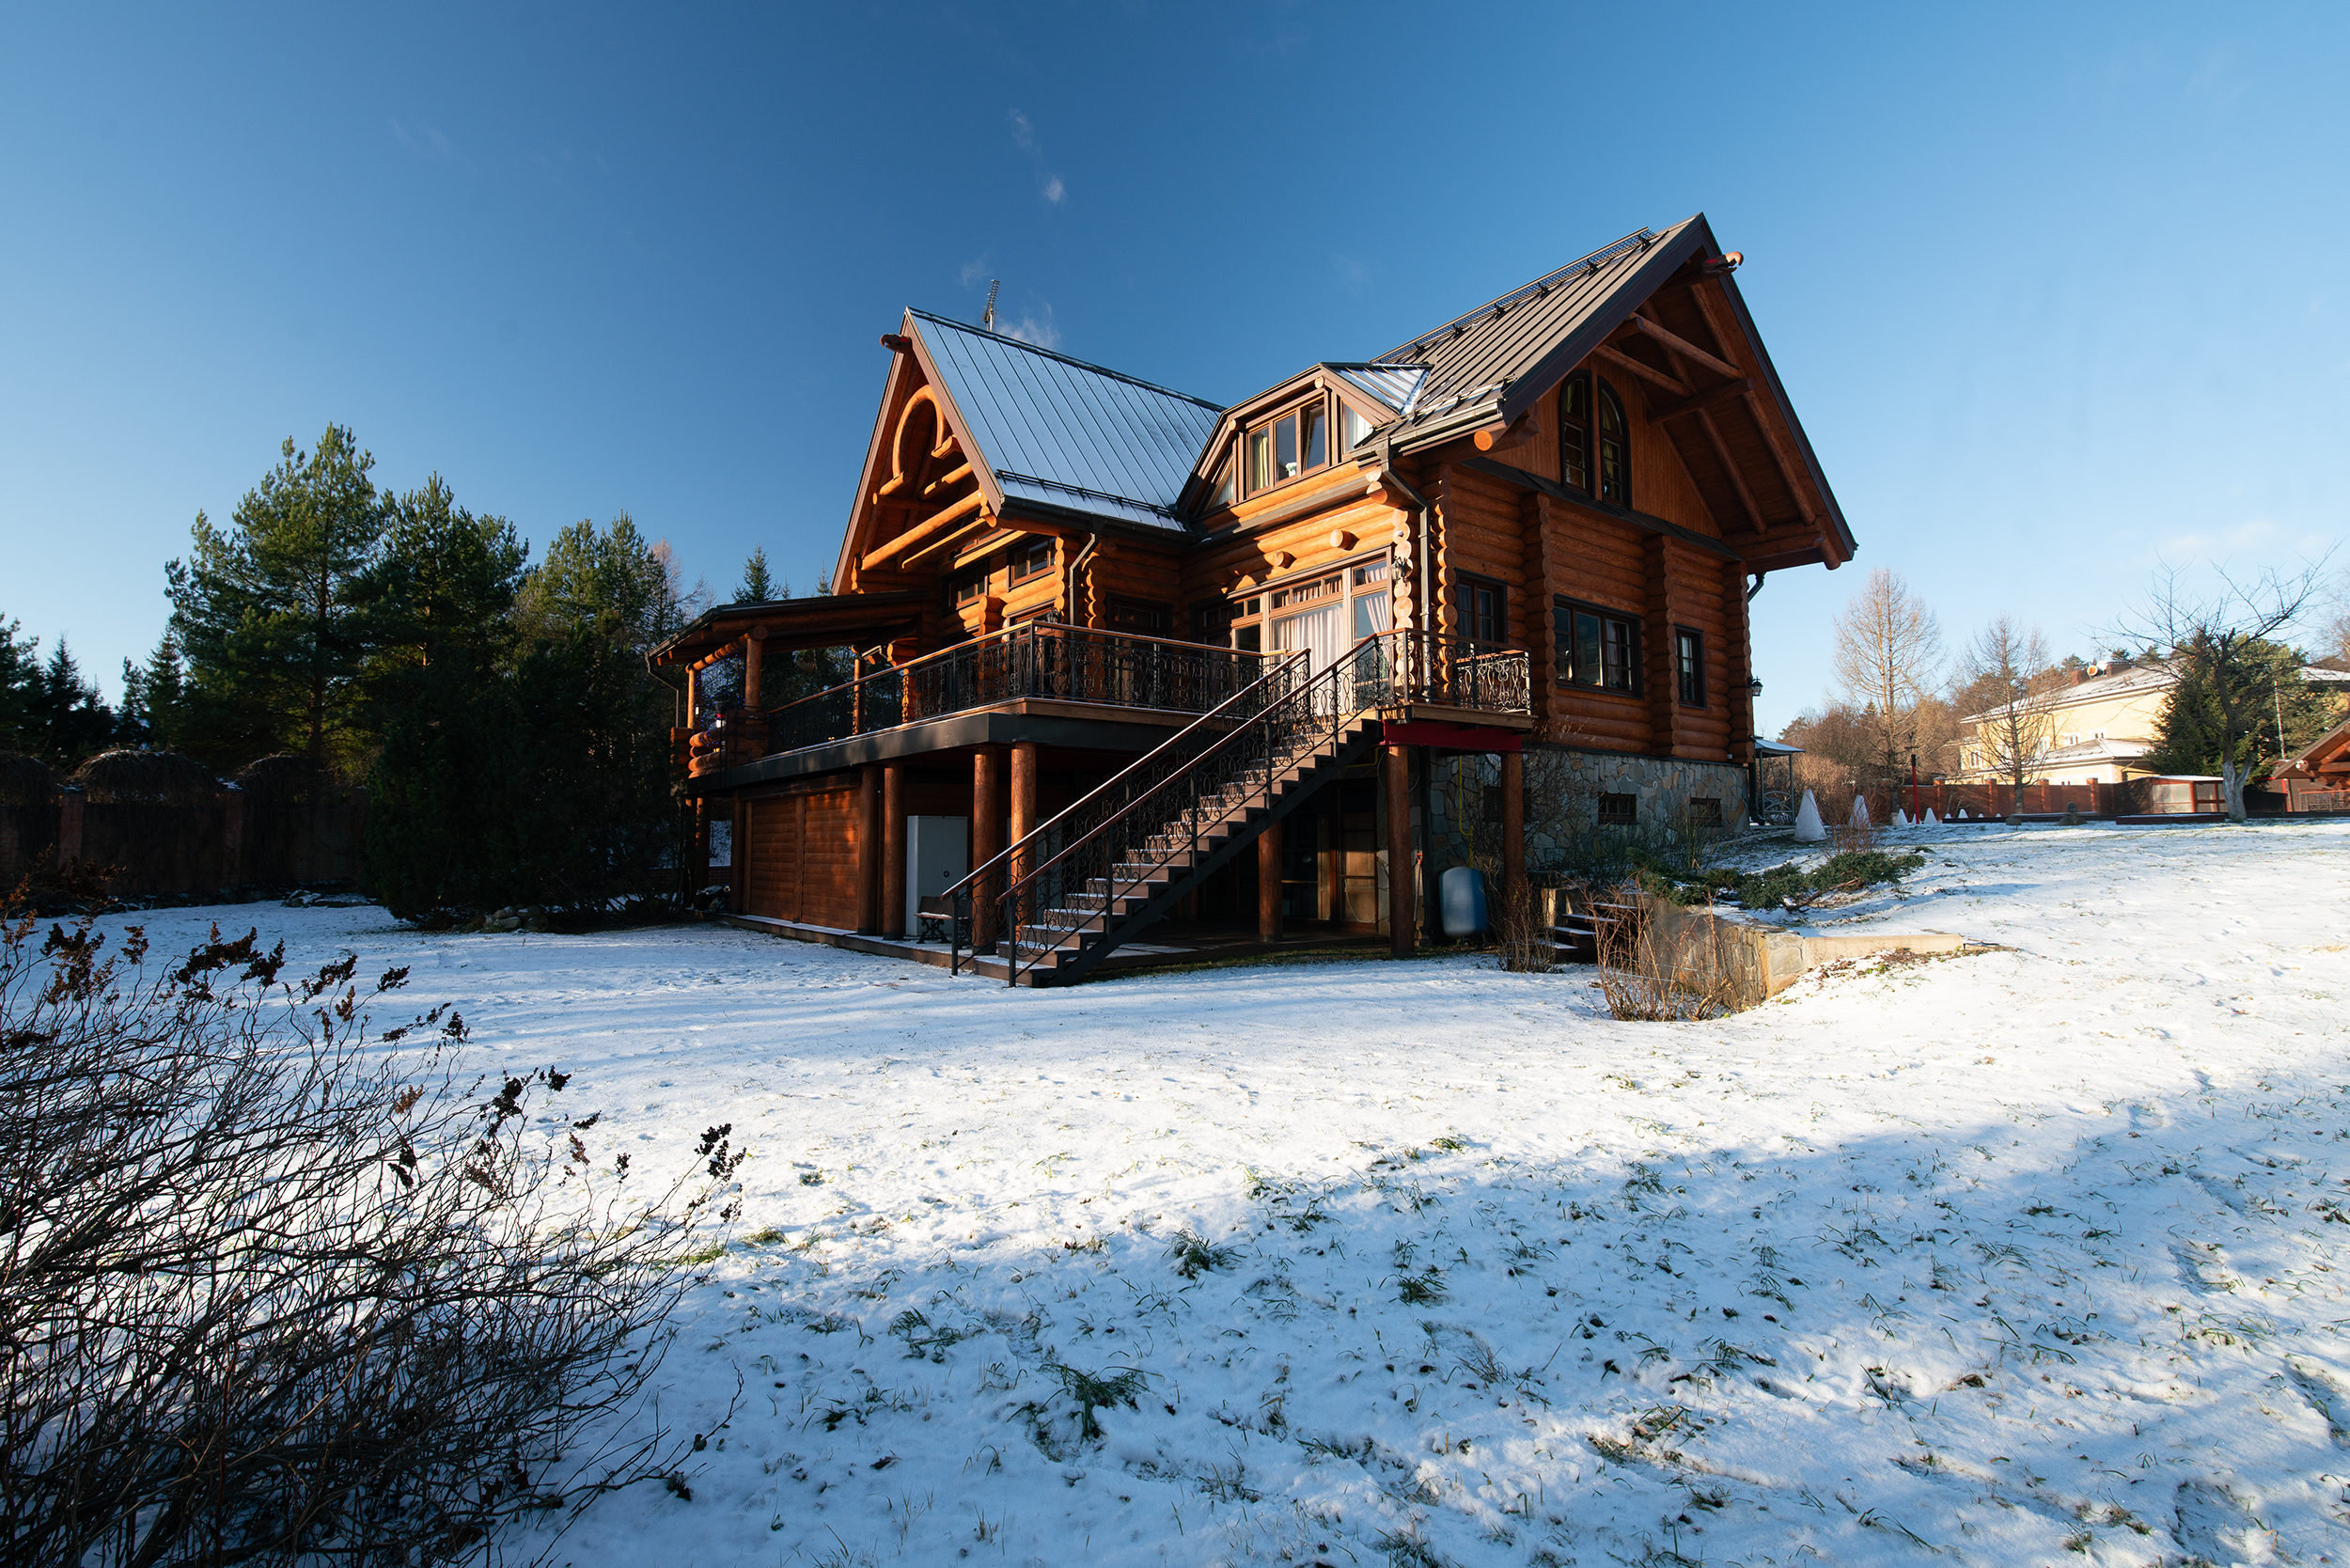
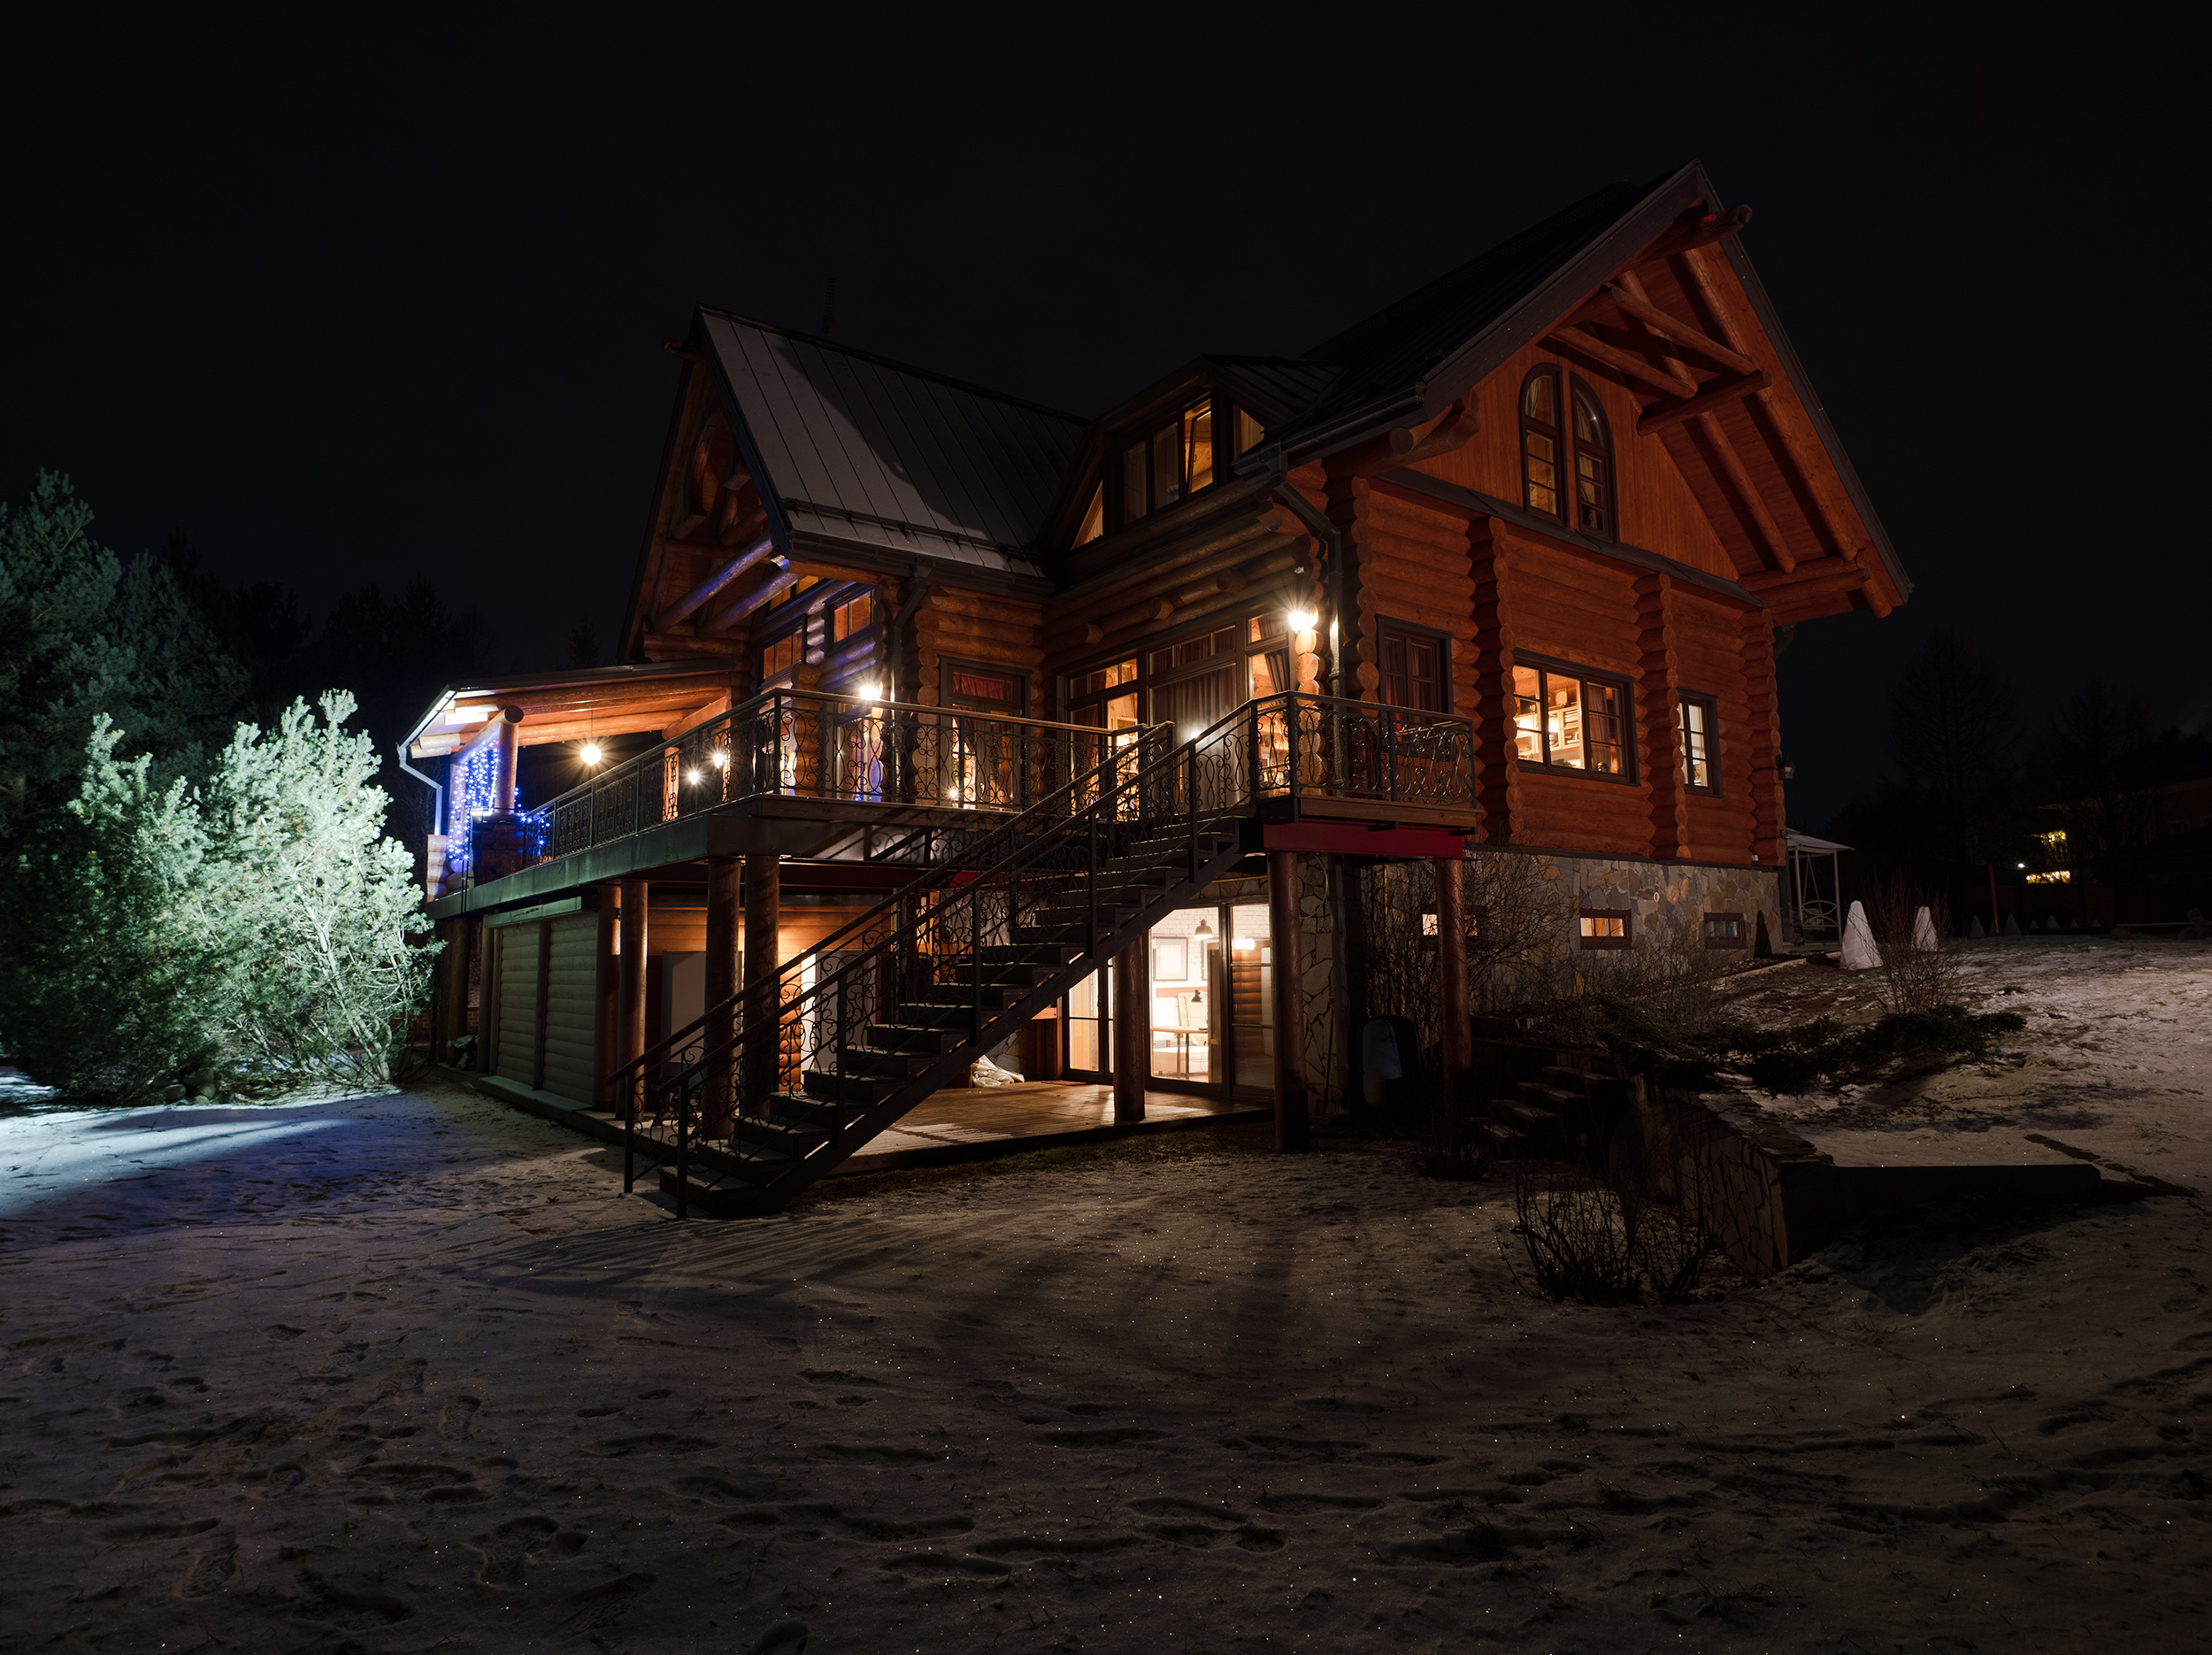
74. Can you light a house from the outside?
Everything is possible, but not everything is worth undertaking. Let’s say, lighting a house can be done quite simply (example ⬎). But the house shouldn’t be too large, and around it, it’s desirable to have space because the light needs to be distributed at least somewhat evenly.
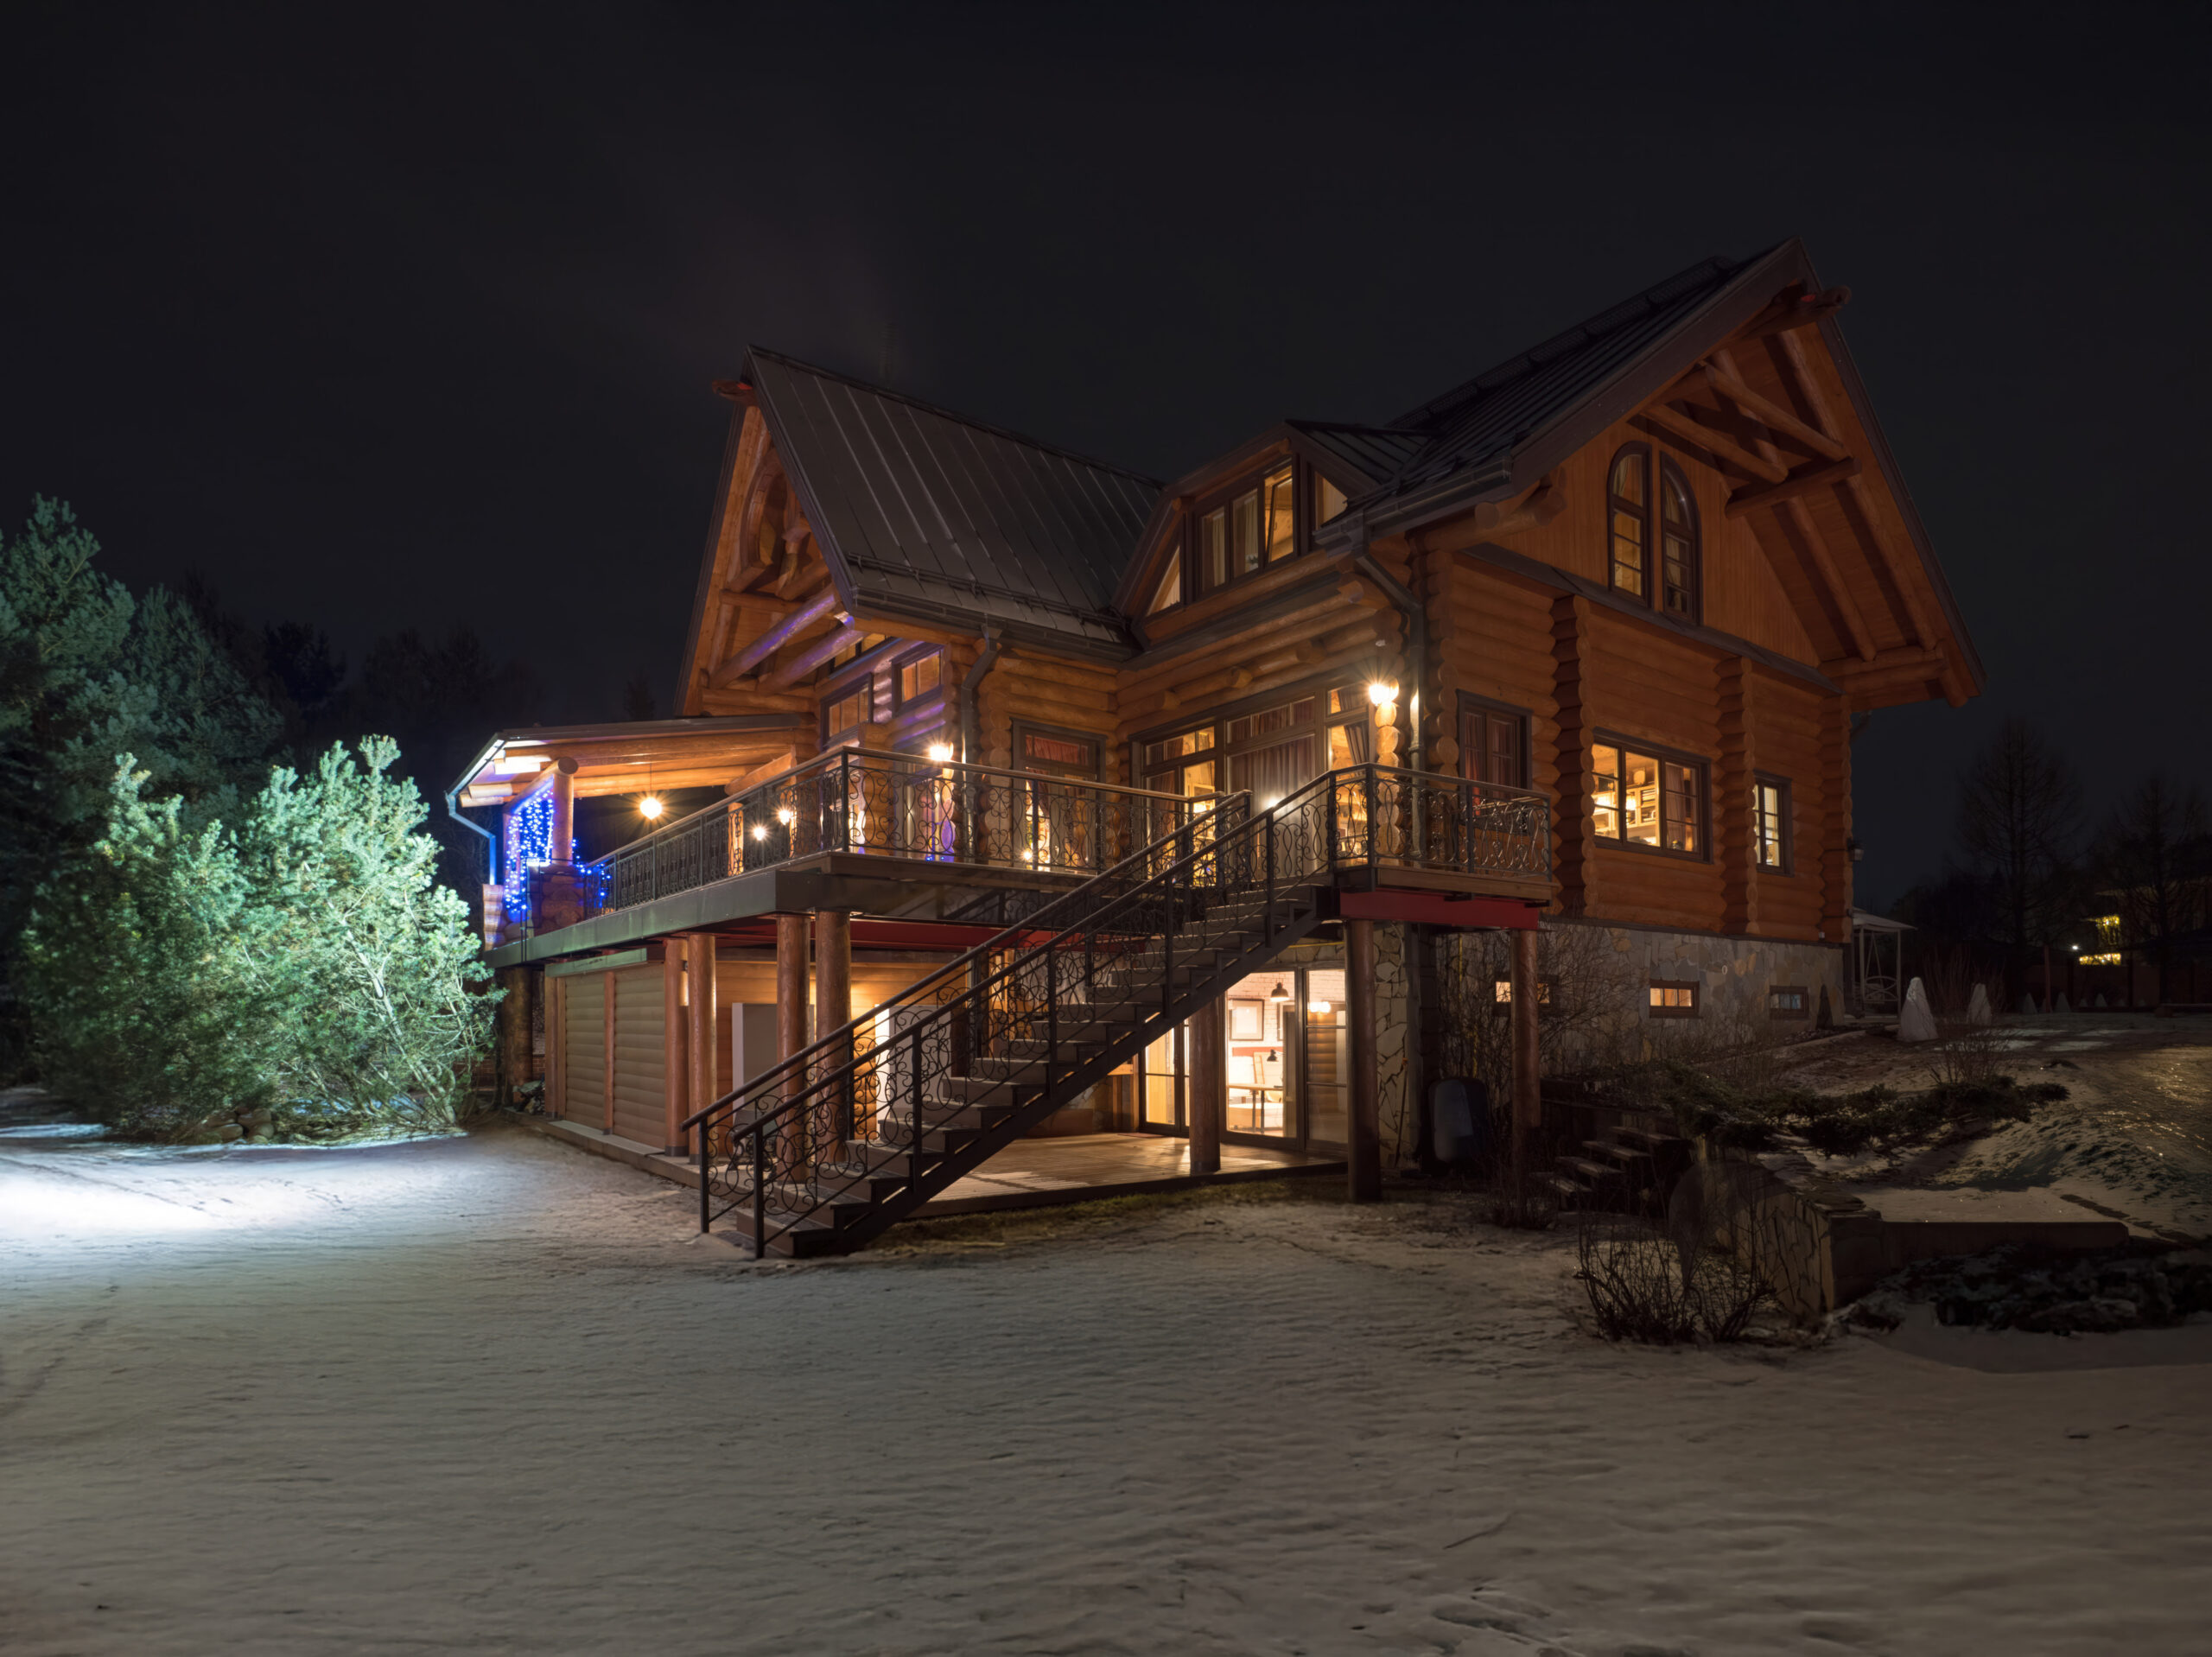 ? Lighting a house at night
Far from always is there an opportunity to wait for the «best moment» for evening shooting. And the object itself may well be located so that the sun and sunset won’t help in specific angles. Then the moment comes to wait for night and turn on your own light.
75. Can We Do Without Additional Lighting?
Almost always — yes. But there’s a nuance that becomes clear once we remember why this additional light is needed. Not many know the answer.
Additional light is primarily needed where we cannot achieve «clean» light. The example of the room (?) is about that. In other cases, blending exposures and manual retouching are quite capable of handling the situation. The catch is that it’s a creative and non-standard process, and we, «like bio-robots,» want to find a method and apply it without analyzing the situation. Even if it’s not simple. But the brain loves to save effort, so say neuropsychologists, and I almost believe them.


Nathan Cool. Before and After
The wonderful author of many textbooks and masterclasses, Nathan Cool, analyzes working with a bathroom in his video «Fast Shower Pops for Real Estate Photography.» He shows it «as is,» then takes a series of shots with flash, as he loves to do, and shows the result after blending with masks. The result is cool, but I didn’t like it. It’s not close to reality at all. And I got «bitten»: I took a screenshot from the monitor. And started working with it. Yes-yes, no RAW, just a screen screenshot. And I got…

Here is such a result of working with masks and curves.
76. How to Get Rid of Retouching? Is it Worth Outsourcing Remotely?
10 years ago, many were hired «for the camera.» Now everyone has a good camera — in their phone. Well, or almost good. But I’m hired for the quality of the solution. This skill developed as a result of long practice and situational decisions. Even for any apartment, I try to shoot «as for myself.»
Conclusion. A remote retoucher is effective where the task is technical and repeatable: product shots on a white background, standard portraits in one style.
But if the shoot is creative, diverse, and requires authorial control (like most interior projects), — outsourcing processing most often becomes a path of mutual torment for a small gain, not quality and the pleasure of quality work.
77. What are the nuances of choosing a lens and camera for combining photo and video shooting of interiors?
About video. Many photographers, myself included, try to expand their immediate services with an additional option — video shooting. And here we need to try to anticipate the types of shooting planned and the result we aim for.
Stabilizer. If you plan to shoot video with a stabilizer (gimbal), the choice of gimbal is determined by the weight and dimensions of your setup (camera+lens). Gimbal specifications often overstate their load capacity by about 1.5 times. That is, working at the maximum weight is possible, but with jerks or other glitches.
And even significant rolling shutter won’t prevent doing push-in/pull-out and rise/fall shots.
78. What role does sensor size play in cameras for interior video shooting?
79. Which specific cameras and lenses to choose as a set for interior shooting? What are the arguments?
80. Why are there no Nikon or Canon cameras in my recommendations?
81. What software to use for processing interior photos?
I use Adobe Lightroom for cataloging and basic correction, Adobe Photoshop for retouching and complex blending. Lightroom is ideal for working with large series of shots, color correction, and exposure. Photoshop is indispensable for precise retouching, removing clutter, complex masking, and HDR blending. Specialized plugins for noise reduction and sharpening are also useful. There is other software, but I’m satisfied with everything.
For me, a critically important point is the presence of a lens correction profile for any lens. Sometimes it’s very necessary.


82. How to correct perspective and verticals if you don’t have a Tilt-Shift lens? And what are the consequences?
In Lightroom with the Transform tool or in Photoshop via Lens Correction. It’s not so scary. Even if you get slightly empty corners, they can be generated by Photoshop AI. Corners rarely have anything important. It’s important not to overdo it: small leans of verticals look more natural than perfectly aligned but heavily cropped shots. It’s better to shoot with a margin at the edges for subsequent correction. Automatic corrections by lens profile are often insufficient; manual fine-tuning is required ( Example 1, showing the «cost» of digital transformation with content-aware fill ↴ , example 2)
83. How to fight noise in photos?
Shoot at low ISO, use modern AI noise reduction tools (Topaz Denoise AI, DxO DeepPRIME). It’s important to preserve detail: aggressive noise reduction turns textures into «mush.» It’s best to combine several methods: basic reduction in Lightroom, then spot work in specialized software. For shadow areas, noise reduction is more important; for bright areas, minimal processing can be left.
84. How to blend HDR shots naturally?
When blending a shot from several files with different exposures, the operator sees what’s black, what’s white, and what’s in between on each shot. Automation cannot manifest this knowledge. For this reason, HDR tools often create unnatural colors and loss of local contrast. The correct approach: open all shots in the series as layers in Photoshop, align them, then manually create masks for bright, mid, and dark areas. It’s labor-intensive but gives the most natural result.
85. Which masks are most important for blending shots with different exposures and retouching in general?
About the two most important masks. The first is a luminance mask. It can be obtained by copying the entire image to the clipboard, switching to «quick mask» mode (Q), pasting the clipboard contents, switching back from mask mode (Q). You get a selection with a brightness priority. If you invert the selection, you get a shadow priority. If you have many layers from bracketed exposure files — this is a fantastic move for many solutions. The second mask is a depth of field mask, which can be obtained using the «Neural Filters» tool.
86. Which color profile to use? Why?
The workflow usually involves the following. Process in ProPhoto/Adobe RGB (16 bit). Export to a profile agreed with the client. Most often it’s sRGB. For print, deliver in Adobe RGB, having first checked with the printing house.
87. How to prepare interior photos: requirements for portfolio, social networks, and listing websites.
Uploading a portfolio to your own website (WordPress, Tilda, Readymag)? Then quality and loading speed come first. Preparing a publication for Instagram, VKontakte or Yandex.Zen? You need to account for compression and a «catchy» look in the feed. Posting an ad on Avito, CIAN, Yarmarka Masterov or uploading a product to Ozon, Wildberries? They have their own, often strict, technical regulations.
The same photo, posted with incorrect settings, will lose detail on the marketplace, take half a minute to load on the site, and simply get lost in the social feed. This guide is a algorithm for choosing the correct «digital passport» for your image depending on its final destination.
88. Do I need to shoot RAW or is JPEG enough? (repetition for importance)
Only RAW. This gives maximum flexibility in processing, especially when working with complex light. RAW preserves all information from the sensor, allowing you to correct exposure, white balance, recover details in shadows and highlights without quality loss. Although once a photoshoot happened where I shot all the material in JPEG. This was due to the camera glitching, and I reset all settings to factory defaults. But by the 4th hour of shooting, attention was already «floating» and I forgot to check the RAW shooting settings. It’s like it’s always on my camera.
I had to sweat in processing, but I managed without problems for the client. Anything can happen.
89. You mentioned the importance of books. Which books on interior photography are worth reading?
This is a set filtered over the years, giving both practice and philosophy.
7. And to conclude, I propose a publication about architect Kengo Kuma for which Ken’ichi Suzuki took photographs. He is a very quiet master. Publication title: «Kengo Kuma: My Life as an Architect in Tokyo»
90. How can a photographer start working with architectural firms and what can I deduce from my experience about it.
This answer is addressed more to young photographers. But writing it also became an important attempt for me to realize «what is my path» and where is the big road I never took.
My path into architectural photography was gradual and organic. I wasn’t looking for special advertising. I worked in magazines as a designer, and the opportunity to participate in shoots was a natural door into the profession of photographer for me. At first, these were shoots of clubs and restaurants. Precisely interiors. Although there were also atmospheric event photos. My work was seen, someone from acquaintances said: «I have a friend/brother/neighbor-architect, he might like this.» Someone recommended. And gradually everything started spinning. I just went through the doors that opened, and each led to the next needed door.
Result: Whichever path you choose, don’t look for a customer, but offer architects a tool they lack for dialogue with the world. Your job is to make their project desirable. And it starts with an impeccable portfolio and the first bold, but very respectful step towards them.
91. Should a beginner buy a full-frame camera right away? (addition)
Beginners make a classic mistake: they think an expensive camera (FF) = good shots. In fact, for interior shooting, the key is not the camera, but skills and the ability to solve the situation on the spot.
Result: Start with an adequate crop or M4/3 system. Focus on developing an eye, understanding light and composition. Save money for renting lenses and training. Your first camera is a tool for learning and first orders, not a status symbol. Mastery is in the head and eyes, not in the sensor.
92. Can a simple person (layman) take a shot better than a photographer?
Depends on what kind of photographer, and how involved the layman is in the topic of the needed photo. Although St. Helmut Newton worked more in fashion photography, I’ll risk giving an example from his practice.
Real, complex, and interesting projects are born in dialogue, not in tender applications. Nevertheless, I keep a package of standard commercial proposals on the website. And every six months or so, something does "shoot").
94. What should an interior photographer never, under any circumstances, do?
The main sin is to lie. Lie about processing capabilities, promise the impossible. Work without a contract or violate it. But there is a deeper mistake — to stop in the role of a technician. Because today a photographer is also an entrepreneur, psychologist, and negotiator. Pressing the button is 1% of the work. The rest is professionalism as a complex.
95. What is more important for success: portfolio and case studies or specialized education?
It's great to have an art education with experience in solving specific tasks. Technical questions are secondary if there is a foundation. Photographers learn from architects - to understand the concept, from cultural studies - to understand context, from directors - the ability to build a shot and narrative. And light teaches attentiveness and the ability to wait for the right moment. And the client doesn't care what diplomas you have in your desk.
P.S. It's great to study if there's an opportunity to learn experience "hand-to-hand," as is customary in the East. That's amazing. But hardly cost-effective if you fall from the heavens into our local business.
96. AI and phone cameras are advancing. Is there a future for interior photography as a profession?
It not only exists — it's getting clearer. The mass segment will go to algorithms and automation. But the real segment — authorial architecture, design, luxury real estate — will remain with people. The value of artistic vision and the ability to show complex light will increase. Hybrid formats will appear: photo + video, photo + 3D tour. But the essence will remain unchanged: to convey the spirit of a space, make it desirable, tell a story. Technologies change. Human perception — evolves.
97. What does the process of creating commercial photographs of architecture and interiors actually consist of?
The process is three inseparable stages. They constitute the total remuneration, stemming from the labor intensity for each specific object. Obviously, a preliminary site visit is not always needed.
98. If a time machine existed, what would you say to yourself at the beginning of the path, 20 years ago?
I would like to realize the mission of my profession faster. I would say to myself: “Read books (?) on art, more than equipment reviews. It gives strength, gives joy, gives scope. Work with those who respect work - both theirs and yours. Specialize more boldly.
And remember once and for all: you are not just photographing rooms. You help people see the beauty and potential of the space they live in. This is a huge responsibility. And an honor.”
99. How to measure the success of your strategy? By the number of orders?
If that were the case, I would have burned out long ago or died from a sense of uselessness in 2008. Success is a chain of moments of truth. When an architect, looking at a shot, says: "You understood." When a realtor writes: "The apartment sold quickly." When an old client returns with a new project. When you look at your work a year later and feel no shame. When you can choose interesting tasks, not grab at everything. That is balance.
And for happiness, you don't need much: 2-3 shoots a week load you up completely.
Notes and Footnotes
+The 10,000 Hour Rule. To achieve an expert level in any complex endeavor, approximately that volume of practice is required. This concept was popularized by Malcolm Gladwell — a Canadian journalist, author of bestsellers "Outliers," "Blink," "The Tipping Point."
Gladwell, based on the work of psychologist Anders Ericsson, argued: to become a world expert in music, sports, or programming, you need not just practice a lot, but dedicate about 10,000 hours of deliberate, conscious practice. The key word is "deliberate." It's not mechanical repetition, but constantly stepping out of the comfort zone, analyzing mistakes, and working with feedback.
+Lens Flange Focal Distance is the critical distance between the lens mount plane (bayonet) and the camera's sensor plane, which must strictly correspond to the standard of a specific system to ensure correct focusing at all distances; when mounting lenses via adapters, the lens flange focal distance must be greater than that of the camera, otherwise focusing to infinity becomes impossible — this is precisely why you cannot arbitrarily place additional elements (for example, polarizing filters) between the lens and the camera, as this violates the calculated distance and leads to loss of focus.
Portfolio Sections
A methodological approach to space visualization for architects, designers, and developers

Corporate Spaces
Offices, Coworkings, Business Centers
A modern office is a stage for productivity. The shoot focuses on the interaction of light, layout, and corporate identity. The shot visualizes not only the design but also the narrative of the space: how architecture supports communication, and how atmosphere influences team efficiency.

Retail Architecture
Boutiques, Showrooms, Retail Halls
Here, design is a silent salesman. The shoot accentuates the brand's point of contact with the client: guiding the gaze, playing with textures, the scenography of merchandising. Each shot works to increase the average bill, creating a visual trap not for a hurried buyer but for a thoughtful connoisseur.

Public Architecture
Shopping Malls, Atriums, Public Areas
A mall is a modern agora. Photography captures the dynamics of human flows, the scale of space, and its social temperament. We work with contrast: morning emptiness for investor presentations versus energetic daytime for tenant marketing. Architecture as experience.

Hospitality & Hotels
Rooms, Lobbies, SPA Areas
Hotel photography is a promise. A promise of atmosphere, service, memory. The work is built on the contrast of the intimacy of personal space (room) and the theatricality of public space (lobby, restaurant). Light becomes the main co-author, modeling mood: from a brisk morning to a mysterious evening.

Author's Residence
Apartments for Architectural Bureaus
Shooting as the final touch in an architect's work. Focus on the dialogue of materials, purity of lines, authorial intent. The shot must convey not only aesthetics but also the tactility of space. This is portfolio-oriented work, where each project becomes a milestone in the designer's career.

Premium Real Estate
Shooting for Realtors and Developers
Photography as a tool to accelerate the sales cycle and increase asset value. Methodology is based on creating an "emotional deficit" — the shot doesn't just show square footage but offers a desired lifestyle. The space becomes the hero, and its advantages — obvious.

Country Architecture
Houses, Residences, Private Spaces
Dialogue of interior with landscape. The shoot is built on the contrast of private coziness and open views. It's important to convey the texture of natural materials, the play of natural light throughout the day, the feeling of a retreat. This is a story not about square meters but about the quality of time spent in the space.

HoReCa: Restaurants & Bars
Shooting atmosphere and gastronomic theater
Here light, sound, and smell become visible. Photography captures the culminating moment of the evening — that very "golden hour" when the space fills with anticipation. We work with two audiences: for the guest we create magnetic attraction, for the professional — a case study on the competent organization of the service scenario.

Exterior & Facade Photography
Architecture in Urban Context
Shooting a building as a portrait of a personality. Working with context: how a new volume converses with historical buildings or natural landscape. Focus on details revealing the architect's intent, and on overall shots demonstrating the silhouette and integration into the environment. Documentation for history and promotion.
Work Methodology: Each shoot begins with a brief, where we determine not only technical parameters but also the emotional goal of the project. I work with natural light as the main material, supplementing it with precise accents. The result — a series of images that work as a cohesive visual narrative, not a set of disparate shots.
Architectural Video:
Immersion in Space
Kinetic exploration of an open-space office. The camera repeats the employee's route, revealing the logic of the layout.
Rhythm and texture. The video sequence is synchronized with the acoustics of the space, turning the overview into an immersive experience.
Increasing privacy. From public zone to intimate. The video conveys the hierarchy of the duplex space.
Modularity as a principle. The video emphasizes the purity of construction and flexibility of the layout solution.
Отзывов пока нет
Оставить отзыв